

Permissions in Mstnd: a complete reference for who sees and who edits
In this article
The «Permissions» tab in Mstnd is the reference that shows all of the system's permissions grouped by category, each with its name, code, description and the roles that include it. It helps system and governance officers quickly answer the question: "who can do this?". Permissions are not granted directly from this tab, but through roles in the «Roles» tab.
Quick overview
| Item | Details |
|---|---|
| Module | Users and roles |
| Where it is in the interface | The side menu «Users and roles» → the «Permissions» tab |
| Direct link | https://app.mstnd.sa/users?tab=permissions |
| Goal | Show all of the system's permissions clearly, and which roles include each permission |
| Who it is for | The account owner, the system administrator, the information security officer and the internal auditor |
| Video length | About 27 seconds |
| What you will learn | Reading the permissions table, searching for a permission, filtering by category, and understanding how permissions relate to roles |
Watch the video
In under half a minute, the video shows the permissions screen, the parts of each permission and the search, filter and sort tools, then reminds you that granting is done through roles.
Why this feature?
When an auditor or a manager asks "who can delete correspondence?" or "who can manage API keys?", answering without a single reference means opening and reviewing every role. As custom roles multiply, this work becomes slow and error-prone.
The «Permissions» tab flips the point of view. Instead of asking "what are this role's permissions?", you ask "who holds this permission?", and you find the answer in the «Roles» column right next to the permission.
| Without a permissions reference | With the «Permissions» tab |
|---|---|
| You open every role to find out who holds a specific permission | You see the roles that include the permission in the same row |
| Vague permission names that differ from one person to another | A clear plain-language name and description, and a fixed technical code, for each permission |
| Hard to review a whole area such as correspondence | Filtering by category shows the permissions of that area alone |
| Audit reviews take a long time | One reference used in the regular review |
Value for the organization: full transparency in how permissions are distributed, and direct support for governance and audit requirements. Value for the individual: the system administrator answers access questions within seconds, and the developer finds the exact permission code when needed.
Where to find it
- From the side menu, choose «Users and roles».
- On the «User management» page, choose the «Permissions» tab.
Direct link: https://app.mstnd.sa/users?tab=permissions
This screen is linked to the neighboring «Roles» tab: the same permissions appear in the «Create new role» window and in the «Role details» window.
Concepts and terms
| Term | Meaning in Mstnd |
|---|---|
| Permission | An authorization to carry out a specific operation in the system, such as «Send correspondence» |
| Category | A group of permissions for one area, such as correspondence for correspondence, or «Audit log» |
| Name | The clear, plain-language label of the permission as it appears in the interface |
| Code | A fixed technical identifier of the permission, such as correspondence.send, which you can copy with the copy button |
| Description | A short explanation of exactly what the permission allows |
| Roles | The roles that include the permission, shown as badges such as «Owner», «Admin» and «Employee» |
| Granting through roles | The principle that a user gets a permission through their role, not directly |
Step by step
Step 1: Browse all of the system's permissions by category
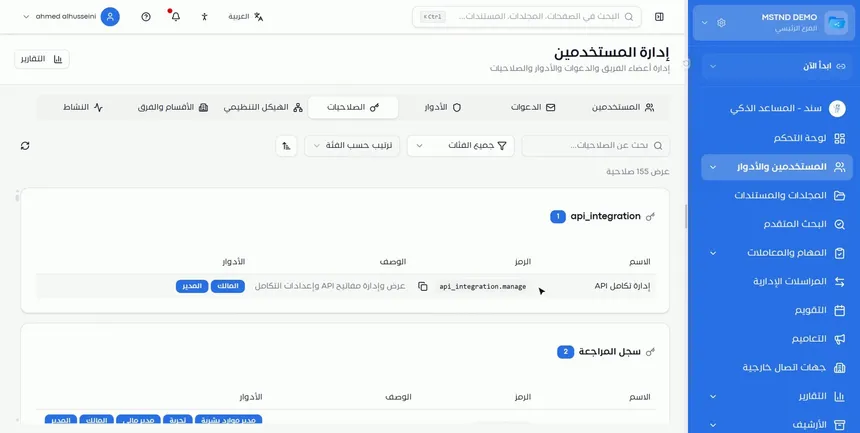
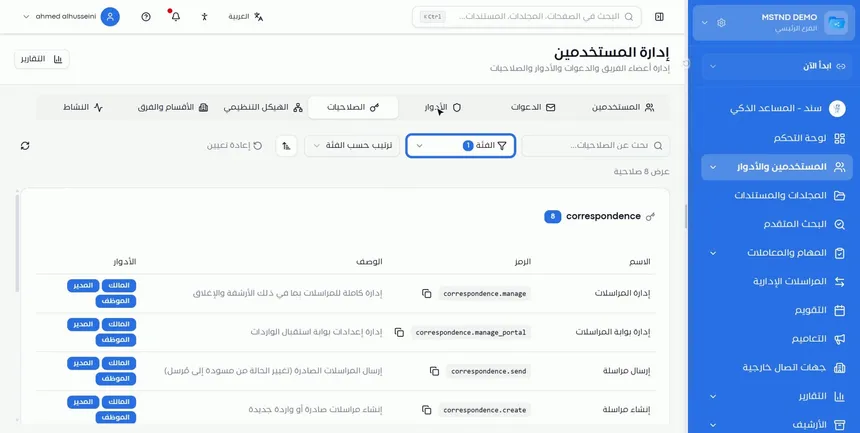
When you open the tab, the number of permissions shown appears at the top, such as «Showing 155 permissions», followed by the categories in cards. Each card carries the category name and a badge with its number of permissions, such as the api_integration category with one permission, and «Audit log» with two.
This split makes reading easier: instead of one long list, you see the permissions grouped by the area they belong to.
Step 2: Read the parts of each permission
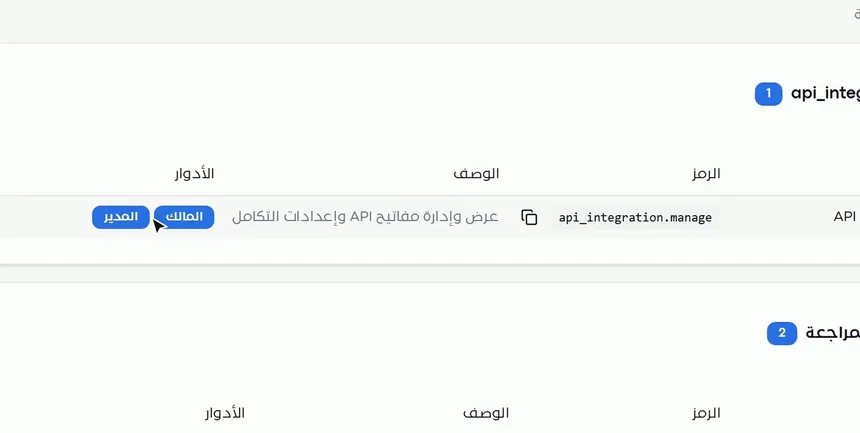
Each card holds a table with four columns:
- Name: such as «Manage API integration».
- Code: such as
api_integration.manage, with a button next to it to copy it. - Description: such as «View and manage API keys and integration settings».
- Roles: badges for the roles that include the permission; in this example, only «Owner» and «Admin».
The «Roles» column matters most in a security review. If you see a sensitive permission with many roles next to it, that is a sign to review those roles.
Step 3: Search for a specific permission
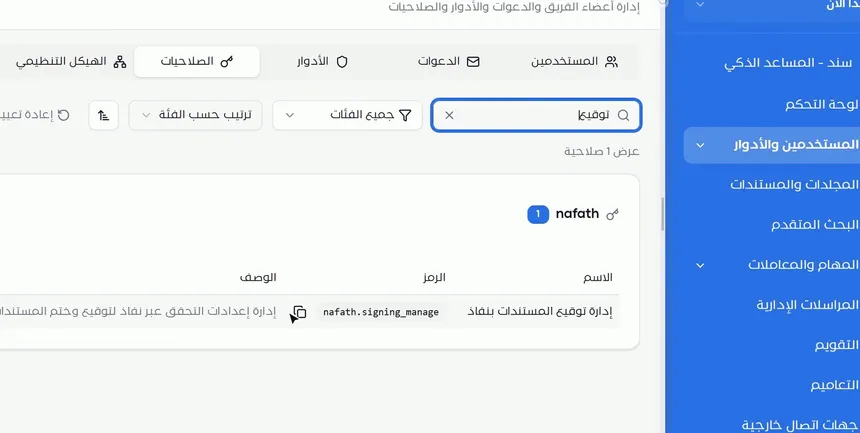
In the «Search permissions…» box, type a word from the permission's name, such as «delete», «share» or «export». The list shrinks to show only the matches, and the counter at the top changes.
Search is the fastest way to answer a specific question. For example, search for «delete» to see every delete permission in the system, and the roles that hold them, on one screen.
Step 4: Filter by category and change the sort order
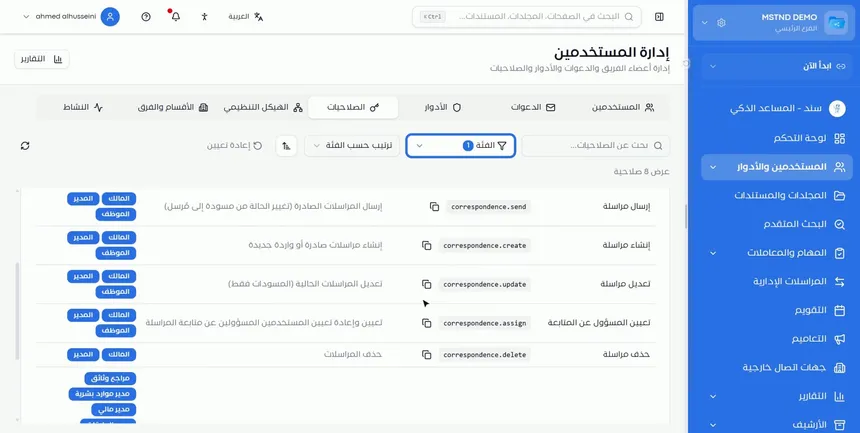
From the «All categories» filter, choose one or more categories. In the example, the correspondence category was chosen and «Showing 8 permissions» appeared, including:
- «Send correspondence»: send outgoing correspondence and change its status from draft to sent.
- «Create correspondence»: create new outgoing or incoming correspondence.
- «Edit correspondence»: edit existing correspondence, in draft status only.
- «Assign follow-up owner».
- «Delete correspondence»: only «Owner» and «Admin» appear next to it.
You can change the order from the «Sort by category» list and reverse its direction with the button next to it. To clear the filter and return to the full view, click «Reset».
Step 5: Remember that permissions are granted through roles
The «Permissions» tab is for viewing and reviewing. To grant or withdraw a permission:
- Go to the «Roles» tab.
- Create a new role that includes the permission, or review the appropriate role.
- Assign the role to the users concerned.
This design ensures that every permission a user holds has a clear source, their role, so there are no "individual" permissions that are hard to trace.
Options and their effect
| Option or setting | What it does | When to use it |
|---|---|---|
| «Search permissions…» | Shows the permissions that match the word | To answer a specific question such as "who can delete?" |
| The «All categories» / «Category» filter | Limits the view to one or more categories | To review a whole area such as correspondence |
| «Sort by category» | Changes the order in which permissions are shown | To organize your reading as you need |
| The reverse sort button | Flips the sort direction | To reach the end of the list quickly |
| «Reset» | Clears the filters and restores the full view | After finishing the review of a category |
| The refresh button | Reloads the list | After editing roles in another tab |
| The copy code button | Copies the permission's code | For documentation or for contacting the technical team |
Practical scenarios
Scenario: An internal auditor in a government entity reviews delete permissions
Situation: The internal audit unit has requested a list of the roles that can delete documents and correspondence.
What you do in Mstnd:
- Open the «Permissions» tab.
- Type «delete» in the search box.
- Review the «Roles» column for each delete permission shown.
- Copy the codes and document them in the audit report.
Result: An accurate report within minutes, based on the actual data in the system.
Scenario: A trading company secures its API integrations
Situation: The company is about to connect Mstnd to an accounting system and wants to make sure that managing API keys is limited to senior management.
What you do in Mstnd:
- Filter on the
api_integrationcategory. - Check that only «Owner» and «Admin» appear next to «Manage API integration».
- If an unexpected custom role appears, go to «Roles» and review it.
Result: A secure integration in which only authorized people can manage the keys.
Scenario: A school reviews correspondence permissions
Situation: A school's administration wants administrative staff to create correspondence, while deletion stays in the hands of the administration.
What you do in Mstnd:
- Filter on the correspondence category.
- Review who holds «Create correspondence» and who holds «Delete correspondence».
- Adjust the custom roles from the «Roles» tab if needed.
Result: A balanced distribution that allows day-to-day work and protects records from deletion.
Scenario: An IT officer at a hospital documents the access policy
Situation: The hospital is preparing an information security policy document that requires a list of the sensitive permissions.
What you do in Mstnd:
- Go through the categories one by one using the filter.
- Copy the codes and descriptions of the sensitive permissions.
- Record the roles linked to each permission in the document.
Result: A policy document built on fixed codes that you can refer back to in later reviews.
How it relates to other features
- Roles: the only place to grant permissions, by creating a role that includes them and then assigning it to users.
- Users: shows the effective permissions of each user based on their role.
- Activity: records the operations carried out, so you can check that permissions are used properly.
- API integration: managing it is tied to the «Manage API integration» permission.
- Administrative correspondence: what each user can do in correspondence is set by the permissions of the correspondence category.
Tips and best practices
- Make reviewing the «Permissions» tab a regular habit, monthly or quarterly.
- Start the review with the sensitive permissions: deletion, external sharing, settings and API integration.
- Search with the action word, such as «delete» or «export», to gather similar permissions across categories.
- Copy the codes into official documents instead of the names, because the codes are fixed.
- If an unexpected role appears next to a sensitive permission, review it immediately from the «Roles» tab.
- Click «Reset» after every review so that you do not miss permissions the next time.
Warnings and common mistakes
FAQ
What is the Permissions tab in Mstnd?
It is a reference that shows all of the system's permissions grouped by category, each with its name, code, description and the roles that include it.
How do I give a user a specific permission?
From the «Roles» tab: create a role that includes the permission, or choose an existing role that includes it, then assign it to the user. Permissions are not granted from the «Permissions» tab.
How do I know who can delete documents?
Search for «delete» in the «Permissions» tab, and review the «Roles» column next to the delete documents permission to see which roles hold it.
What is the permission code for?
The code is a fixed technical identifier, such as correspondence.send, that is useful for documentation and for talking with the technical team without confusion. You can copy it with the copy button next to it.
Can I show the permissions of one category only?
Yes. Choose the category from the «All categories» filter, and only its permissions appear, with their count. Click «Reset» to return to all of them.
What is the difference between the «Permissions» tab and the «Role details» window?
«Role details» shows the permissions of a single role, while the «Permissions» tab shows each permission with all the roles that include it.
Why does the «Employee» role not appear next to some permissions?
Because the core «Employee» role includes only basic permissions, while some permissions, such as «Delete correspondence» in the example shown, are limited to «Owner» and «Admin».
How many permissions are there in Mstnd?
The tab shows the total at the top of the list, such as «Showing 155 permissions» in the example shown, and the counter changes when you search or filter.
Summary
- The «Permissions» tab is a complete reference to all of the system's permissions, grouped by category.
- Each permission has a name, a copyable code, a description and the roles that include it.
- Search and filtering by category quickly answer the question "who can do this?".
- Permissions are granted only through roles, from the «Roles» tab.
- Regularly reviewing this tab is an essential part of access governance in the organization.
Try it free: Create your organization's account in Mstnd
Was this article helpful?
Related articles
 0:36
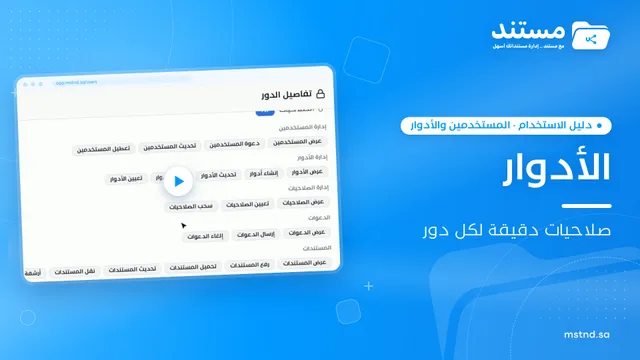
Roles in Mstnd: precise permissions for every job role
Learn about roles in Mstnd: core and custom roles, each role's permissions, and creating a role with precisely chosen permissions, then assigning it to users.
 1:03
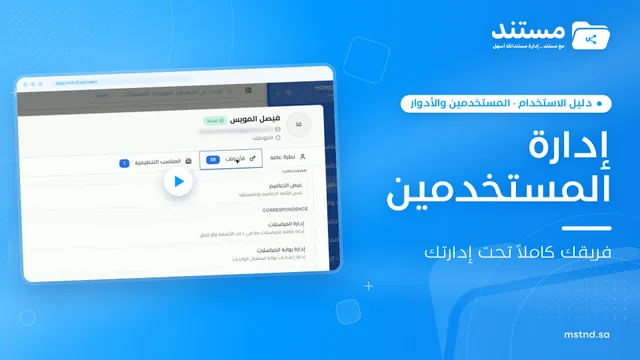
Managing users in Mstnd: roles, status, positions and invitations
Learn the Mstnd Users page: search and filters, the user profile with effective permissions and positions, changing roles, deactivating, and inviting new staff.
 0:23
The activity log in Mstnd: who did what, and when
The Mstnd activity log shows every operation in the system with who did it and when; search by keyword or user name and pick a date range to review events.
 0:42
API integration in Mstnd: connect your systems programmatically with secure keys
Learn the Mstnd API integration page: public and secret keys, base URL and docs, the «Integrations» folder, rate limit, IP restrictions and usage statistics.
 0:50
Administrative correspondence in Mstnd: outgoing and incoming in one organized register
Administrative correspondence in Mstnd: outgoing and incoming in one register, indicators, filters by direction, status and confidentiality, and reply threads.