

Creating a new Mstnd account: from your email to setting up your organization
In this article
Creating an account is the first step to using Mstnd. In it you register your organization and start a 7-day free trial, with no credit card needed. The process has three stages: «Create your account» to verify your identity, «Tell us about your company» for your organization's details, and «Let's set up Mstnd for your company» to choose your goals and organizational structure and invite your team. At the end your request is sent for review, and you receive a notification as soon as it is approved so you can start working.
Quick overview
| Item | Details |
|---|---|
| Module | Getting started |
| Where it is in the interface | The standalone sign-up page on the identity portal, before you enter the system |
| Direct link | https://identity.mstnd.sa/signup |
| Goal | Register your organization in Mstnd and give the system an initial setup that fits your sector, size and goals |
| Who it is for | The organization's owner, or the person who will set up the system for the first time |
| Video length | About two and a quarter minutes |
| What you will learn | Verifying your email and mobile, entering your company details, choosing your goals and a structure template, inviting your team, and what happens after you submit the request |
Watch the video
The video shows the whole sign-up journey step by step, from entering your email address to the «Your account is under review» screen.
Why this feature?
After you sign up, many systems ask you to build everything from scratch: departments, folders and users. That makes your first days in the system slow and delays the moment you get real value from it. Mstnd shortens this stage by collecting, during sign-up, the information it needs to prepare your work environment.
When you specify your sector, your company's size and your goals, the system tailors your experience, templates and settings to them. And when you choose an organizational structure template and a folder structure, you enter the system with a clear starting point that you can adjust later as you like.
| Before | After |
|---|---|
| You sign up, then face an empty screen that needs a long setup | An initial organizational structure and folders are ready from your first sign-in |
| Generic settings that do not reflect the nature of your business | An experience and templates tailored to your sector and size |
| Colleagues are added later, one by one | You can invite your team during sign-up itself |
| Uncertainty about the account's status after sign-up | A clear screen showing that the request is under review and how you will be notified |
Its value for the organization: an organized start that reflects the organization's reality, and an account verified by email and mobile. Its value for you: only a few minutes stand between you and a ready work environment, and you can skip whatever you do not need right now.
Where to find it
- Open the sign-up page directly: https://identity.mstnd.sa/signup
- Or go to the official Mstnd website and choose to start the free trial.
- You see a split page: a panel introducing Mstnd's features on one side and the sign-up form on the other, with the bar of the three stages above the form.
Concepts and terms
| Term | Meaning in Mstnd |
|---|---|
| Organization | The entity you register in Mstnd (a company, an entity or an institution), inside which you work with your team |
| Verification code | A 4-digit code sent to your email or mobile to confirm that it belongs to you |
| Sign-up stages | Three consecutive stages: «Create your account», «Tell us about your company» and «Let's set up Mstnd for your company» |
| Sector | Your company's field of business; it is used to tailor templates and settings |
| Organizational structure template | An initial administrative structure (general management, departments and teams) suggested for your sector, fully editable later |
| Folder structure | An initial arrangement of folders that your organization starts with |
| Under review | The account's status after you complete sign-up, until the Mstnd team reviews and approves your details |
Step by step
Step 1: Start your free trial
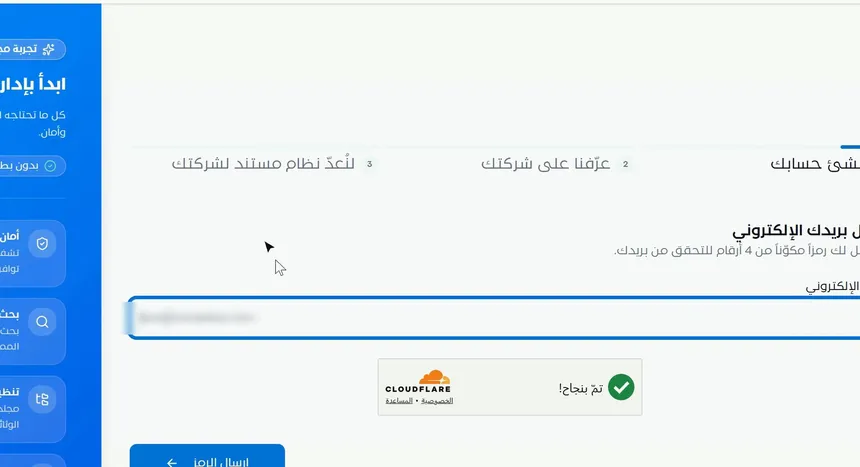
The sign-up page opens on the first stage, «Create your account». On one side of the page you find a short introduction to Mstnd's features, and badges stating that the trial is free for 7 days, that it needs no credit card and that setup takes minutes. You do not need any financial commitment to start.
An automatic security check box may appear under the email field to confirm that the user is a human. Wait until the success mark appears before you continue.
Step 2: Enter your email address
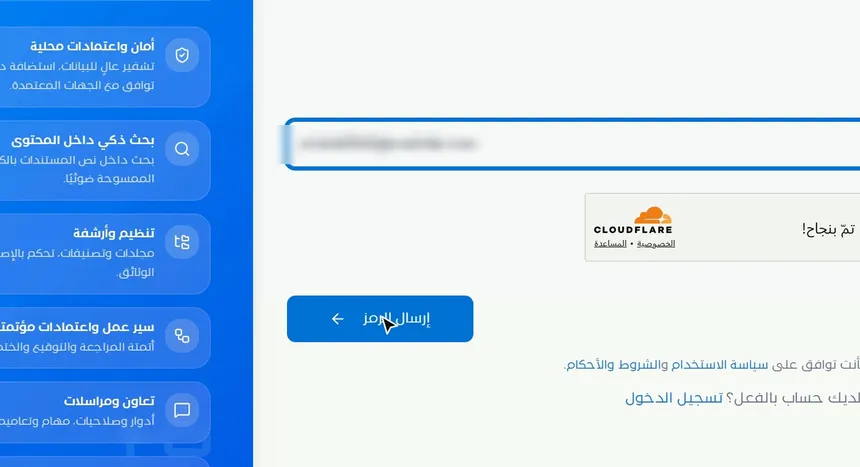
Type your email address in the field provided. This email will be your account's identifier, and it is where the verification messages and, later, the account approval notification arrive.
Step 3: Click «Send code»
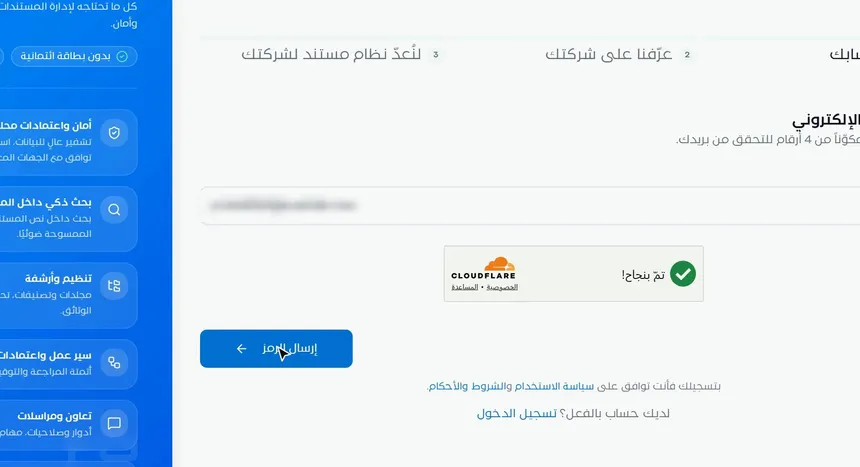
After typing your email, click «Send code». The system sends a verification code to the email you entered. If the email contains a typo, the code will not reach you, so check it before you click.
Step 4: Verify your email with the code you received
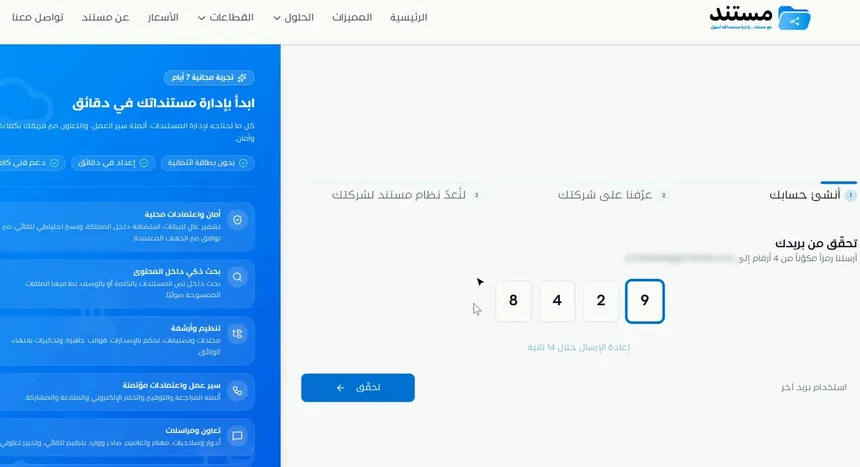
A 4-digit code arrives in your inbox. Type it in the four boxes, then click «Verify». The screen shows a countdown for resending in case the code is late, and a «Use another email» option if you want to change the email.
Step 5: Choose a strong password
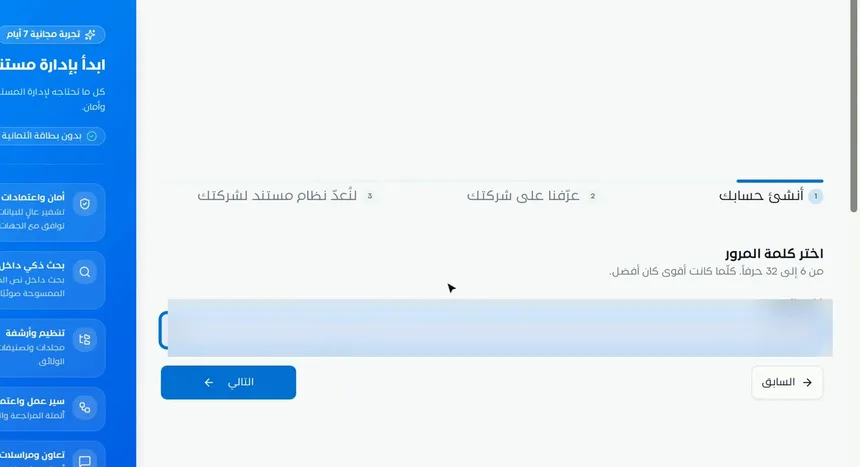
Choose a password between 6 and 32 characters long. As the screen points out, the stronger it is, the better. This account will usually be the organization owner's account, meaning the account with the highest permissions in the system, so its password deserves special care.
Step 6: Enter your mobile number and verify it
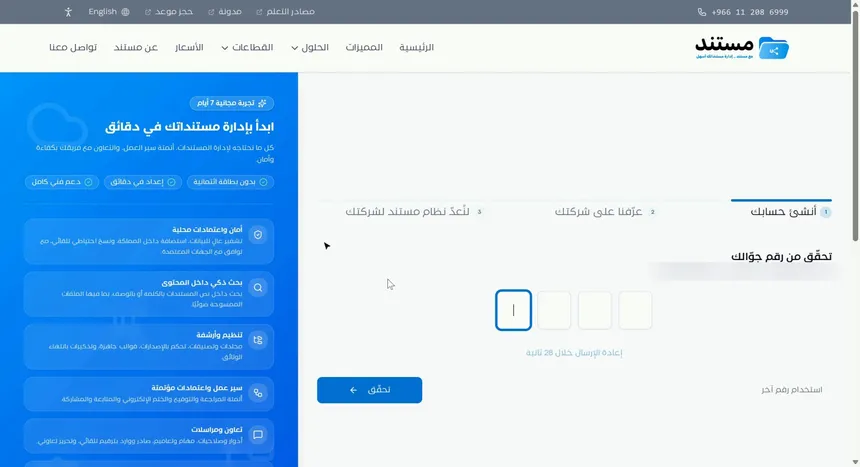
Type your mobile number to receive a code by text message. Then enter the code in the «Verify your mobile number» boxes and click «Verify». As with the email, there is a resend countdown and a «Use another number» option.
Verifying your mobile adds a second layer of verification to the account and confirms that a real person who can be contacted is behind the request.
Step 7: Type your first name and family name
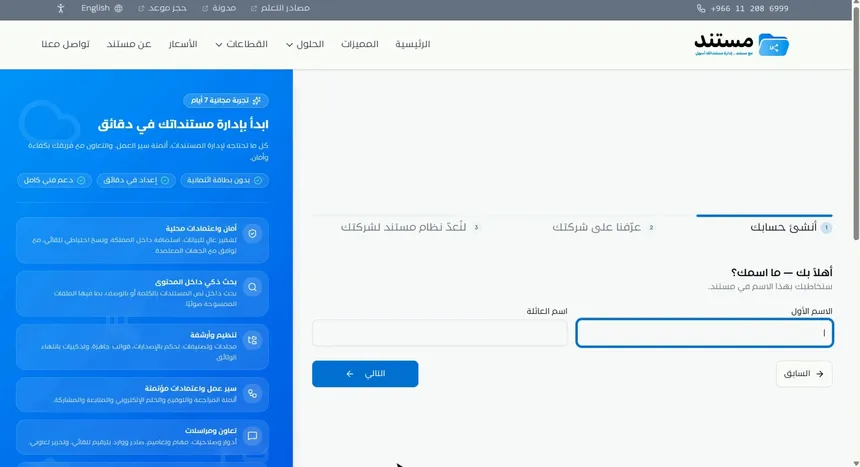
On the «Welcome! What's your name?» screen, type your first name and family name. Mstnd uses this name to address you inside the system, and it appears to your colleagues in tasks, correspondence and the activity log.
Step 8: Choose your position in the company
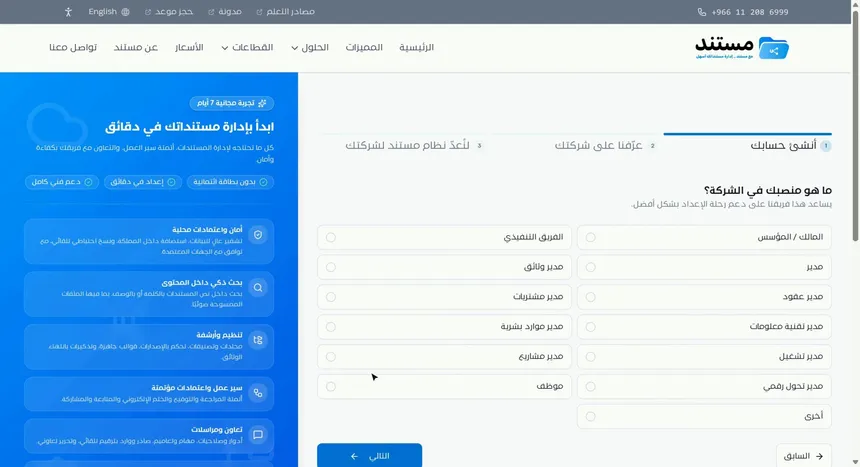
Choose your position from the list. The options include «Owner / Founder», «Executive team», «Manager», «Document manager», «Contracts manager», «Procurement manager», «IT manager», «HR manager», «Operations manager», «Project manager», «Digital transformation manager», «Employee» and «Other».
This choice helps the Mstnd team prepare an experience that suits the nature of your role, because a contracts manager's concerns differ from an IT manager's. This step completes the first stage, «Create your account».
Step 9: Tell us about your company: the company name
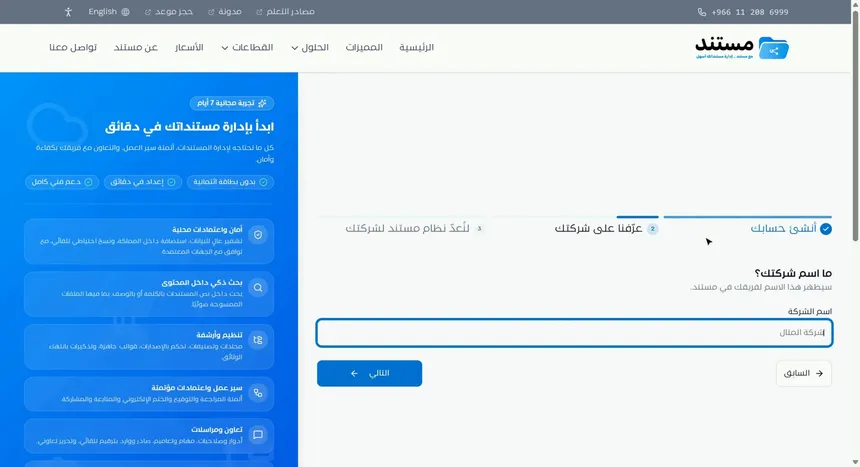
You now move to the second stage, «Tell us about your company». Type the company name in the «Company name» field. The screen explains that this name will appear to your team in Mstnd, so write it in the form your employees know.
Step 10: Add the company website or click «Skip for now»
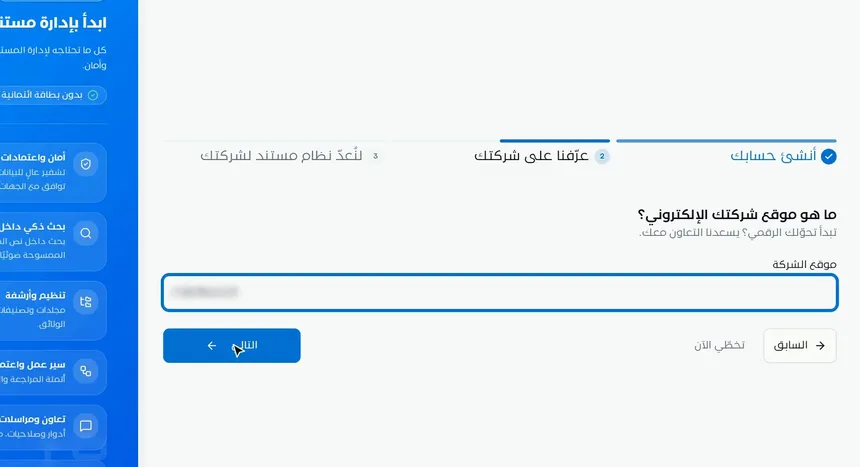
You can add your company's website in the «Company website» field. This field is optional: if your company has no website, or you do not have it to hand right now, click «Skip for now» and continue.
Step 11: Choose your company's sector
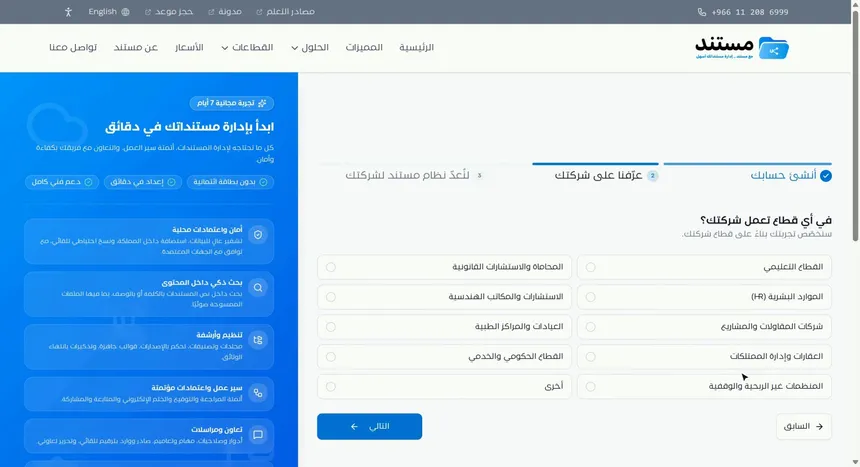
Choose the sector your company works in. The options shown include «Education sector», «Law and legal consulting», «Human resources (HR)», «Consulting and engineering firms», «Contracting and project companies», «Clinics and medical centers», «Real estate and property management», «Government and public services sector», «Non-profit and endowment organizations» and «Other».
This is one of the most important choices in sign-up, because Mstnd tailors your templates and settings based on it. For example, the sector determines the organizational structure templates you will be offered shortly.
Step 12: Set your company's size
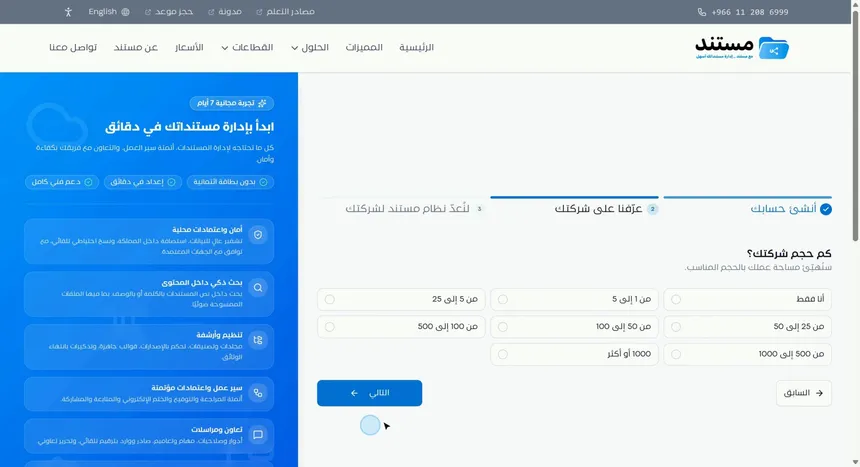
Set your company's size by its number of employees. The options start at «Just me» and go up to «1000 or more». The screen notes that this choice is used to prepare a workspace of the right size. This step completes the second stage.
Step 13: Choose your goals in order of priority
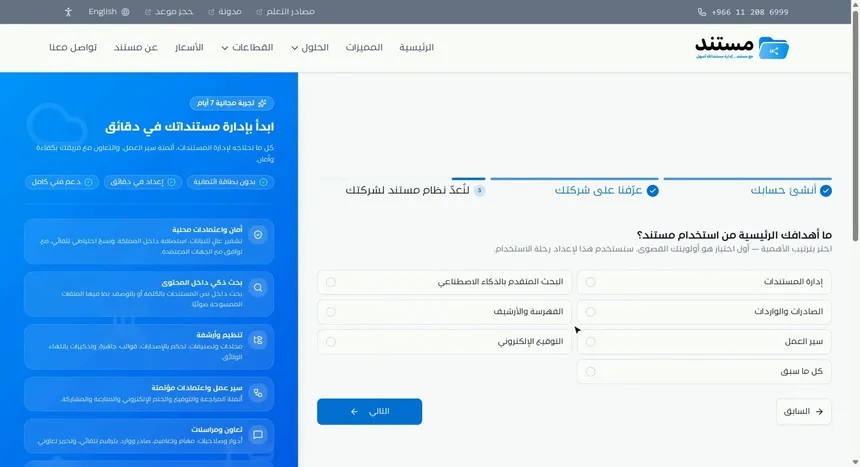
The third stage, «Let's set up Mstnd for your company», starts with a question: what are your main goals in using Mstnd? The options are «Document management», «Outgoing and incoming correspondence», «Workflows», «Advanced AI search», «Indexing and archive», «Electronic signature» and «All of the above».
Choose your goals in order: your first choice is your top priority. The system uses this order to set up your user journey, including the starting point suggested to you on your first sign-in.
Step 14: Choose the organizational structure template that fits your sector
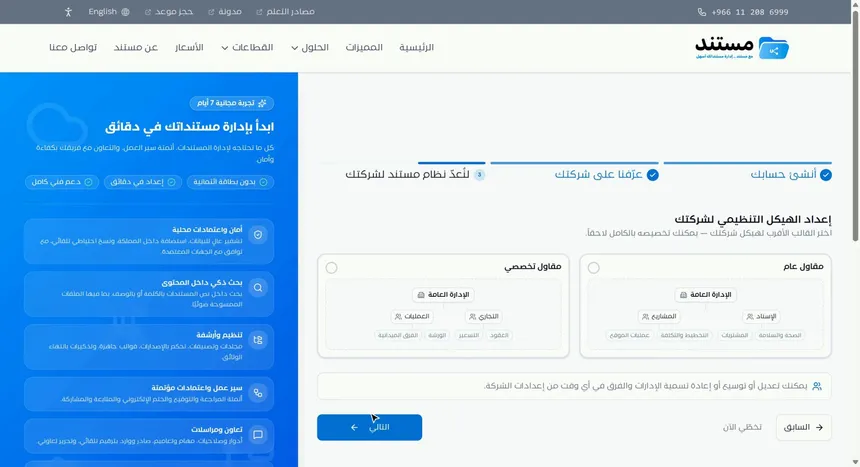
Mstnd offers you organizational structure templates suggested for your sector. Each template shows the shape of the structure: the general management at the top, the departments beneath it, and each department's teams beneath that. For example, in the contracting sector you see templates such as «General contractor» and «Specialist contractor».
Choose the template closest to your company. Do not worry if it is not a perfect match: the screen points out that you can edit, expand or rename the departments and teams at any time later. You can also skip this step.
Step 15: Invite your team or click «Skip for now»
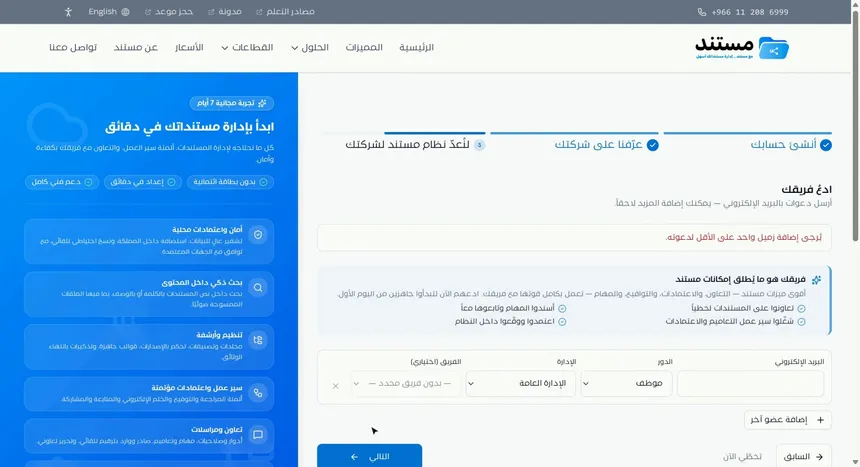
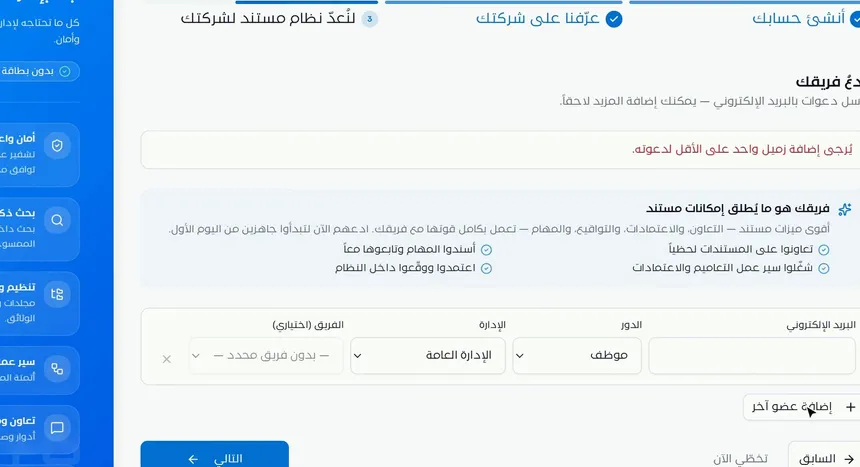
On the «Invite your team» screen you can send email invitations to your colleagues right away. For each colleague you set:
- Email address.
- Role: such as «Employee».
- Department: such as «General management» or one of the departments of the template you chose.
- Team (optional): or you leave it as «No specific team».
To add another person, click «Add another member». The screen reminds you that Mstnd's most powerful features, such as collaborating on documents and assigning tasks, approvals and signatures, work at full strength with a team.
If you want to continue without inviting anyone, click «Skip for now». You can add more people later from the Invitations page.
Step 16: Choose the folder structure to start with
In the last setup step you choose the folder structure your organization starts with. This structure is the starting point for organizing your documents, and you can develop it later by creating new folders or editing the existing ones from the Folders page.
Step 17: Your account is under review
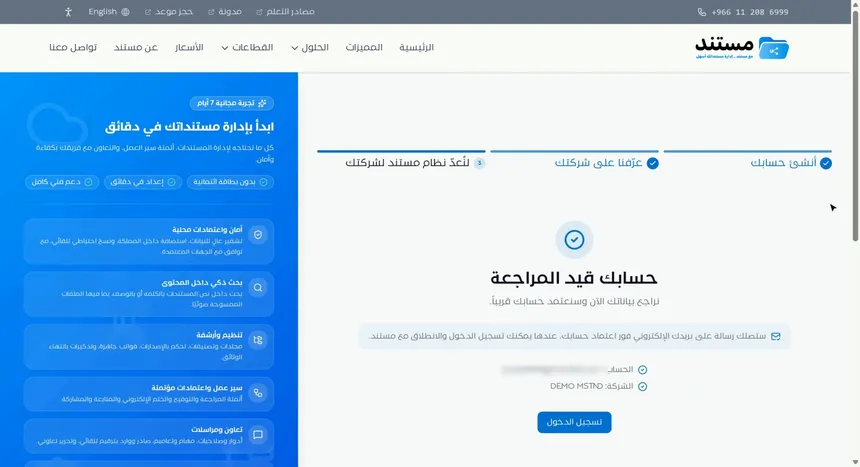
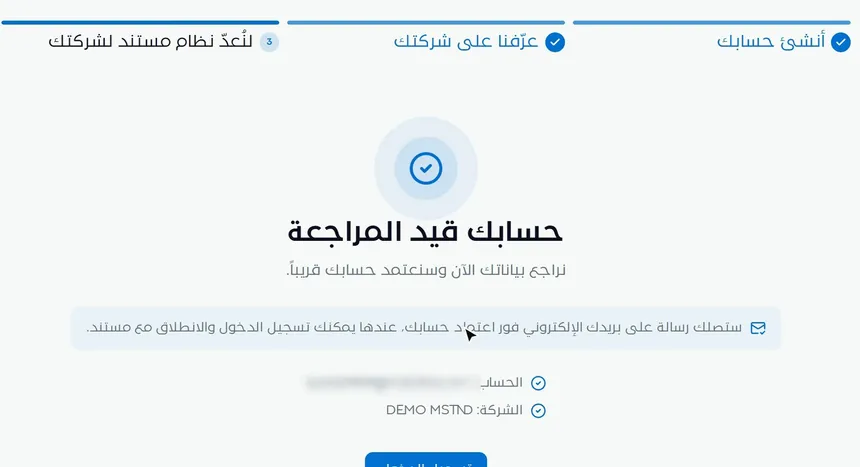
With that, the three stages are complete, and the «Your account is under review» screen appears with the message: We are reviewing your details now and will approve your account soon. The Mstnd team reviews the details you entered, and the screen shows a summary of the account and the company name.
As soon as the account is approved, you receive a message by email; then you sign in and get going. The journey continues in the guide First sign-in after your request is accepted.
Options and their effect
| Option or setting | What it does | When to use it |
|---|---|---|
| «Send code» | Sends a 4-digit verification code to your email | Right after typing your email |
| «Verify» | Confirms the code you entered and takes you to the next step | After entering the email or mobile code |
| Resend | Sends a new code after the countdown ends | If the code did not reach you |
| «Use another email» / «Use another number» | Takes you back to change the email or the number | If you discover a mistake in your details |
| Position | Helps prepare an experience that suits your role | Always; choose the one closest to your responsibilities |
| Sector | Tailors the templates, the settings and the structure templates | Always; it is one of the most influential choices |
| Company size | Prepares a workspace of the right size | Always |
| Goal order | Sets your priorities and the suggested user journey | Order them by their actual importance |
| Organizational structure template | Creates initial departments and teams | Choose the one closest to your reality, or skip it and build later |
| Team invitation | Sends email invitations with a role, a department and a team | When you know from the start who will work with you |
| «Skip for now» | Skips the current optional step | For the website, the invitations or anything you postpone |
| «Back» | Goes one step back so you can change an answer | When you want to correct an earlier choice |
Practical scenarios
Scenario: A mid-sized contracting company starts digitizing its contracts
Situation: The contracts manager of a contracting company wants to move project contracts and correspondence into one system, and plans to involve the procurement team from day one.
What you do in Mstnd:
- Sign up with your work email and choose the «Contracts manager» position.
- Choose the «Contracting and project companies» sector and the matching size.
- Order your goals: «Document management», then «Electronic signature», then «Workflows».
- Choose the «General contractor» template if the company carries out varied projects.
- Invite the members of the procurement team and set their department from the template.
Result: After approval, the team enters a system whose departments and teams are close to the company's reality, and starts working right away.
Scenario: A small law firm
Situation: A lawyer runs a five-person firm and wants to try the system alone before involving colleagues.
What you do in Mstnd:
- Choose the «Owner / Founder» position and the «Law and legal consulting» sector.
- Choose the size «5 to 25» or whatever fits the firm.
- Put «Indexing and archive» or «Advanced AI search» first, depending on your need.
- Click «Skip for now» on the team invitation screen.
Result: The owner tries the system alone, then invites colleagues later from the Invitations page after organizing the folders.
Scenario: A private school organizes its outgoing and incoming correspondence
Situation: A school's administration deals every day with incoming letters from education authorities and needs to organize its outgoing and incoming correspondence.
What you do in Mstnd:
- Choose «Education sector».
- Put «Outgoing and incoming correspondence» first among your goals.
- Choose the closest structure template, and invite the administrative communications officer with the «Employee» role and their department.
Result: Mstnd starts with an experience focused on administrative correspondence, with a structure that reflects the school's departments.
Scenario: A government entity tries the system before a wider rollout
Situation: The digital transformation department of a government entity is evaluating document management systems before adopting one of them.
What you do in Mstnd:
- Sign up in the name of the digital transformation officer and choose the «Digital transformation manager» position.
- Choose «Government and public services sector» and the entity's actual size.
- Choose «All of the above» if the evaluation covers every capability.
- Invite two or three members from the departments involved in the evaluation.
Result: A small evaluation team tests the system during the trial period on a structure close to the entity's own.
How it relates to other features
- First sign-in after your request is accepted: the very next step after your account is approved, with the introductory tour and the «Get started» list.
- Organizational structure: shows the template you chose during sign-up as an interactive chart after you sign in.
- Sections and teams: where you edit the departments and teams the template created, and add managers and members to them.
- Invitations: the invitations you sent during sign-up appear here with their status, and from here you send more invitations.
- Roles: the role you give colleagues when you invite them determines their permissions; here you learn the difference between the roles.
- Folders: the folder structure you chose is the starting point that you develop from this page.
Tips and best practices
- Sign up with an official work email on your organization's domain, not with a personal email.
- Choose a long password that combines letters, numbers and symbols, and do not reuse it from other services.
- Take a minute to choose the right sector, since it determines the suggested templates and settings.
- Order your goals by their real priority, not by the order in which they appear on the screen.
- Choose the closest structure template even if it is not an exact match: editing it is faster than building a structure from scratch.
- Invite a limited number of key colleagues during sign-up, and leave the rest until the departments and roles are complete.
- Keep your email and mobile available after sign-up, since the verification and approval messages arrive on them.
Warnings and common mistakes
FAQ
How do I sign up for Mstnd?
Open https://identity.mstnd.sa/signup, enter your email and verify it with a 4-digit code, then choose a password and verify your mobile. After that, enter your company details and goals, choose a structure template and send the request for review.
Does the free trial need a credit card?
No. The free trial lasts 7 days and does not require you to enter a credit card.
How long should the password be?
From 6 to 32 characters. It is better to choose a strong password, because this account is usually the one with the highest permissions in the organization.
Can I edit the organizational structure template after sign-up?
Yes. You can edit, expand or rename the departments and teams at any time after you sign in, from the «Sections and teams» tab.
Do I have to invite my team during sign-up?
No, this step is optional. Click «Skip for now» and invite your colleagues later from the Invitations page.
Why does Mstnd ask for your company's sector and size?
To tailor your experience: the sector determines the suggested templates, settings and structure templates, and the size is used to prepare the right workspace.
When can I enter the system after signing up?
After the Mstnd team reviews your details and approves the account. You receive an email as soon as it is approved, and then you sign in.
What do I do if the verification code does not arrive?
Check your spam folder, wait for the countdown to end and then ask for the code to be resent. If the email or the number contains a mistake, use the option for another email or number.
Summary
- Signing up for Mstnd takes three stages: «Create your account», «Tell us about your company» and «Let's set up Mstnd for your company».
- The account is verified with one verification code sent to your email and another sent to your mobile.
- Your sector, your size and the order of your goals tailor your experience and templates from the start.
- The organizational structure template, the team invitation and the folder structure give you a ready starting point, and all of them can be edited later.
- After you submit, the account becomes «Under review», and you receive a notification by email as soon as it is approved.
Try it free: Create your organization's account in Mstnd
Was this article helpful?
Related articles
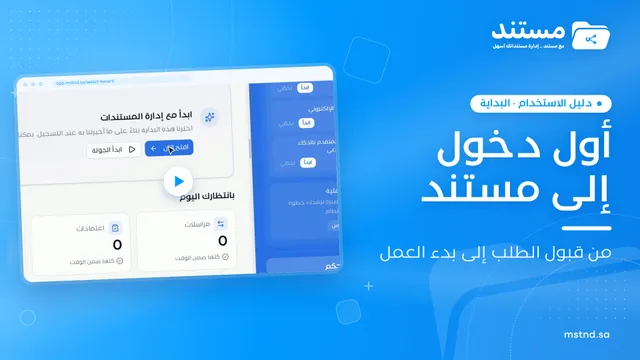 0:47
Your first sign-in to Mstnd after your request is accepted: from the notification to getting to work
What happens after your Mstnd request is accepted: signing in and choosing your organization, the introductory tour, the «Get started» list and your free trial.
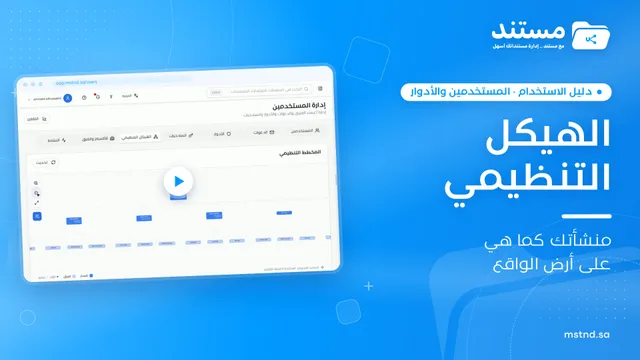 0:29
The organizational structure in Mstnd: your organization as it really is
Learn the organizational structure in Mstnd: an interactive chart to zoom and drag, show or hide member names, with color-coded sections, teams and leads.
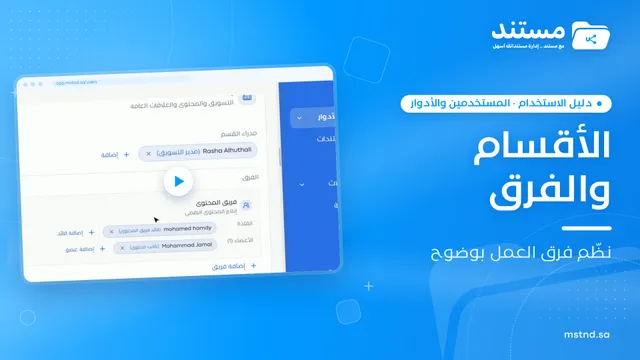 1:06
Sections and teams in Mstnd: organize your work teams clearly
Learn the Mstnd Sections and teams tab: general management and its managers, creating a section, adding its managers, then a team with its lead and members.
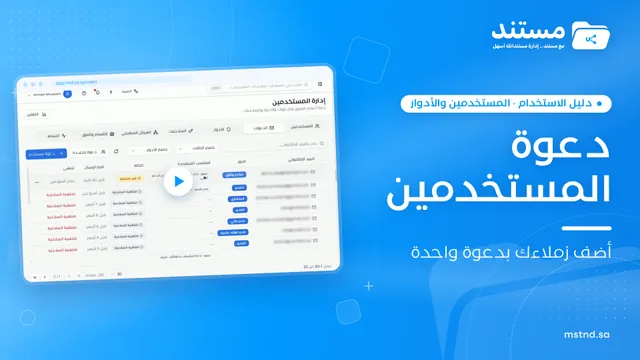 0:47
Invitations in Mstnd: track your team's invitations and send them in one go
Learn the Invitations tab in Mstnd: track each invitation's status, resend, copy the link or cancel, and invite several employees with one role and position.
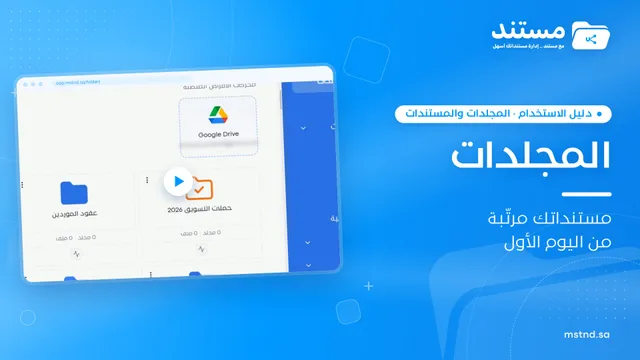 1:26
Folders in Mstnd: organize your organization's documents from day one
Learn the Mstnd Folders page: Personal space, structure folders, Shared with me, new folders with a confidentiality level, color and icon, views and actions.
 0:36
Roles in Mstnd: precise permissions for every job role
Learn about roles in Mstnd: core and custom roles, each role's permissions, and creating a role with precisely chosen permissions, then assigning it to users.