

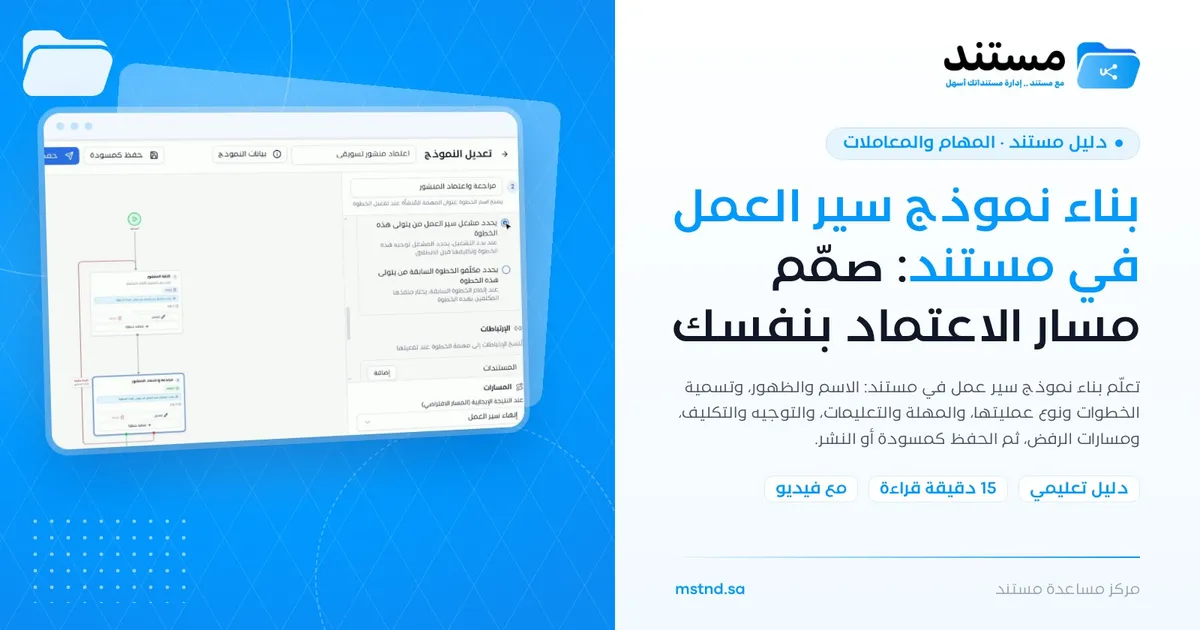
Building a workflow template in Mstnd: design your own approval path
In this article
Building a workflow template in Mstnd turns one of your organization's procedures into a digital path that the system runs automatically. You enter the template's name and description and choose who can see it, then build its steps in a visual builder: each step has a name, an operation type, a deadline in days and instructions, a way of determining who handles it, and paths that define where the work goes on approval or rejection. Finally, you save it as a draft or publish it so that it becomes «Active» and ready for launching transactions.
Quick overview
| Item | Details |
|---|---|
| Module | Tasks and workflows |
| Where it is in the interface | «Workflow templates» → «Create template», or «Edit» from the «⋯» menu or from the template details page |
| Direct link | https://app.mstnd.sa/workflow/templates/<id>/edit |
| Goal | Design a recurring procedure with clear steps, owners, deadlines, and paths for approval and rejection |
| Who it is for | Operations and quality officers, department managers, and whoever is tasked with automating the organization's procedures |
| Video length | 1 minute 18 seconds |
| What you will learn | Creating the template and setting its visibility, using the step builder, choosing the operation type, writing the deadline and instructions, the routing and assignment options, setting the rejection path, and saving and publishing |
Watch the video
The video builds a complete two-step template called «Marketing post approval»: «Write the post» with the «Create» operation, then «Review and approve the post» with the «Approve» operation and a path that sends the post back for writing on rejection, and it ends by publishing the template.
Why this feature?
Most organizations have procedures, but they are not written down precisely. "The content team writes the post, then the manager approves it" sounds clear, until the questions arrive: Who in the content team? How many days do they have? If the manager rejects it, does the post go back to the same writer or to someone else? And what exactly should the writer attach?
The workflow template builder makes you answer these questions once, at design time. After that, the system applies the answers automatically in every transaction: it creates the task for the right assignee, sets the instructions as its description, calculates the deadline, and moves the work to the right step according to the outcome.
| Before the template builder | With the workflow template builder |
|---|---|
| The procedure lives in employees' memory | The procedure is designed and drawn in a diagram |
| Every request needs someone to route it by hand | The system creates the next task automatically |
| Instructions are explained every time | Instructions are written once and become the task description |
| A rejection throws the procedure into confusion | The rejection path is defined in advance for each step |
| Changing the procedure needs a circular and training | Editing and publishing the template changes the procedure for everyone |
Value for the organization: Standardized, controlled procedures that can be measured and improved, and that depend less on individuals.
Value for the individual: Every employee knows their role, their deadline and exactly what is required of them.
Where to find it
To create a new template:
- Side menu → «Tasks and workflows» → «Workflow templates».
- Click «Create template».
To edit an existing template:
- From the template card: «⋯» → «Edit».
- Or from the template details page: the «Edit» button at the top.
The direct link to the edit page has this form: https://app.mstnd.sa/workflow/templates/<id>/edit
Concepts and terms
| Term | Meaning in Mstnd |
|---|---|
| Step builder | The «Edit template» page, with the diagram on the left and the step editor on the right |
| Step name | Becomes the title of the task created when the step is activated |
| Operation type | The work required in the step; each task performs only one operation, such as «Create», «Review» or «Approve» |
| Deadline | The number of days available to complete the step |
| Instructions | Text that explains what is required, and becomes the task description for the employee who carries it out |
| Routing and assignment | Setting the unit and the people who handle the step, and how they are chosen |
| Paths | The next step on a positive outcome (the default path) and on a negative outcome |
| Draft / Active | A draft is a saved template that has not been published; an active template is published and ready to use |
Step by step
Step 1: Click «Create template» and enter the name and description
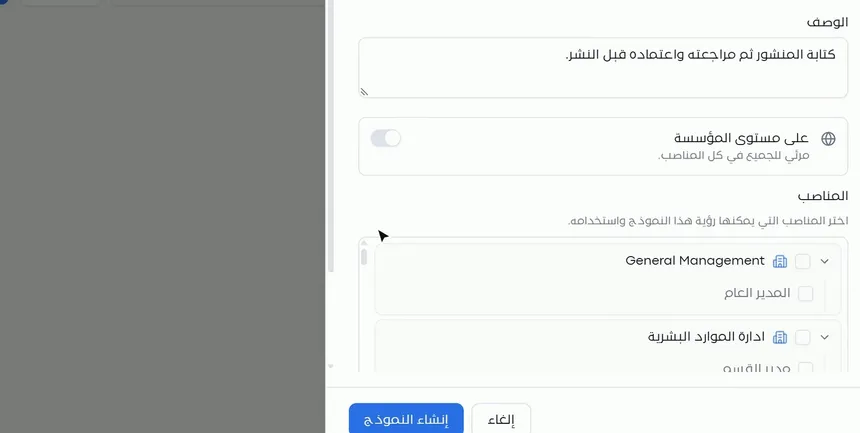
On the «Workflow templates» page, click «Create template». A dialog appears asking for:
- Template name: such as «Marketing post approval».
- Description: a sentence that summarizes the procedure, such as «Write the post, then review and approve it before publishing».
The name and description are what appear on the template card in the library and, later, in the titles of transactions. Write them so that any employee understands at first glance what this procedure is.
Step 2: Choose who sees the template, then «Create template»
In the same dialog, you set the template's visibility with one of two options:
- «Organization-wide»: a switch that makes the template «visible to everyone in all positions».
- Positions: if you do not turn on the switch, choose from the department tree the positions that can see and use this template, such as «General manager» or «Section manager».
Then click «Create template». The message «Template saved as draft» appears, and you move to the «Edit template» page, which contains two default steps titled «Step 1» and «Step 2» between the start and end points.
Step 3: Get to know the step builder
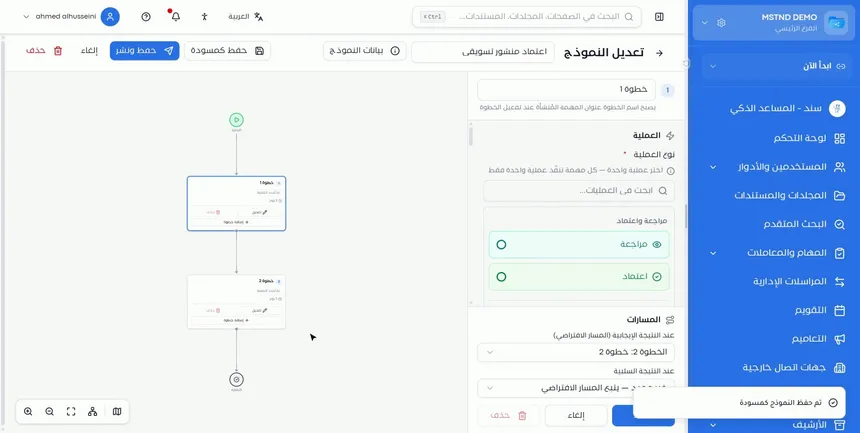
The «Edit template» page is split into two parts:
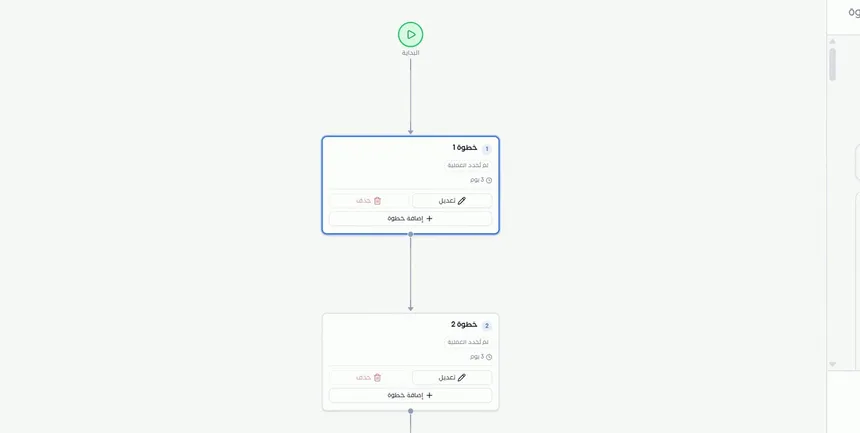
- The diagram on the left: draws the steps from «Start» to «End». Each step has a box with «Edit», «Delete» and «Add step» buttons. At the bottom are the zoom in and zoom out tools, fit to view, and the minimap.
- The step editor on the right: shows the settings of the selected step: the name, the operation, the deadline and instructions, routing and assignment, links, paths, and the «Save», «Cancel» and «Delete» buttons.
The top bar holds the template name, the «Template info» button, «Save as draft», «Save and publish», «Cancel» and «Delete».
Step 4: Name the first step and choose its operation type
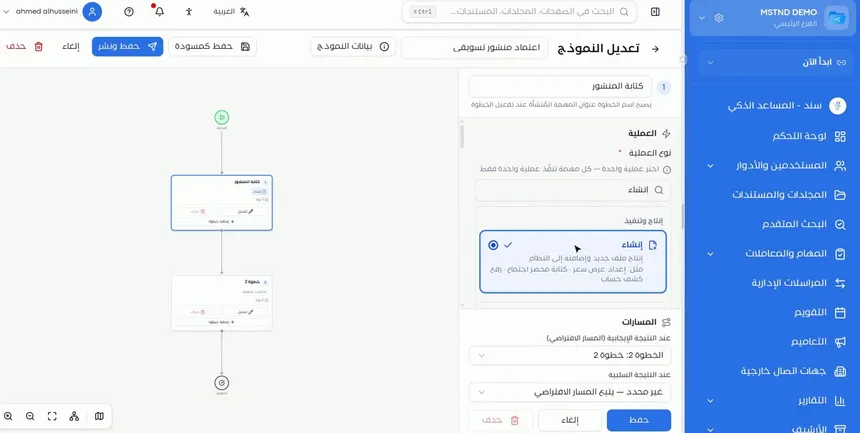
Click «Step 1» in the diagram, then in the editor:
- Enter the step name: such as «Write the post». Under the field is a note: «The step name becomes the title of the task created when the step is activated».
- Choose the operation type: the field is required, and the rule is «Choose one operation — each task performs only one operation». You can search the operations, which are sorted into groups, such as:
- «Review and approval»: containing «Review» and «Approve».
- «Production and execution»: containing «Create», described as «Produce a new file and add it to the system», with examples: preparing a price quote, writing meeting minutes, uploading an account statement.
In our example you choose «Create», because what this step requires is producing the post file.
Step 5: Set the deadline and write the instructions
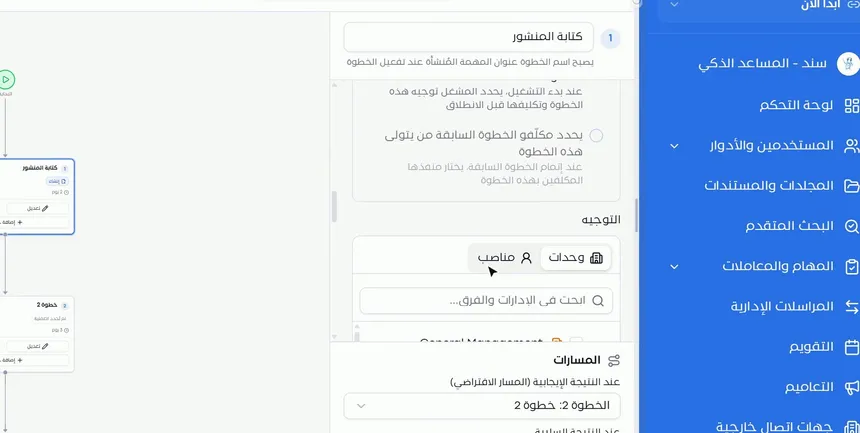
In the same editor:
- Deadline in days: the number of days the assignee has to complete the step, such as two days.
- Instructions: text that becomes the description of the task the employee sees, such as «Write the post text and attach the design».
Write the instructions as specific commands. The employee who opens the task does not see the template or the diagram, only the name and the instructions. If the instructions are vague, rejections and returns will keep happening.
| Weak instructions | Good instructions |
|---|---|
| Prepare the post | Write the post text and attach the design as an image |
| Review | Review the text and the design, then approve, or reject and state the reason |
| Attach the files | Attach the price quote and the bill of quantities, at least one file |
Step 6: Choose the «Routing and assignment» method
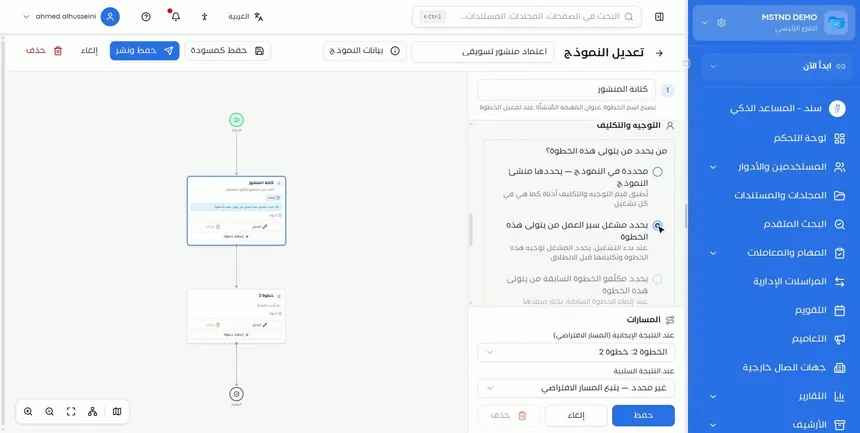
In the «Routing and assignment» section, the system asks you: «Who decides who handles this step?». The three options:
| Option | What it means | When to choose it |
|---|---|---|
| Set in the template — chosen by the template creator | The routing and assignment values you set here are applied as they are in every run | When the same person or unit always handles the step, such as the finance manager |
| The workflow initiator chooses who handles this step | When the run starts, the initiator sets the step's routing and assignment before launch | When the person who carries out the step varies from one transaction to another, and whoever starts the transaction knows who it is |
| The previous step's assignees choose who handles this step | When the previous step is completed, the person who carried it out chooses the assignees of this step | When the person who carried out the previous step is best placed to choose the next one |
If you choose to set it in the template, a «Routing» section appears with two tabs, «Units» and «Positions», along with a search across departments and teams for choosing the unit.
Below this section is the «Links» section, where you can add «Documents». The links you add here are copied to the step's task when the step is activated, which is useful for attaching a fixed reference document, such as the brand identity guidelines.
Step 7: Save the step and check the diagram
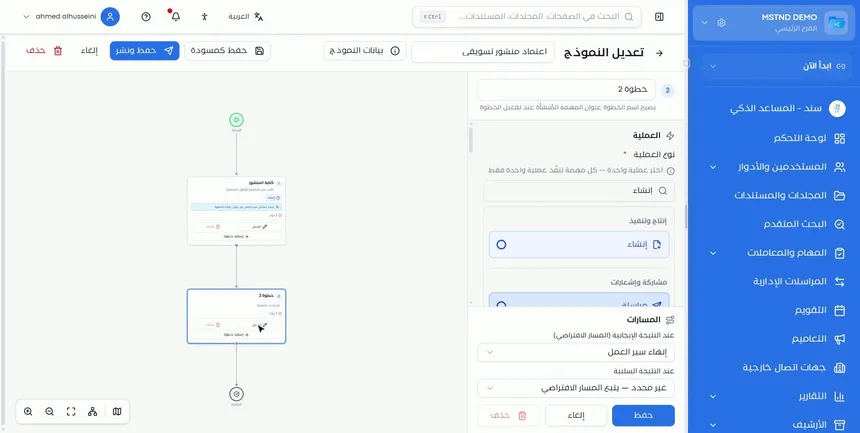
Click «Save» at the bottom of the editor. The step's box in the diagram updates immediately to show the new name, the operation type, the assignment method and the deadline.
Check the box after every save. The diagram is the picture of the procedure that everyone who opens the template later will see; if it looks confusing here, it will be confusing for everyone.
Step 8: Design the second step
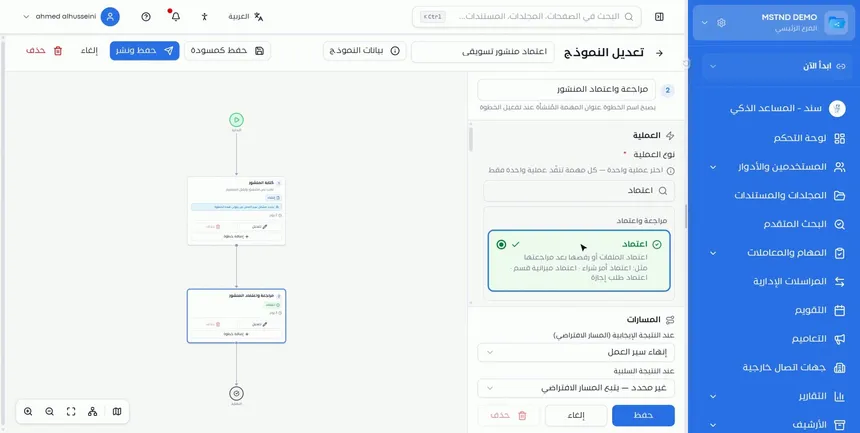
Click «Step 2» and repeat the setup:
- Name: «Review and approve the post».
- Operation type: «Approve».
- Deadline and instructions: such as three days, and «Review the post and approve it, or reject it and state the reason».
- Routing and assignment: depending on who the approver is.
Step 9: Set the rejection path in «Paths»
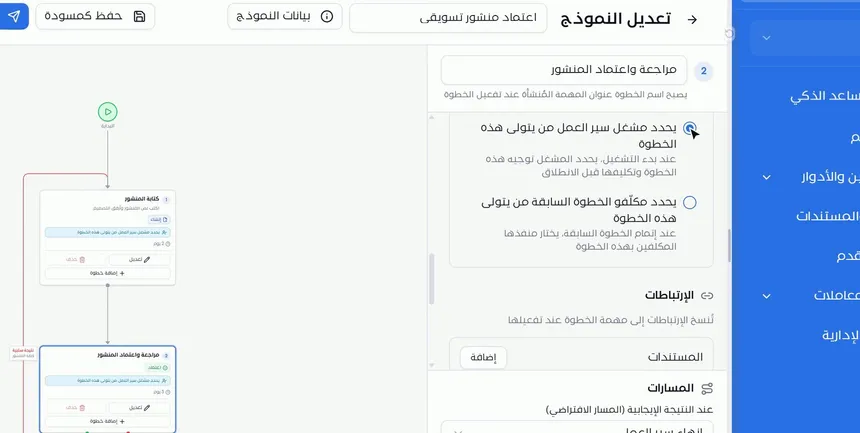
The «Paths» section has two fields:
- On positive outcome (default path): the next step on approval, or «End workflow» if this is the last step.
- On negative outcome: the step the work returns to on rejection. The default value is «Not set — follows the default path».
In our example, for the negative outcome you choose «Step 1: Write the post». A red line labeled «Negative outcome» then appears in the diagram, going back from the approval step to the writing step.
Step 10: Add more steps, then save or publish
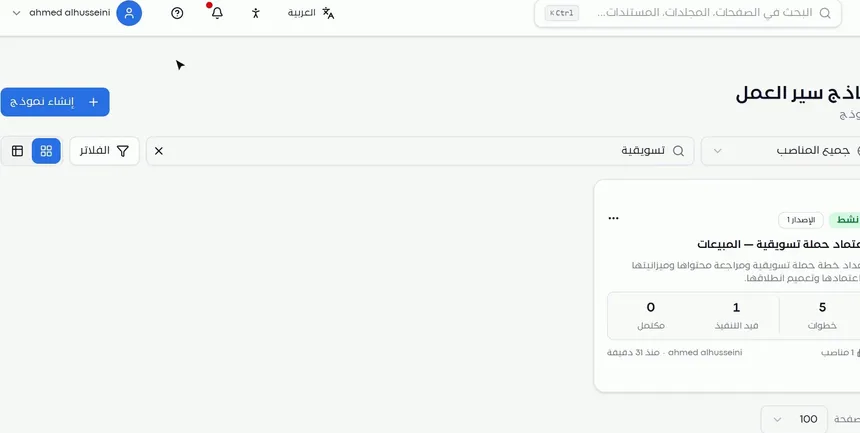
To add more steps, click «Add step» in the box of the step you want to add after, then set it up the same way.
When you finish, choose one of the two buttons at the top:
- «Save as draft»: saves your work without publishing. The template stays a «Draft» and is not in use yet.
- «Save and publish»: saves the template and publishes it so that it becomes «Active».
Use a draft when you need to review the template with the procedure's owner before approving it, and publish when you are sure of the steps and paths.
Step 11: Check the published template
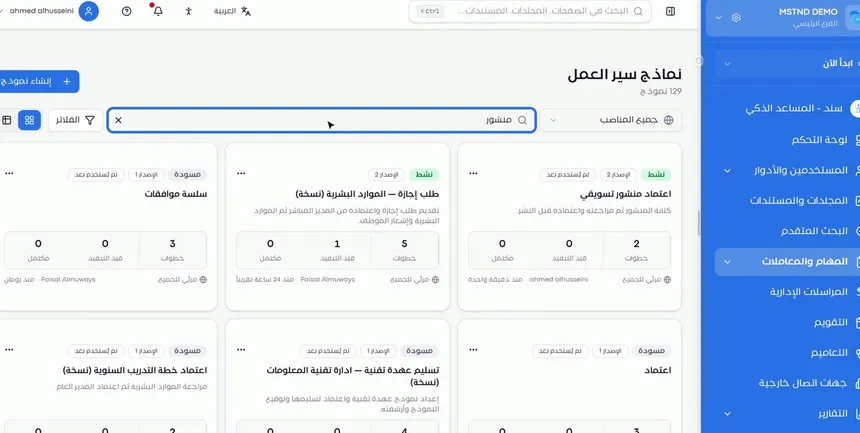
After publishing, you return to the template library, where the «Marketing post approval» card appears with the «Active» status, its number of steps and its visibility, and a «Not used yet» badge because no transactions have been launched from it so far.
The template is now ready. You can open its details to check the diagram, or start the first transaction from it right away.
Options and their effect
| Option or setting | What it does | When to use it |
|---|---|---|
| «Organization-wide» | Makes the template visible to everyone in all positions | For general procedures that apply to all employees |
| Positions | Limits who can see and use the template to specific positions | For specialized procedures |
| Step name | Becomes the title of the created task | Always, phrased with a clear verb |
| Operation type | Defines the required work, one operation per task | For every step; it is a required field |
| Deadline in days | Sets the time available for the step | According to the realistic time the work takes |
| Instructions | Become the task description for the person carrying it out | Always, with specific details |
| Set in the template | Applies the same routing and assignment in every run | When the person carrying out the step is fixed |
| Set by the workflow initiator | The person who starts the transaction chooses who carries out the step | When the person carrying out the step varies from case to case |
| Set by the previous step's assignees | The person who carried out the previous step chooses the next one | When the person who carried out the previous step knows best who should be next |
| Links (documents) | Copied to the step's task when it is activated | To attach a fixed reference to the step |
| On positive outcome | Sets the next step or «End workflow» | For every step |
| On negative outcome | Sets the step to return to on rejection | Especially for review and approval steps |
| «Add step» | Adds a step after the current one | To extend the path |
| «Delete» (in the step) | Deletes the step | To remove a step that is not needed |
| «Template info» | Shows the template's basic information for editing | To change the name, the description or the visibility |
| «Save as draft» | Saves without publishing | When a later review is needed |
| «Save and publish» | Saves and publishes the template so that it becomes «Active» | When the design is complete |
Practical scenarios
Scenario: A trading company automates post approval
Situation: The marketing team publishes content every day, every post needs the marketing manager's approval before publishing, and rejected posts get lost among messages.
What you do in Mstnd:
- Create a «Marketing post approval» template and make it visible to marketing positions.
- Step 1: «Write the post» with the «Create» operation, a two-day deadline, and the assignment «Set by the workflow initiator».
- Step 2: «Review and approve the post» with the «Approve» operation, and the assignment set in the template to the marketing manager position.
- In step 2's paths: the negative outcome goes back to «Write the post».
- «Save and publish».
Result: Every post goes through the same path, and a rejected post goes back automatically to its writer with the manager's note.
Scenario: A hospital designs a clinical policy approval procedure
Situation: Clinical policies are prepared by a section, then reviewed by the quality committee, then approved by the medical director.
What you do in Mstnd:
- Create the template and choose the relevant positions.
- Step 1: «Prepare the policy draft» with the «Create» operation, and the assignment «Set by the workflow initiator» because the section differs each time.
- Step 2: «Quality review» with the «Review» operation; a rejection goes back to step 1.
- Step 3: «Medical director approval» with the «Approve» operation; a rejection goes back to step 2.
- Save as a draft, review the diagram with the quality committee, then publish.
Result: A procedure that is clear to everyone, and a rejection by the medical director goes back to quality, not directly to the section.
Scenario: A contracting company builds a progress claim approval procedure
Situation: Subcontractors' progress claims are prepared by the site engineer and reviewed by the project manager, who then chooses the right accountant for the financial review.
What you do in Mstnd:
- Step 1: «Prepare the progress claim» with the «Create» operation and instructions that specify the required attachments.
- Step 2: «Project manager review» with the «Review» operation; a rejection goes back to step 1.
- Step 3: «Financial review» with the «Review» operation, and the assignment «The previous step's assignees choose who handles this step».
- «Save and publish».
Result: The project manager routes each claim to the accountant responsible for that project, with no need for a separate template for each project.
Scenario: A school prepares a school trip request procedure
Situation: The teacher submits the trip plan, the vice principal for academic affairs reviews it, and then the school principal approves it.
What you do in Mstnd:
- Create the template as «Organization-wide» so that all teachers can reach it.
- Design the three steps with their operations and deadlines.
- In «Links», add the school trip regulations document so that it appears in the preparation task.
- Set the rejection paths, then «Save and publish».
Result: Every teacher sees the regulations while preparing the plan, so fewer plans are rejected for missing requirements.
How it relates to other features
- Workflow templates: the starting point with the «Create template» button, and the place where the template appears after publishing.
- Workflow template details: shows the template as you designed it here, and takes you back to «Edit».
- Transactions: every transaction launched from the template follows the steps and paths you built.
- Transaction details: the transaction diagram reflects your design, with the status of each step during execution.
- Carrying out a task: the step name becomes the task title, and the instructions become its description.
- Organizational structure: the source of the units and positions used in routing and assignment and in the template's visibility.
Tips and best practices
- Sketch the procedure on paper or discuss it with its owner before opening the builder: who does what, and what happens on rejection?
- Stick to the «one operation per step» rule, and split compound steps.
- Name steps with clear verbs, such as «Write the post» and «Review and approve the post», because they will become task titles.
- Write instructions that specify the required output, such as the file type and the number of files.
- Set the rejection path in every review or approval step, and do not leave it on the default.
- Keep deadlines realistic, and consult whoever will actually carry out the step.
- For important procedures, save as a draft first and review the diagram with the stakeholders before publishing.
- Use «Links» to attach regulations and reference guides to the steps that need them.
Warnings and common mistakes
FAQ
How do I create a new workflow template in Mstnd?
From «Workflow templates», click «Create template», enter the name and description, set the visibility, then confirm with «Create template». After that, design the steps in the step builder and click «Save and publish».
Can a single step include more than one operation?
No. Each task performs only one operation. If you need to create a file and then approve it, make them two separate steps.
What is the difference between the three «Routing and assignment» options?
«Set in the template» fixes who carries out the step in every run, «Set by the workflow initiator» leaves the choice to the person who starts the transaction, and «Set by the previous step's assignees» leaves the choice to whoever carried out the step before it.
How do I make a rejected request go back to an earlier step?
In the step's «Paths» section, choose in the «On negative outcome» field the step the work goes back to. A red line will appear in the diagram to show the return.
What are the instructions in a step for?
The instructions become the description of the task that the employee carrying it out sees, so they are how that employee knows exactly what is required.
What is the difference between «Save as draft» and «Save and publish»?
«Save as draft» saves the template without publishing it, so it stays unusable, while «Save and publish» publishes it so that it becomes «Active» and transactions can be launched from it.
How do I choose who sees the template?
When creating it, turn on «Organization-wide» so that everyone sees it, or choose specific positions from the department tree. You can change this later from «Template info».
How do I add a new step between two steps?
In the diagram, click «Add step» in the box of the step you want to add after, then set up the new step and click «Save».
Summary
- Building a template starts with the name, description and visibility, then moves to the step builder.
- Each step has a name that becomes the task title, one operation, a deadline, and instructions that become the task description.
- «Routing and assignment» defines who handles the step: fixed in the template, the workflow initiator, or the previous step's assignees.
- «Paths» define what happens to the work on approval and rejection, and appear in green and red in the diagram.
- «Save as draft» is for review, and «Save and publish» makes the template «Active» and ready for transactions.
Try it free: Create your organization's account in Mstnd
Was this article helpful?
Related articles
 0:44
Workflow templates in Mstnd: ready-made templates for your organization's procedures
Learn Mstnd workflow templates: recurring procedure templates with status, version, steps and transactions, search, filters, view, edit, copy, archive, create.
 0:45
Workflow template details in Mstnd: understand the path before you launch it
Learn the Mstnd workflow template details page: each step's operation, owner and deadline, positive and negative paths in the diagram, and starting a workflow.
 0:41
Transactions in Mstnd: follow every workflow from one screen
Learn the Mstnd Transactions page: see every workflow with its number, status, priority and progress, use scope and filters, export it and start a new workflow.
 0:48
Transaction details in Mstnd: know where your transaction stands and who is handling it
Learn the Mstnd transaction details page: progress, current step, workflow steps, the path diagram and branches, comments, files and log, pausing or cancelling.
 0:57
Carrying out a task in Mstnd: from «Start» to «Complete task»
Learn the Mstnd task page: view its data and routing, start work, preview the operation file, approve or reject it with a note, then complete and log the task.
 0:29
The organizational structure in Mstnd: your organization as it really is
Learn the organizational structure in Mstnd: an interactive chart to zoom and drag, show or hide member names, with color-coded sections, teams and leads.