

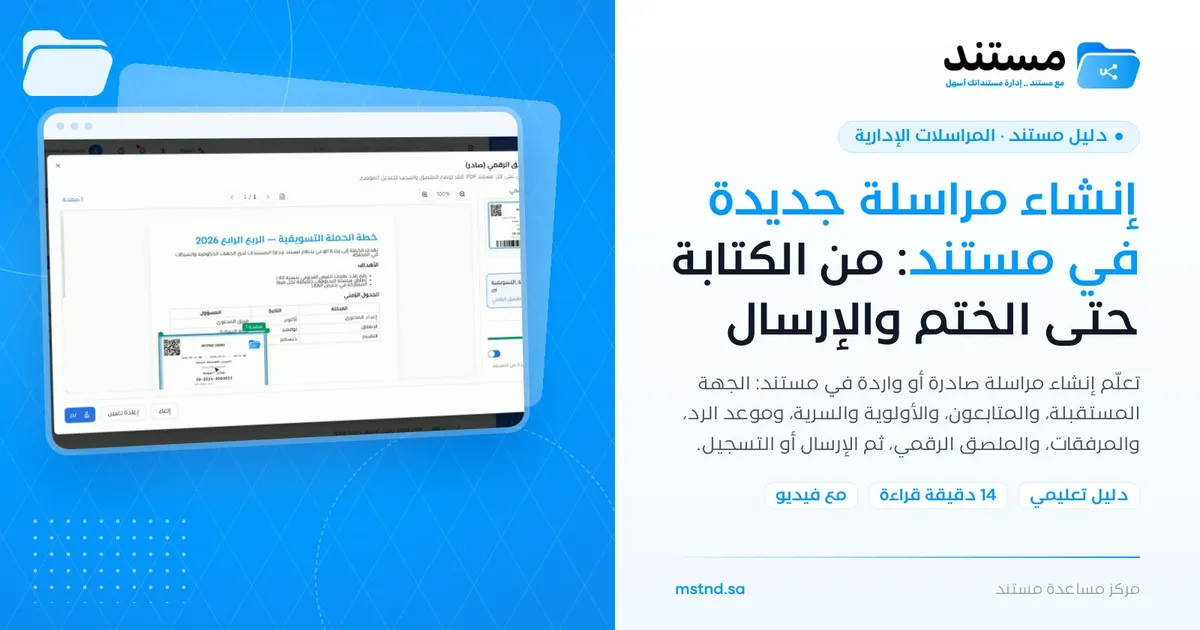
Creating new correspondence in Mstnd: from writing to stamping and sending
In this article
The «New correspondence» dialog in Mstnd is where you create any official correspondence, outgoing or incoming, with a party inside or outside the organization. In it you set the receiving party, the follow-up owners, the priority and the confidentiality level, write the subject and the text, and attach the letter; the system then stamps it with a digital sticker carrying the number, the date, a barcode and a QR code before sending. It serves administrative communications departments, secretarial staff and every employee who issues official letters, and it makes sure that every item is registered, numbered and followed up from the very first moment.
Quick overview
| Item | Details |
|---|---|
| Module | Administrative correspondence |
| Where it is in the interface | Side menu «Administrative correspondence» → the «New correspondence» button at the top of the page |
| Direct link | https://app.mstnd.sa/correspondence |
| Goal | Create an official correspondence item with complete data, stamped with a digital sticker, then send it, register it or save it as a draft |
| Who it is for | Administrative communications staff, office managers, secretarial staff, and everyone who issues letters or registers incoming mail |
| Video length | About 1 minute 34 seconds |
| What you will learn | Choosing the correspondence type, filling in its data, setting the reply date and the sending method, adding attachments, placing the digital sticker, and the difference between «Send», «Register» and «Save as draft» |
Watch the video
The video shows how to create an outgoing item to an internal party step by step, from choosing the type until it appears at the top of the correspondence list with its new number.
Why this feature?
Official correspondence is the organization's memory. Every outgoing letter is a commitment, and every incoming letter is a request that needs follow-up. In the traditional way, a letter is written in a word processor, then printed and stamped by hand, its number is recorded in a ledger or a spreadsheet, and then it is sent by mail. Each of these stages carries a chance of error: a duplicated number, a letter without a date, or a reply that is forgotten because nobody was assigned to follow it up.
The «New correspondence» dialog brings these stages together in a single form. The system numbers the item automatically, stamps the attachment with a digital sticker, sets who follows it up, fixes the expected reply date, and then sends it by email and instant notification together.
| Before | After |
|---|---|
| Manual numbering in a paper register or a spreadsheet | An automatic number that appears in the digital sticker and in the list |
| A manual stamp on the printed letter | A digital sticker with the number, date, barcode and QR code, placed on the PDF file |
| Nobody is explicitly responsible for following up the reply | «Follow-up owners» are set from the moment of creation |
| The reply date lives in the employee's memory | «Requires reply» with a clear date that appears in the details and the reports |
| Retyping the incoming letter's data by hand | AI reads the attached letter and suggests the registration fields |
The value for the organization is a complete correspondence register that can be referred back to and measured. The value for the individual is saving time and reducing procedural errors that could embarrass the department in front of other parties.
Where to find it
- From the side menu, open «Administrative correspondence».
- Click the «New correspondence» button at the top of the correspondence page.
- Choose the correspondence type from the list that appears.
Direct link: https://app.mstnd.sa/correspondence
Concepts and terms
| Term | Meaning in Mstnd |
|---|---|
| Outgoing | Correspondence that goes out from your unit to another party |
| Incoming | Correspondence that reaches your unit from another party and is registered in the system |
| Internal party | A section, team or user inside the organization |
| External party | A party from outside the organization, such as a government entity, a supplier or a client |
| Follow-up owners | The users assigned to follow up the item until it is completed or the reply arrives |
| Confidentiality level | A classification that defines how sensitive the item's content is and who can see it |
| Requires reply | A flag that makes the item await a reply by a set date |
| Digital sticker | A digital stamp placed on the attachment, carrying a barcode, a QR code, the outgoing number and the date |
Step by step
Step 1: Choose the correspondence type
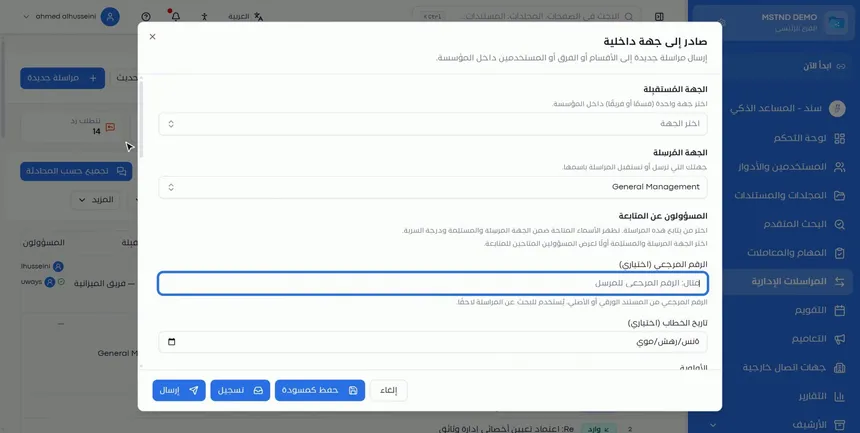
Click «New correspondence» and the available types appear. The type is determined by two questions: Is the correspondence going out from you or coming in to you? And is the other side an internal or an external party? In the video, «Outgoing to an internal party» is chosen, which means sending an item to a section, team or user inside the organization.
Choosing the right type matters because it determines the shape of the form and the fields that appear, and how the item is classified in the indicators and reports later. Use «Incoming» when you register a letter you received from another party, and «Outgoing» when you are the sender.
Step 2: Set the receiving party
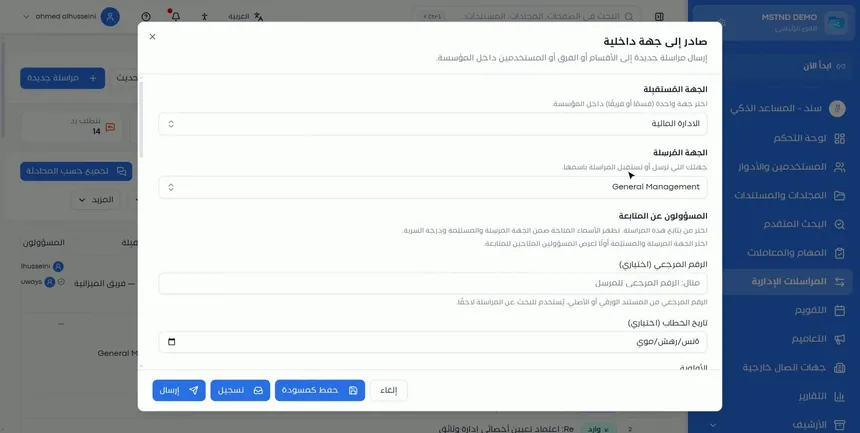
Choose the party that will receive the item, such as «Finance department». As for the sending party, the system fills it in automatically with your own unit, so you do not need to enter it every time.
This automatic filling keeps the data consistent: every item is attributed to its correct unit in the organizational structure, and that is what makes correspondence reports by party accurate.
Step 3: Assign the follow-up owners
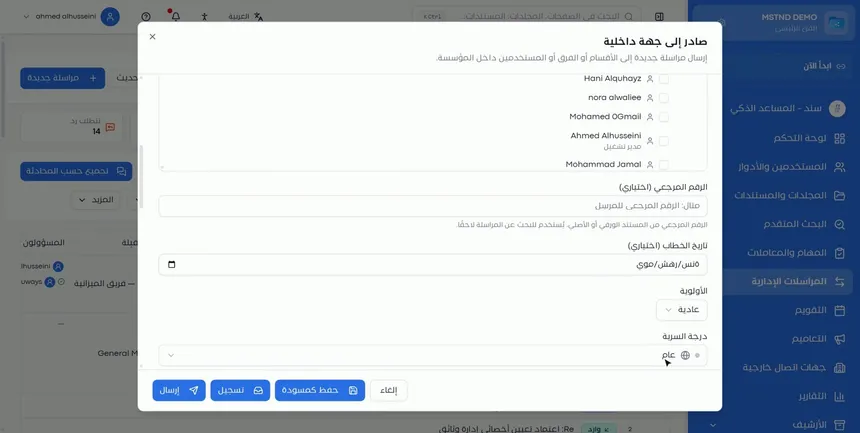
In the «Follow-up owners» field, choose who will follow up the item. It could be you, a colleague in your team, or more than one person.
Why does this matter? Because an item that nobody follows up by name is easily lost. Having a named follow-up owner means there is someone who knows they must make sure the item arrives and gets a reply. Later, the follow-up owner can mark that they have followed up from the correspondence details page.
Step 4: Enter the reference number, date, priority and confidentiality
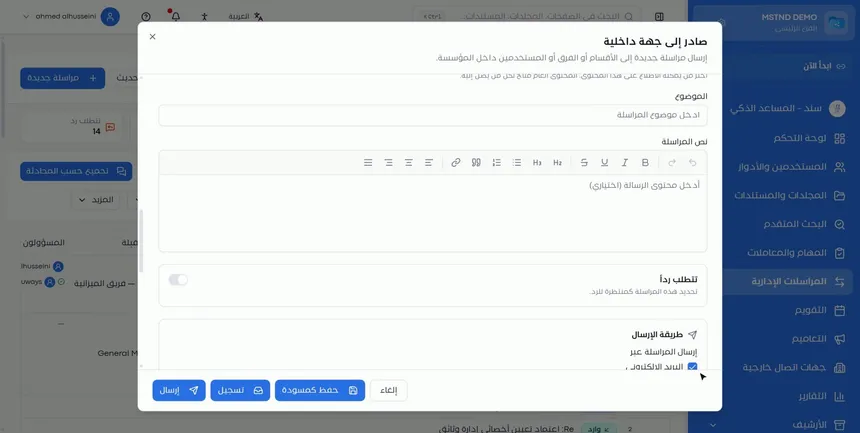
This part has four fields:
- Reference number: optional. Use it when the letter has its own number at the other party, especially for incoming mail.
- Letter date: optional. Useful when the original letter's date differs from the date it is registered in the system.
- Priority: sets how urgent the item is.
- Confidentiality level: sets how sensitive the content is. A note under it explains that the choice affects who can see the content.
Step 5: Write the subject and the correspondence text
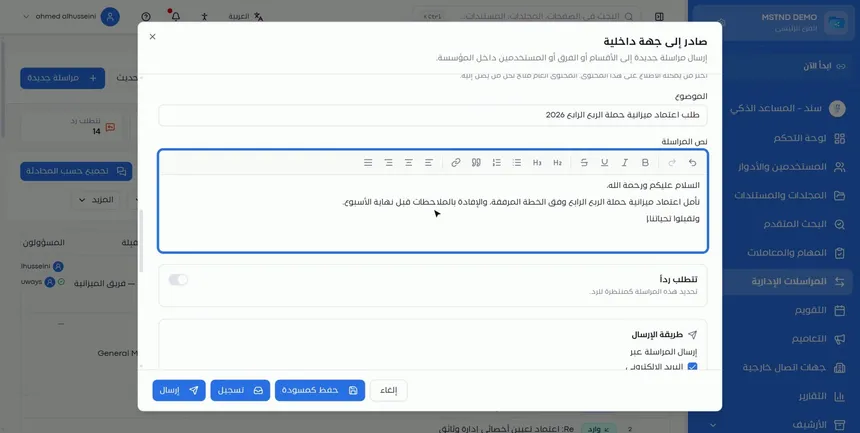
Write a clear subject in the «Subject» field, then write the text in «Correspondence text». The editor supports formatting: headings, bold, italic and underline, numbered and bulleted lists, quotes, links and text alignment.
The subject is the first thing the recipient sees, and it is what people search by later. So make it descriptive and specific, such as «Request to approve the Q4 campaign budget», instead of generic titles such as «Request» or «Letter».
Step 6: Set whether a reply is required and the sending method
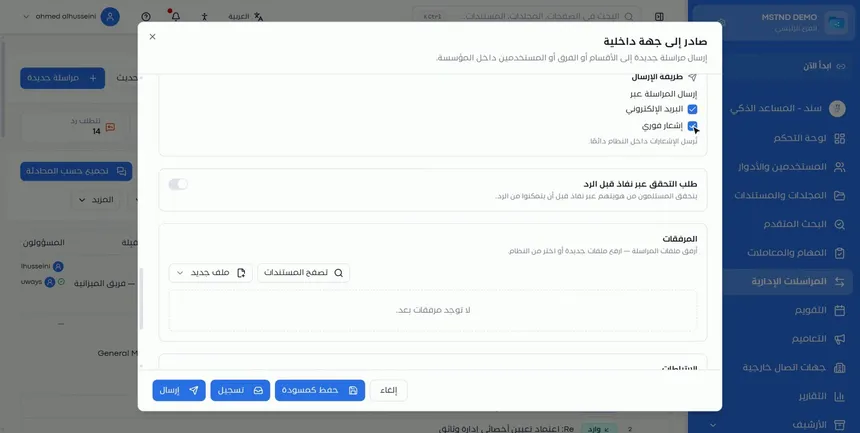
If you are expecting a reply to the item, turn on «Requires reply», then set the reply due date. This date appears in the correspondence details as «Final reply due date», and compliance rates in the reports are calculated against it.
Next, choose the «Sending method». In the video, «Email» and «Instant notification» are selected. In-system notifications are always sent, as the interface indicates. The form also shows the «Require Nafath verification before replying» option, which requires recipients to verify their identity through Nafath before they can reply.
Step 7: Add the attachments
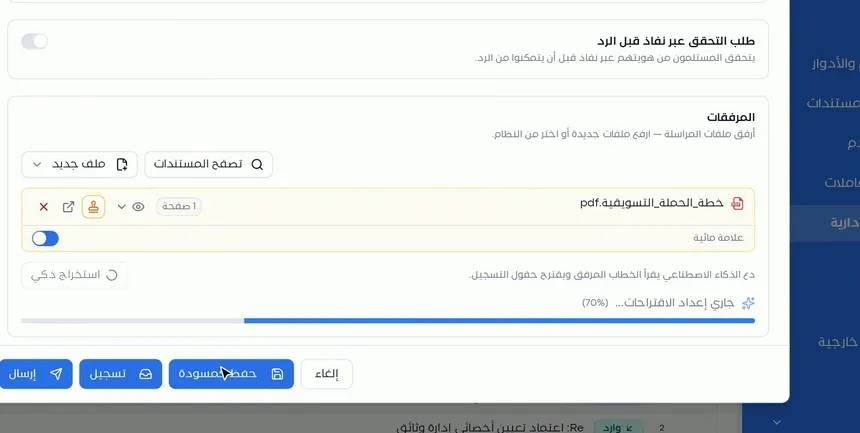
In the «Attachments» section you have two ways:
- New file: you upload a file from your device, such as a scanned letter.
- Browse documents: you choose a document that already exists in Mstnd, so you do not need to download it and then upload it again.
The second way is useful when the document was prepared or approved inside the system, because it keeps the item linked to the original document.
Step 8: Review the attachment, the watermark and the AI suggestions
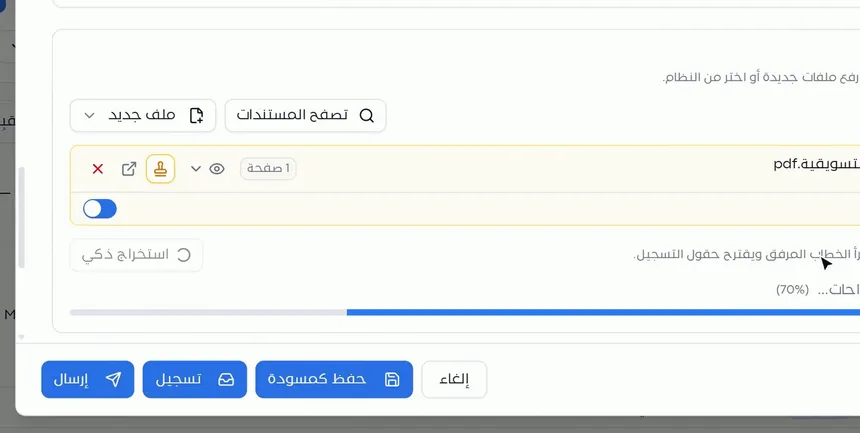
Once added, the attachment appears in the list, and you can put a watermark on it. AI also reads the content of the letter and suggests the registration fields to you, such as the subject and the letter's data.
These suggestions save a lot of time when registering incoming mail, where the data is written in the letter itself. But always review them before relying on them.
Step 9: Understand the difference between «Send», «Register» and «Save as draft»
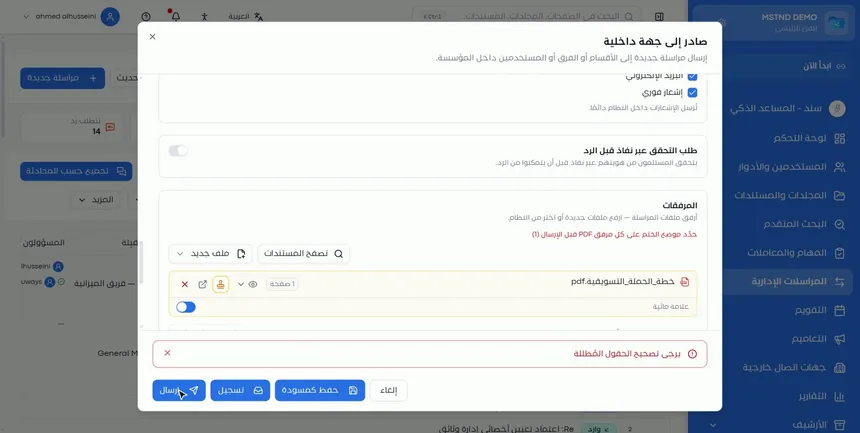
At the bottom of the dialog there are three main buttons:
| Button | What happens |
|---|---|
| «Send» | The item is sent to the receiving party by the methods you chose |
| «Register» | The item is registered in the system with its number, without being sent |
| «Save as draft» | The item is saved so you can finish it later, without being registered or sent |
Use «Register» when you want to record an item in the register without sending it electronically, for example because it was delivered on paper. Use «Save as draft» when you are waiting for data or a review before sending.
Step 10: Set the position of the outgoing stamp on the attachment
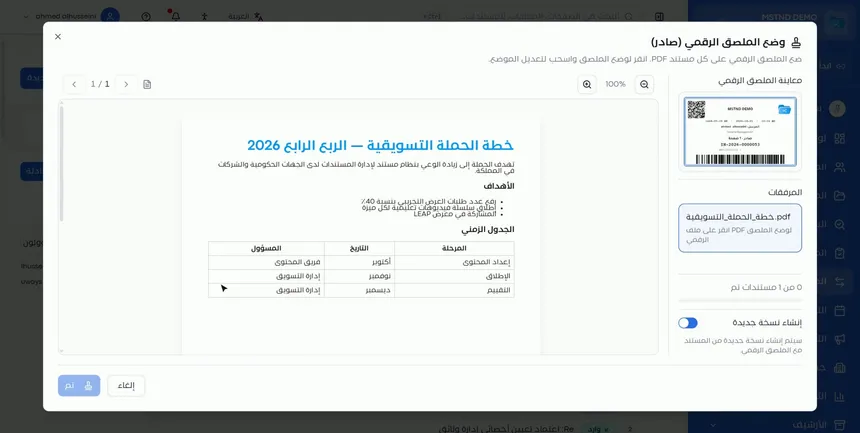
Before sending, the system asks you to set the position of the outgoing stamp on the PDF attachment. You open this from the stamp icon next to the attachment.
This step makes the sent letter carry its outgoing number and date on the page itself, just as a paper letter is stamped in the communications department.
Step 11: Place the digital sticker
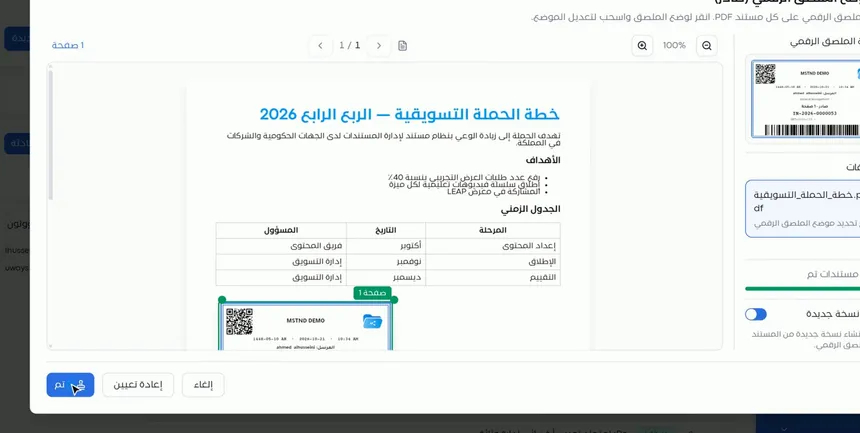
The «Digital sticker» appears, containing a barcode, a QR code, the outgoing number and the date. Click the right spot on the page and drag the sticker to it.
Choose a position that does not cover the letter's text or signatures, such as the top margin or an empty corner. The sticker must be readable, and the content must stay clear.
Step 12: Send the correspondence
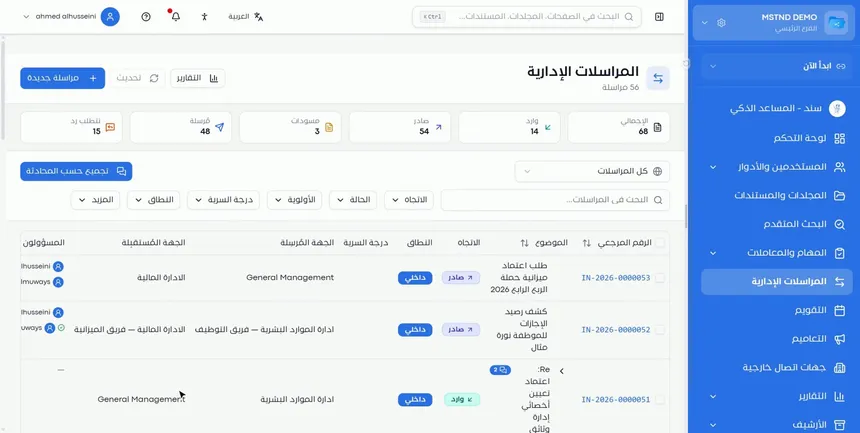
After placing the sticker, click «Send». The system sends the item to the receiving party by the selected methods and fixes the sticker on the attachment.
Step 13: Check that the correspondence appears in the list
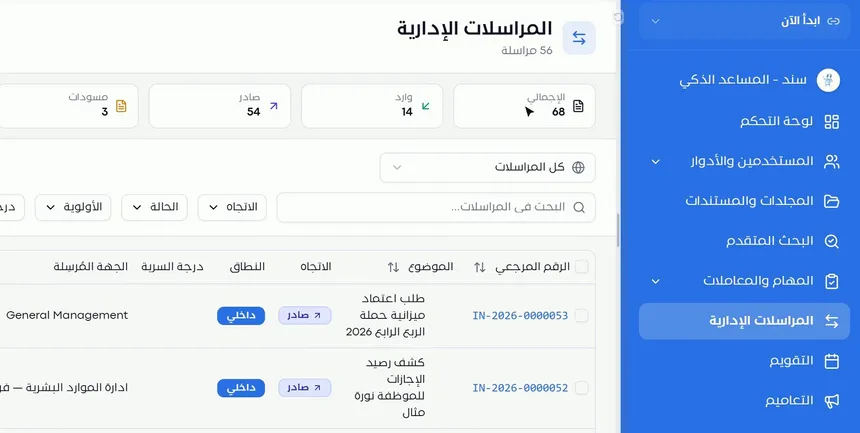
A success message appears, the new item sits at the top of the list with its number, and the counters at the top of the page update. From here you can open it to follow it up in correspondence details.
Options and their effect
| Option or setting | What it does | When to use it |
|---|---|---|
| Outgoing / Incoming | Sets the direction of the item | Outgoing when you send, and incoming when you register what you received |
| Internal / External party | Sets whether the other side is inside or outside the organization | According to the receiving or sending party |
| Receiving party | Sets who receives the item | Always |
| Follow-up owners | Assigns people to follow up the item | For every item that needs follow-up or a reply |
| Reference number and letter date | Record the original letter's data | Especially when registering incoming mail |
| Priority | Sets the degree of urgency | For truly urgent items |
| Confidentiality level | Sets how sensitive the content is and who can see it | For items that contain sensitive information |
| «Requires reply» and the reply due date | Makes the item await a reply by a set date | When you expect an answer from the receiving party |
| Email / Instant notification | Sets the sending channels | Email for documentation, and the notification for speed |
| «Require Nafath verification before replying» | Requires the recipient to verify their identity before replying | For items where the identity of the person replying must be confirmed |
| New file / Browse documents | Adds an attachment from your device or from the system | Depending on where the file is |
| Watermark | Adds a watermark to the attachment | For sensitive attachments |
| Digital sticker | Stamps the attachment with the number, date, barcode and QR code | Before sending outgoing mail |
| «Send» / «Register» / «Save as draft» | Sends, records, or saves to finish later | Depending on how ready the item is and how it will be delivered |
Practical scenarios
Scenario: A communications department in a government entity registers an incoming letter
Situation: A scanned letter has arrived from another government entity, requesting data within a week.
What you do in Mstnd:
- Choose «Incoming» from an external party.
- Upload the letter from «New file» and let AI suggest the registration fields.
- Check the reference number and the letter date against the original letter.
- Assign the follow-up owner in the department concerned, and turn on «Requires reply» with a date before the deadline ends.
- Click «Register».
Result: The letter is recorded with its number and reference, and it has a named follow-up owner and a clear reply date.
Scenario: A contracting company sends a notice to the procurement department
Situation: The projects department needs the procurement department to approve an urgent material supply request.
What you do in Mstnd:
- Choose «Outgoing to an internal party» and select the procurement department.
- Set the priority to high, and write a subject that includes the project name.
- Attach the bill of quantities from «Browse documents».
- Turn on «Requires reply» with a near date, and choose email and instant notification.
- Place the digital sticker, then «Send».
Result: The request arrives immediately, appears to the recipient as an item awaiting a reply, and stays stamped with its number.
Scenario: A hospital prepares a confidential letter before approval
Situation: The medical affairs department is writing a letter that contains sensitive information, and is waiting for the director's review before sending it.
What you do in Mstnd:
- Create the item and set the appropriate confidentiality level.
- Write the text in the editor and add the attachment with a watermark.
- Click «Save as draft».
- After the review, complete the item, place the sticker, then send it.
Result: The letter does not go out before it is complete, and the attachment stays protected with a watermark.
Scenario: A law firm records a letter delivered by hand
Situation: A warning letter was delivered to the other party by hand, and it must be recorded in the correspondence register.
What you do in Mstnd:
- Choose «Outgoing to an external party» and select the party from the contacts.
- Attach a copy of the letter and place the outgoing stamp on it.
- Click «Register» instead of «Send».
Result: The letter is recorded in the system with an outgoing number and date, without a duplicate electronic dispatch.
How it relates to other features
- Administrative correspondence: the main page from which you open «New correspondence»; it shows the item after creation, along with the indicators and filters.
- Correspondence details: after sending, you follow up the item from here and reply to it, and the follow-up owners mark that they have followed up.
- External contacts: the source of the external parties you choose when creating correspondence for an external party.
- Smart watermark: where you set up the watermark settings applied to attachments.
- Stamp: stamping regular documents complements the outgoing sticker; it is useful when you need to stamp the document itself before attaching it to the correspondence.
- Nafath, the Saudi national single sign-on: linked to the «Require Nafath verification before replying» option.
- Report page: the «Correspondence log» report measures what you create here by direction, status, priority and party.
Tips and best practices
- Write a descriptive subject that includes the purpose and the party or project; it is the basis for searching later.
- Assign a follow-up owner to every item that needs a reply, and do not assume that the sender will remember.
- Turn on «Requires reply» with a realistic date, because that date counts toward measuring compliance with reply deadlines.
- Choose attachments from «Browse documents» when the document already exists in the system, to avoid multiple copies.
- Review the AI suggestions before relying on them, especially numbers and dates.
- Place the digital sticker in an empty area that does not cover the text or the signature.
- Use «Save as draft» when you are waiting for a review, instead of sending and then correcting.
- Keep high priority and high confidentiality levels for what truly deserves them.
Warnings and common mistakes
FAQ
How do I create new correspondence in Mstnd?
Open «Administrative correspondence» from the side menu, click «New correspondence» and choose the type, then fill in the party, the follow-up owners, the subject, the text and the attachments, and click «Send».
What is the difference between «Send», «Register» and «Save as draft»?
«Send» delivers the item to the receiving party, «Register» records it in the system with its number without sending it, and «Save as draft» saves it so you can finish it later.
What is the digital sticker on correspondence?
It is a digital stamp placed on the PDF attachment. It contains a barcode, a QR code, the outgoing number and the date, and you set its position by clicking and dragging on the page.
Can I attach a document that is already in the system instead of uploading a file?
Yes. In the «Attachments» section, choose «Browse documents» and select the document you need.
How do I set a reply date for the correspondence?
Turn on «Requires reply» in the form, then set the reply due date. It will appear in the correspondence details as «Final reply due date».
Does AI read the attached letter?
Yes. Once the attachment is added, AI reads the letter and suggests the registration fields, and it is still up to you to review them before saving.
Can correspondence be sent by email and notification together?
Yes. In «Sending method», you can select «Email» and «Instant notification» together, and the system's internal notifications are always sent.
Why don't I need to enter the sending party?
Because the system fills it in automatically with your unit, which ensures that the item is attributed to the right party in the records and reports.
Summary
- «New correspondence» combines writing, numbering, stamping and sending in a single form.
- The type is determined by the direction (outgoing or incoming) and the other side (internal or external).
- Follow-up owners and «Requires reply» make sure that no item is left without follow-up.
- Attachments come from your device or from the system, and AI suggests the registration fields from them.
- The digital sticker stamps the letter with the number, date, barcode and QR code before sending.
- Choose between «Send», «Register» and «Save as draft» depending on how ready the item is and how it will be delivered.
Try it free: Create your organization's account in Mstnd
Was this article helpful?
Related articles
 0:50
Administrative correspondence in Mstnd: outgoing and incoming in one organized register
Administrative correspondence in Mstnd: outgoing and incoming in one register, indicators, filters by direction, status and confidentiality, and reply threads.
 0:53
Correspondence details in Mstnd: track a correspondence until it is closed
Learn the Mstnd correspondence details page: number, status, priority, reply deadline, activity log, follow-up owners, stamped attachments and threaded replies.
 0:56
External contacts in Mstnd: your clients and suppliers in one directory
Learn Mstnd external contacts: a client and supplier directory with search and filters, and how to add a new contact with its basic, contact and business data.
 1:28
The smart watermark in Mstnd: protect your documents with your brand identity
Design a smart watermark with your logo, user details and date, set when and where Mstnd adds it to documents and correspondence, plus a confidentiality mark.
 0:25
Electronic stamp in Mstnd: stamp your documents with your organization's stamps
Learn electronic stamps in Mstnd: choose an approved organization stamp, place it on the page at the right size and apply it, authenticated via Nafath.
 0:57
Nafath in Mstnd: sign-in and signing with a verified identity
Set up Nafath in Mstnd: sign-in verification, tracking the Nafath request balance, registering member ID numbers and choosing which actions require Nafath.