

The smart watermark in Mstnd: protect your documents with your brand identity
In this article
The «Smart watermark» in Mstnd is a feature that lets you design a watermark carrying your organization's identity, which is added automatically to your documents and correspondence. You choose the logo source, the opacity, the layout, the text color and the watermark's components, such as the organization name, the user name and the date, then you set when it is applied, where, and to which file types. You can also add a confidentiality level mark that shows a word such as «Confidential» on every page of classified documents, so every document carries a trace of its source and its sensitivity level.
Quick overview
| Item | Details |
|---|---|
| Module | Settings |
| Where it is in the interface | Side menu → «Settings» → «Smart watermark» |
| Direct link | https://app.mstnd.sa/settings/dynamic-watermark |
| Goal | Add a unified watermark with the organization's identity to documents and correspondence automatically, to limit leaks and make the source clear |
| Who it is for | The system administrator, the information security officer, the administrative communications officer and the corporate identity department |
| Video length | About a minute and a half |
| What you will learn | Designing and previewing the watermark, choosing and ordering its components, setting when and where it is applied, and turning on the confidentiality level watermark |
Watch the video
In about a minute and a half, the video covers every section of the page in order: the design and the preview, then «When to apply», then «Where to apply» and the file types, then the confidentiality level mark, and it ends with saving the changes.
Why this feature?
When a document leaves the organization, printed or as a sent file, it is often hard to tell where it came from, who took it out and when. A document that carries no sign of its sensitivity may be passed around as if it were ordinary. A traditional watermark solves part of the problem, but it is added by hand, so it is sometimes forgotten, and it differs from one employee to another.
The smart watermark turns this into a policy rather than a matter of personal judgment. You design it once and set the actions and folders it applies to, and the system adds it automatically. Because its components include data such as the user name and the date, every document becomes stamped with its context.
| Without the smart watermark | With the smart watermark |
|---|---|
| The watermark is added by hand and is sometimes forgotten | It is added automatically on the actions you set |
| The watermark's look differs between employees | One design with the organization's identity on every document |
| It is hard to tell the source of a copy in circulation | The watermark carries the organization name, the user name and the date |
| The confidentiality level does not appear on the document's pages | The confidentiality level mark shows a word such as «Confidential» on every page |
Value for the organization: a deterrent against leaks, a unified visual identity on outgoing documents, and a protection policy that is applied without relying on individuals to remember it. Value for the individual: employees do not need to add the watermark themselves every time, and anyone who reads the document knows its sensitivity level at once.
Where to find it
- From the side menu, open «Settings».
- Choose «Smart watermark».
- The page opens with the design section in the middle, the «Preview» on the left and the «Save changes» button at the bottom.
Direct link: https://app.mstnd.sa/settings/dynamic-watermark
Concepts and terms
| Term | Meaning in Mstnd |
|---|---|
| Smart watermark | A watermark with a design set by the organization, which the system adds automatically to documents and correspondence according to the settings |
| Preview | An approximate look of the watermark that updates immediately with every change to the settings |
| Opacity | How visible the watermark is over the page content |
| Layout | How the watermark is spread over the page: «Tiled», repeated across the page, or «Single, centered» |
| Components | The details that appear in the watermark, such as the logo, the organization name, the date and the user name, and their order |
| When to apply | The actions on which the system adds the watermark automatically |
| Where to apply | The scope of folders the watermark covers: all folders or specific folders |
| Confidentiality level watermark | An option that makes classified documents show the word for their level, such as «Confidential», as a watermark on every page |
Step by step
Step 1: Open the «Smart watermark» page
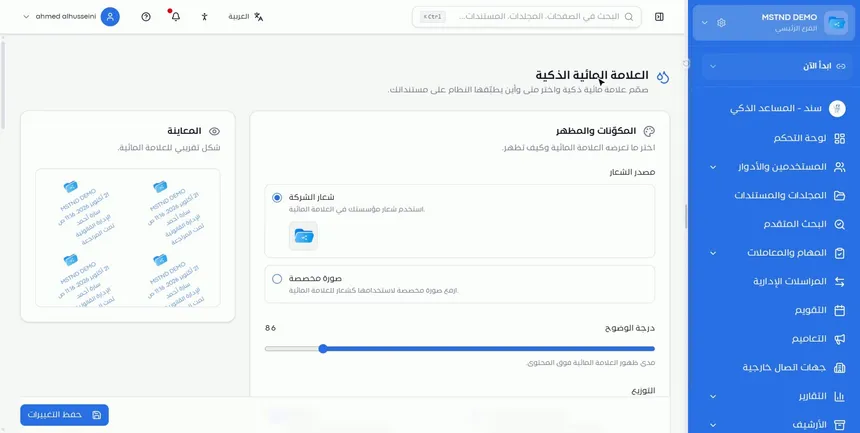
From this page you design a watermark that is added automatically to your documents and correspondence. Everything you set here applies at the organization level, so it is best handled by the system administrator or the information security officer, in coordination with the corporate identity department.
Step 2: Watch the live preview
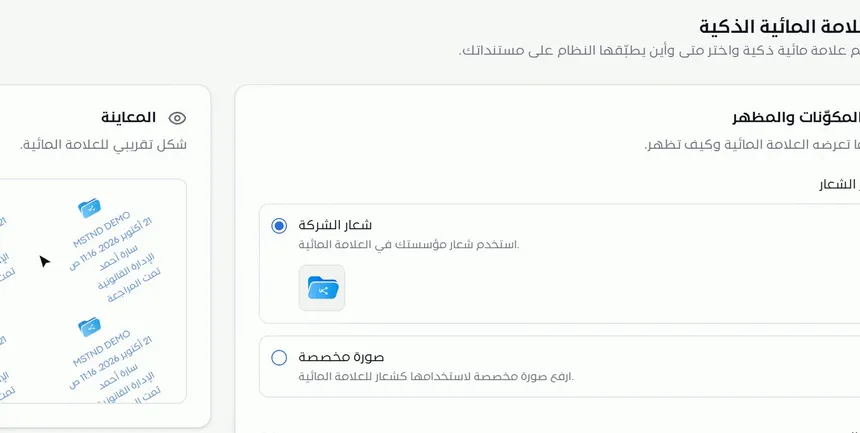
On the left of the page is the «Preview» panel, with the subtitle «Approximate look of the watermark». This panel updates with every change you make, so you see the effect of the logo, opacity, layout and components immediately, before saving. Use it to make sure the watermark is visible enough to deter, and light enough not to get in the way of reading the content.
Step 3: Choose the logo source
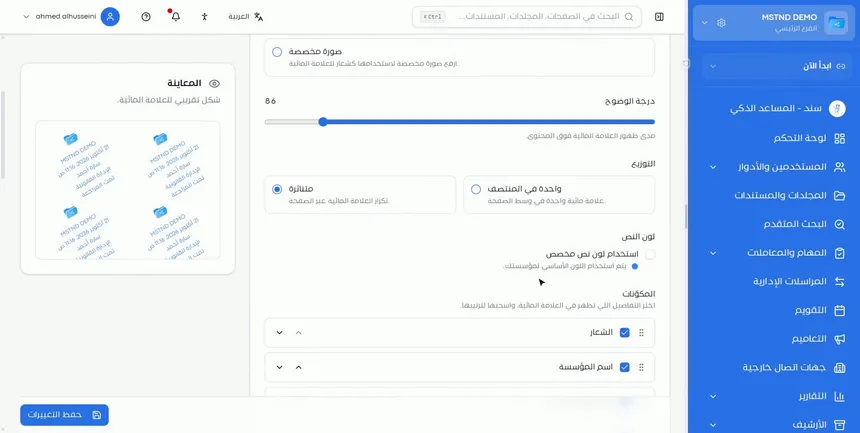
The first setting is the logo source, and you have two options:
- Company logo: uses your organization's logo as defined in the system.
- «Custom image»: you upload a custom image to use as the watermark's logo.
Choose the company logo in the usual case, to keep a unified identity. Choose a custom image if you have a version of the logo designed specifically for watermarks, such as a single-color version.
Step 4: Set the «Opacity»
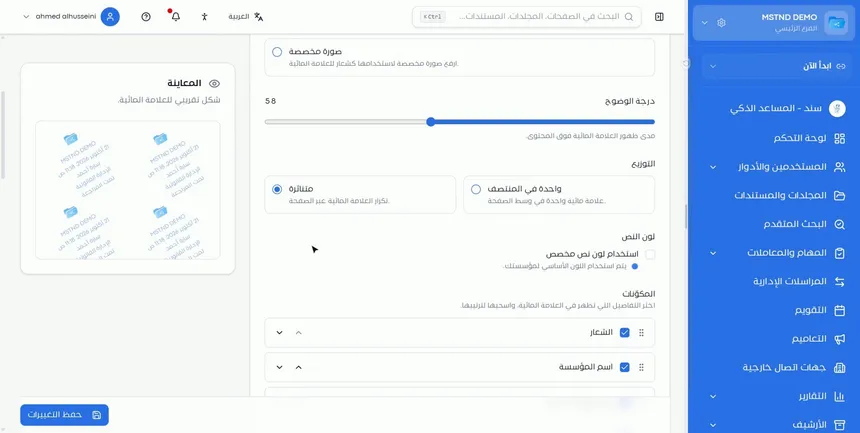
«Opacity» is a slider that controls how visible the watermark is over the content. Move it and watch the preview. A high value makes the watermark stand out, which suits documents whose source you want to be clear beyond any doubt. A low value makes it light, so it does not distract the reader.
Step 5: Set the «Layout»
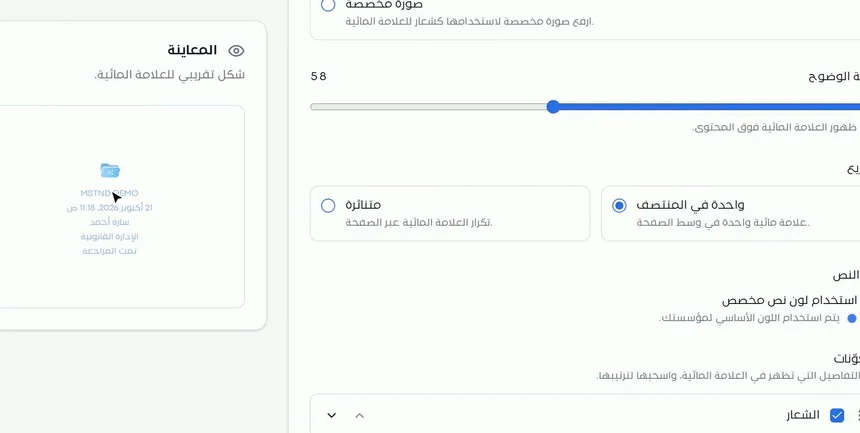
«Layout» has two options:
- «Tiled»: repeats the watermark across the page.
- «Single, centered»: one watermark in the middle of the page.
You will notice that the preview changes as soon as you choose. A tiled layout is harder to remove or crop because the watermark covers the whole page, while a single watermark in the center is visually calmer.
Step 6: Choose the «Text color»
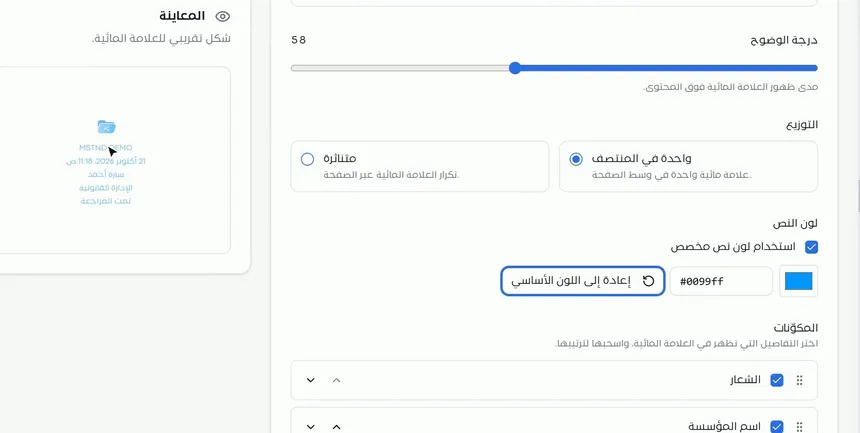
By default, your organization's primary color is used. If you want another color, turn on «Use a custom text color» and enter the color by its code. Choose a color that keeps your identity and stays readable over the content of the documents you usually handle.
Step 7: Choose the «Components» and order them
In «Components» you choose the details that appear in the watermark, such as the logo, the organization name, the date and the user name. Each component has a checkbox to show or hide it and arrows to move it up or down, and you can also drag it to reorder it.
The value of the smart watermark comes from these components. When the watermark includes the user name and the date, every copy carries the fingerprint of who handled it and when, and that is what makes it a real deterrent rather than mere decoration.
Step 8: Set «When to apply» for correspondence
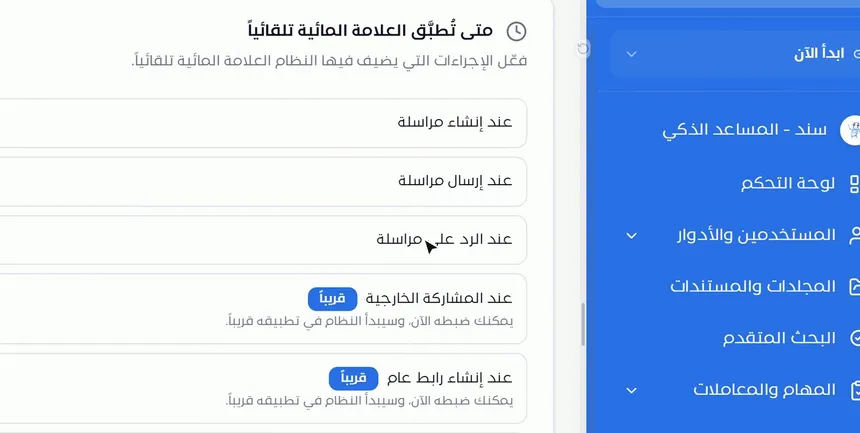
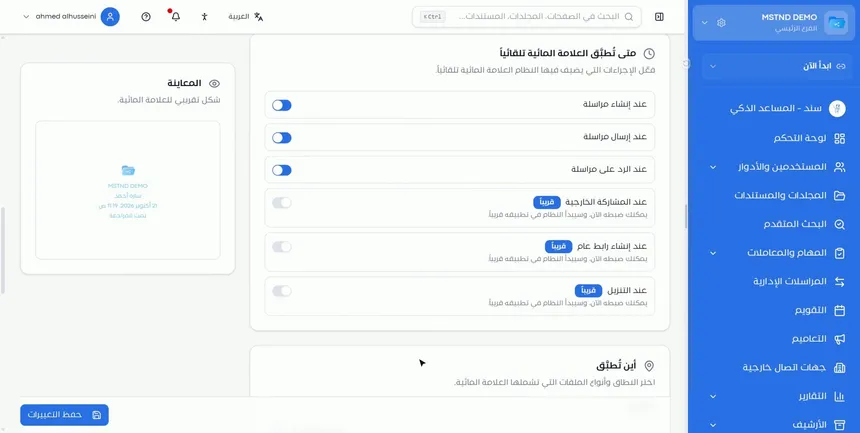
The «When to apply the watermark automatically» section asks you to turn on the actions on which the system adds the watermark. The actions available for correspondence are:
- «When creating correspondence».
- «When sending correspondence».
- «When replying to correspondence».
Turn on the actions that suit your policy. For example, turning on «When sending correspondence» ensures that every attachment that leaves the organization carries the watermark.
Step 9: Set up the upcoming actions in advance
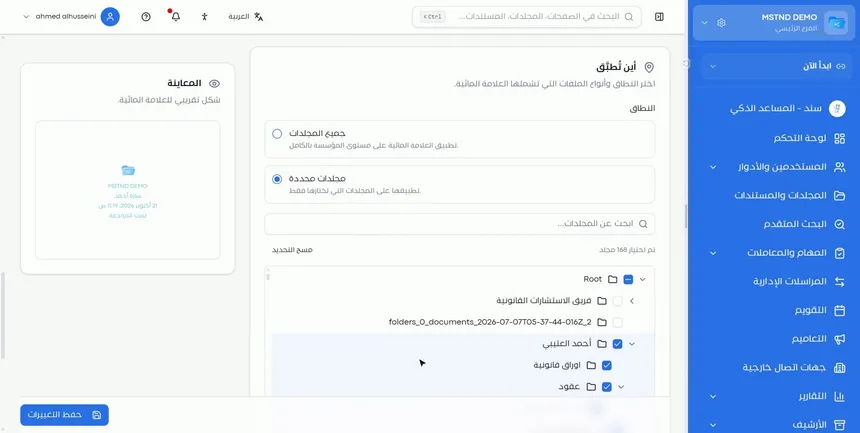
Below the correspondence actions are three more actions with a «Coming soon» badge:
- «When sharing externally».
- «When creating a public link».
- «When downloading».
The interface explains that you can set them now and that the system will start applying them soon. Setting them now means your policy will be ready as soon as these actions are enabled.
Step 10: Set «Where to apply»
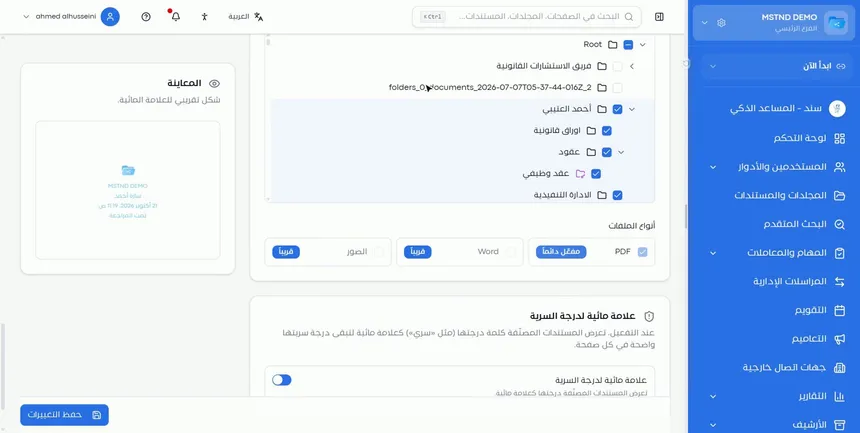
The «Where to apply» section sets the scope: all folders, or specific folders that you pick from the folder tree with checkboxes. The tree shows the folders and their subfolders, so you define precisely what falls within the scope.
Choose all folders if your policy is that every document carries the watermark. Choose specific folders if you want to limit it to sensitive folders, such as contracts and legal papers.
Step 11: Review the «File types»
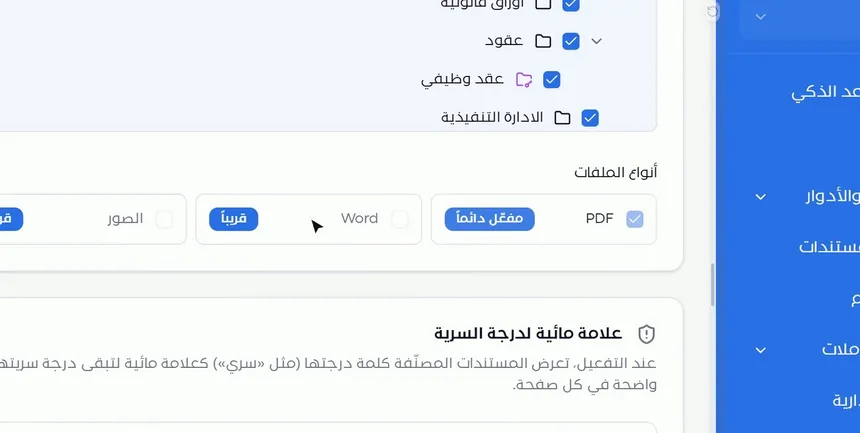
Under «File types»:
- PDF: «Always on».
- Word: «Coming soon».
- Images: «Coming soon».
This means the watermark is currently applied to PDF files. So if you want your attachments to carry the watermark, make sure they are in PDF format.
Step 12: Turn on the «Confidentiality level watermark»
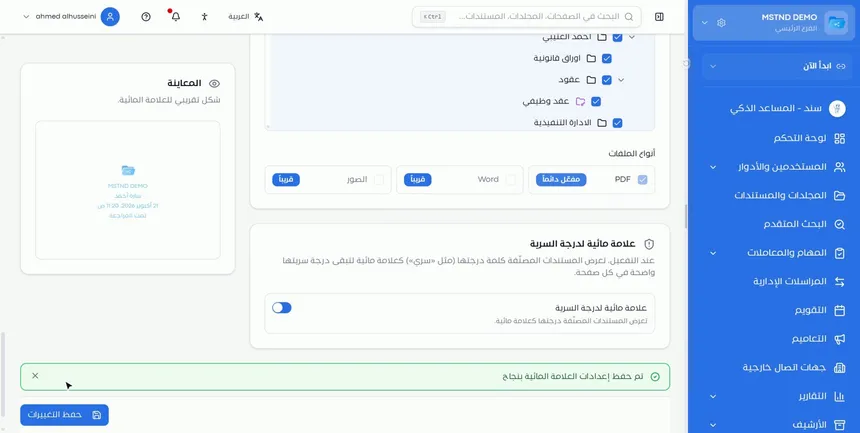
The «Confidentiality level watermark» section is a separate option. When you turn it on, classified documents show the word for their level, such as «Confidential», as a watermark, so their confidentiality level stays clear on every page.
This option completes the classification. The confidentiality level recorded in the document's data is not visible to someone reading a printed copy, but the mark on the page is visible to every eye.
Step 13: Click «Save changes»
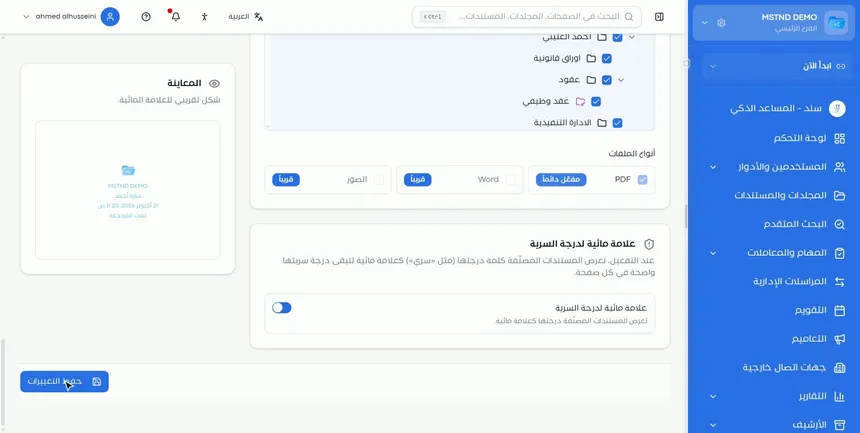
When you finish, click «Save changes» at the bottom of the page. A message confirms that the watermark settings were saved successfully, and from then on the system applies the watermark automatically to correspondence according to your settings.
Options and their effect
| Option or setting | What it does | When to use it |
|---|---|---|
| Company logo | Uses the organization's logo in the watermark | The usual case, to keep a unified identity |
| «Custom image» | Uses an image you upload as the watermark's logo | When you have a version of the logo made for watermarks |
| «Opacity» | Controls how visible the watermark is over the content | Raise it for a clear deterrent, lower it for comfortable reading |
| «Tiled» | Repeats the watermark across the page | For sensitive documents, where the watermark is hard to crop out |
| «Single, centered» | One watermark in the middle of the page | For documents that need a calm look |
| «Use a custom text color» | Changes the watermark's text color to a color you set by its code | When the primary color does not suit the documents' content |
| «Components» | Sets what appears in the watermark and in what order | To add the organization name, the user name, the date and more |
| «When creating correspondence» / «When sending correspondence» / «When replying to correspondence» | The watermark is added automatically on the action | According to the organization's policy for protecting correspondence |
| «When sharing externally» / «When creating a public link» / «When downloading» | Can be set now, and they start being applied soon | To prepare the policy in advance |
| «Where to apply» | All folders or specific folders from the tree | To apply the watermark everywhere or limit it to sensitive folders |
| «File types» | PDF always on; Word and images coming soon | To know which formats the watermark is currently applied to |
| «Confidentiality level watermark» | Shows the level's word on every page of classified documents | To show the confidentiality level to anyone who reads the document |
| «Save changes» | Confirms all the settings | After finishing any change |
Practical scenarios
Scenario: A government entity records the source of its outgoing letters
Situation: A government entity wants every outgoing letter to carry its identity and the details of the person who sent it, to reduce the circulation of copies of unknown origin.
What you do in Mstnd:
- Choose the company logo, a medium opacity and the «Tiled» layout.
- In «Components», turn on the organization name, the user name and the date.
- Turn on «When sending correspondence» and «When replying to correspondence».
- Click «Save changes».
Result: Every PDF attachment that leaves with outgoing correspondence carries the entity's name, the person who sent it and the date.
Scenario: A law firm protects its case files
Situation: A law firm wants the confidentiality level to appear on the pages of case documents, and wants the watermark limited to its legal folders.
What you do in Mstnd:
- In «Where to apply», choose specific folders, and select the contracts and legal papers folders from the tree.
- Turn on «Confidentiality level watermark».
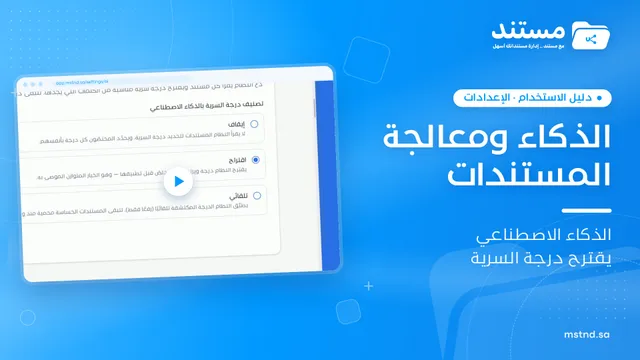
- Set the confidentiality classification to «Suggest» in AI and document processing.
- Save the changes.
Result: Classified documents in the case folders show the word for their level on every page.
Scenario: A contracting company keeps one identity with its suppliers
Situation: A contracting company sends a lot of correspondence and attachments to subcontractors and suppliers, and wants its identity to appear in a consistent way.
What you do in Mstnd:
- Choose the company logo and the organization's primary text color.
- Choose «Single, centered» and a low opacity to keep drawings and tables clear.
- Turn on «When creating correspondence» and «When sending correspondence».
- Save the changes.
Result: Correspondence attachments carry the company's identity without getting in the way of reading the technical details.
Scenario: An HR department protects employment contracts
Situation: An HR department has a folder for employment contracts, and wants every contract it sends to carry a watermark that keeps it from circulating out of context.
What you do in Mstnd:
- In «Where to apply», select the contracts folder and its subfolders.
- Choose «Tiled» and turn on the user name and the date in the components.
- Turn on «Confidentiality level watermark».
- Save the changes.
Result: Employment contracts carry a trace of who handled them and of their confidentiality level.
How it relates to other features
- New correspondence: when you create and send correspondence, the watermark is added automatically according to your settings, and you can also add it to the attachment from the correspondence screen.
- Correspondence details: the watermark appears on the attachment file next to the digital label when you preview it, and when you reply, the «When replying to correspondence» settings apply.
- AI and document processing: AI confidentiality classification sets the document's level, and the confidentiality level watermark shows it on its pages.
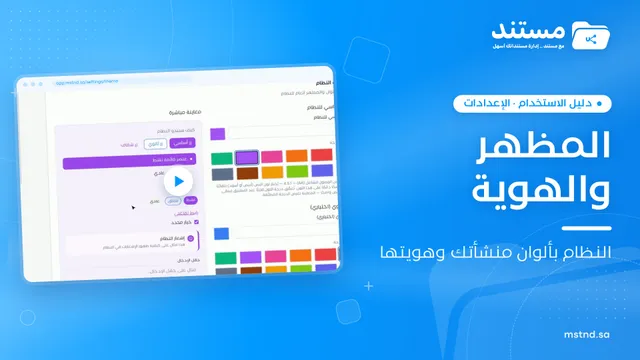
- Appearance and branding: the source of the organization's logo and primary color, which the watermark uses by default.
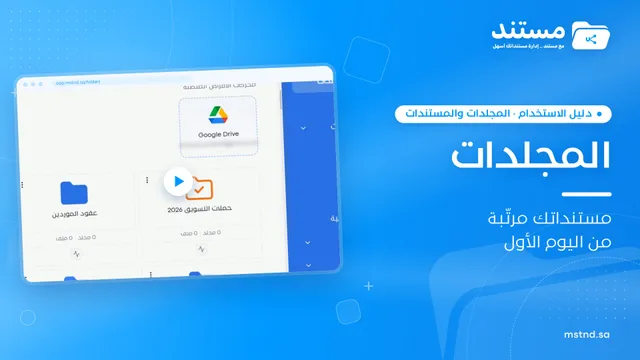
- Folders: the folder tree is where you choose the «Where to apply» scope.
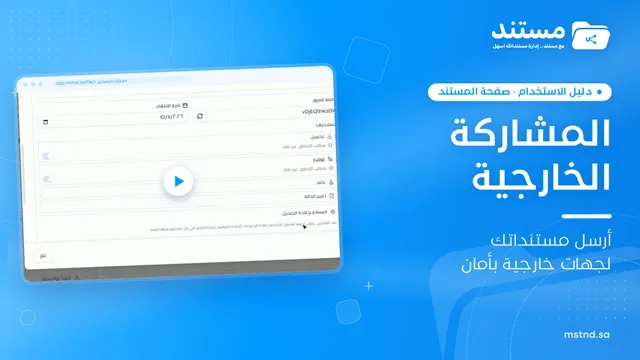
- External sharing: the «When sharing externally» action can be set now; until it starts being applied, a share stays protected by its password, expiry date and permissions.
- Internal sharing and public link: the «When creating a public link» action connects to this feature once it starts being applied.
Tips and best practices
- Use the live preview with every change, and do not save before you are sure the content under the watermark is clear.
- Include the user name and the date in the components: they are what make the watermark a tracking tool rather than just a logo.
- Choose «Tiled» for sensitive documents, and «Single, centered» for documents whose appearance matters.
- Turn on at least «When sending correspondence», because that is the moment the document leaves the organization.
- Convert important attachments to PDF, because it is currently the type that is always on.
- Set the actions with the «Coming soon» badge now, so your policy is ready as soon as they start being applied.
- Turn on the «Confidentiality level watermark» together with AI confidentiality classification so the two work together.
Warnings and common mistakes
FAQ
What is the smart watermark in Mstnd?
It is a watermark that your organization designs once, with its logo and components such as the organization name, the user name and the date. The system adds it automatically to documents and correspondence according to the actions and folders you set.
How do I add a watermark to correspondence automatically?
From «Settings» → «Smart watermark», turn on the actions you need in the «When to apply» section, such as «When sending correspondence», then click «Save changes».
Can I add the user name and the date to the watermark?
Yes. In «Components» you choose the details that appear in the watermark, such as the logo, the organization name, the date and the user name, and you order them with the arrows or by dragging.
What is the difference between the «Tiled» and «Single, centered» layouts?
«Tiled» repeats the watermark across the whole page, while «Single, centered» places one watermark in the middle of the page. The preview shows the difference immediately.
Does the watermark work on Word files and images?
For now, PDF is always on, while Word and images carry a «Coming soon» badge in the «File types» section.
Can I apply the watermark to certain folders only?
Yes. In «Where to apply» you choose between all folders and specific folders that you select from the folder tree.
What is the confidentiality level watermark?
It is an option that, when turned on, makes classified documents show the word for their level, such as «Confidential», as a watermark on every page, so their confidentiality level stays clear.
Is the watermark applied on external sharing and downloading?
These actions carry a «Coming soon» badge. You can set them now, and the system will start applying them later.
Summary
- The smart watermark is designed once and added automatically according to policy, not according to what employees remember.
- You control the logo, opacity, layout, color and components, and watch the result in a live preview.
- «When to apply» currently covers creating, sending and replying to correspondence, with external sharing, public links and downloading coming soon.
- «Where to apply» sets the folders, and under «File types» the watermark currently applies to PDF.
- The «Confidentiality level watermark» shows the document's sensitivity on every page.
Try it free: Create your organization's account in Mstnd
Was this article helpful?
Related articles
 1:34
Creating new correspondence in Mstnd: from writing to stamping and sending
Create outgoing or incoming mail in Mstnd: recipient, follow-up owners, priority, confidentiality, reply date, attachments, digital sticker, send or register.
 0:53
Correspondence details in Mstnd: track a correspondence until it is closed
Learn the Mstnd correspondence details page: number, status, priority, reply deadline, activity log, follow-up owners, stamped attachments and threaded replies.
 0:31
AI and document processing: automatic analysis and confidentiality classification
Set the smart document analysis mode in Mstnd (for all, for specific folders or manual) and AI confidentiality classification: off, suggest or automatic.
 0:29
Appearance and branding in Mstnd: the system in your organization's colors and logo
Learn the Mstnd appearance and branding settings: primary and secondary colors via code or suggestions, live preview, automatic text contrast and logo upload.
 1:26
Folders in Mstnd: organize your organization's documents from day one
Learn the Mstnd Folders page: Personal space, structure folders, Shared with me, new folders with a confidentiality level, color and icon, views and actions.
 0:49
External sharing: send a document to an external party securely
Learn external sharing in Mstnd: send a document to an external party by private link via email or WhatsApp, with password, expiry date, permissions and Nafath.