

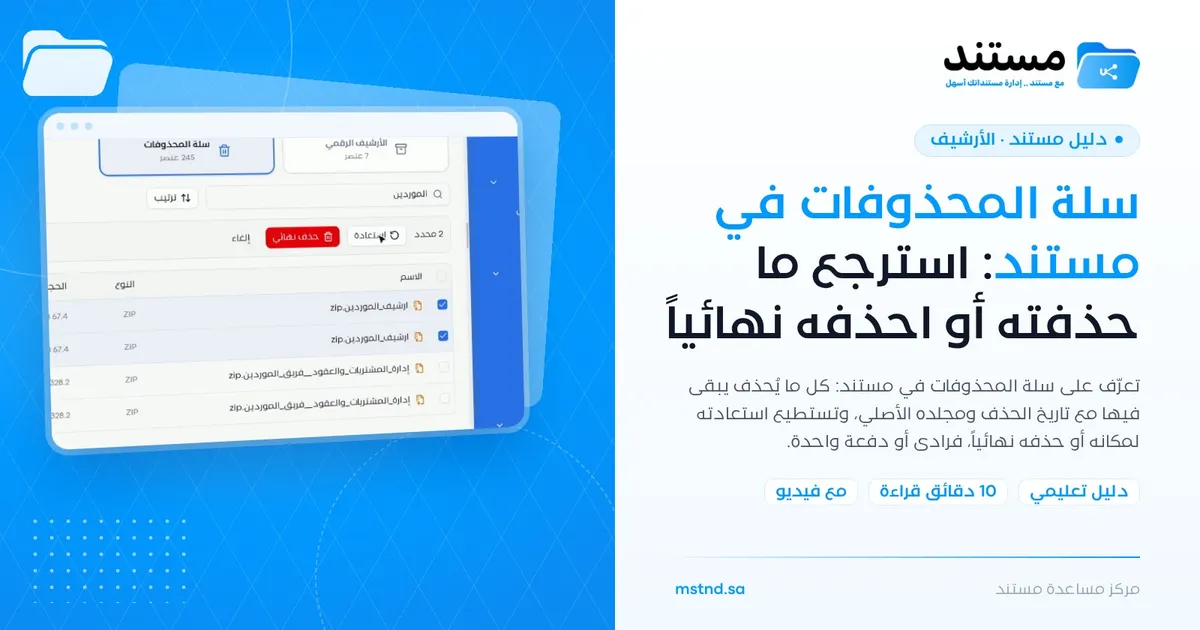
The trash in Mstnd: restore what you deleted or delete it permanently
In this article
The trash in Mstnd is the stop that every deleted document or folder passes through before it is permanently deleted. It shows every deleted item with its deletion date and original folder, and lets you restore it to its place with one click or delete it permanently, for one item or for several items at once. It is the safety net that protects your organization from accidental deletion.
Quick overview
| Item | Details |
|---|---|
| Module | Archive |
| Where it is in the interface | Side menu → «Archive» → the «Trash» card |
| Direct link | https://app.mstnd.sa/archive?tab=trash |
| Goal | Keep deleted items temporarily so that they can be restored, and control their permanent deletion |
| Who it is for | Every user who deletes files, and records officers who manage cleaning up the space |
| Video length | About 28 seconds |
| What you will learn | Reading the trash table, searching for an item, restoring to the original place, permanent deletion and bulk actions |
Watch the video
In about 28 seconds, the video shows the trash page, searching in it, the «Restore» and «Delete permanently» options, and then selecting more than one item and applying the action to them together.
Why this feature?
Accidental deletion is one of the most common mistakes when handling files. An employee cleaning up their folder deletes a contract that is still in force, or deletes a folder thinking it is a duplicate. In systems that delete immediately, this mistake means losing the document or a long trip through the backups.
In Mstnd, a deleted item does not disappear right away. It first moves to the trash, together with what you need to make a decision: when it was deleted, from which folder, and who created it. Then you decide: either it goes back to its place, or it is deleted permanently.
| Before the trash | With the trash |
|---|---|
| An accidental deletion means losing the document | A deleted item stays available to restore |
| You do not know where the deleted file was | The «Folder» column keeps the original folder |
| Retrieving a file requires technical intervention | «Restore» returns it to its place with one click |
| Cleaning up the space is done file by file | Multiple selection applies an action to several items at once |
Its value for the organization: protecting documentary assets from human error. Its value for the individual: the confidence to clean up without worrying about losing anything important.
Where to find it
- From the side menu, click «Archive».
- At the top of the «Archive» page, click the «Trash» card; the number of deleted items appears under it.
Direct link: https://app.mstnd.sa/archive?tab=trash
Concepts and terms
| Term | Meaning in Mstnd |
|---|---|
| Trash | The place every deleted item moves to before its permanent deletion |
| Date deleted | The day the item was deleted |
| Folder (original) | The folder the item was in before deletion; it returns there when restored |
| Created by | The user who originally created the item |
| Restore | Returning a deleted item to its original place |
| Delete permanently | Removing the item from the system with no possibility of restoring it |
| Multiple selection | Choosing several items with checkboxes to apply one action to them |
Step by step
Step 1: Open the «Trash» and read each item's details
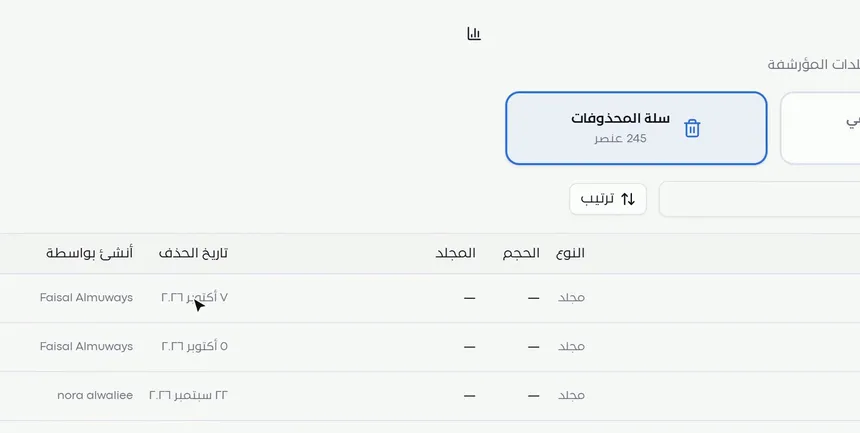
Everything deleted in Mstnd arrives here before permanent deletion. For each item, the table shows:
- Name and Type: folder, or the file type, such as ZIP or PDF.
- Size: for files.
- Folder: its original place before deletion.
- Date deleted: when it was deleted.
- Created by: who originally created it.
The «Folder» column is especially important. It tells you where the item will return if you restore it, and it helps you tell apart two files with the same name that were deleted from two different folders.
Step 2: Search for the deleted item
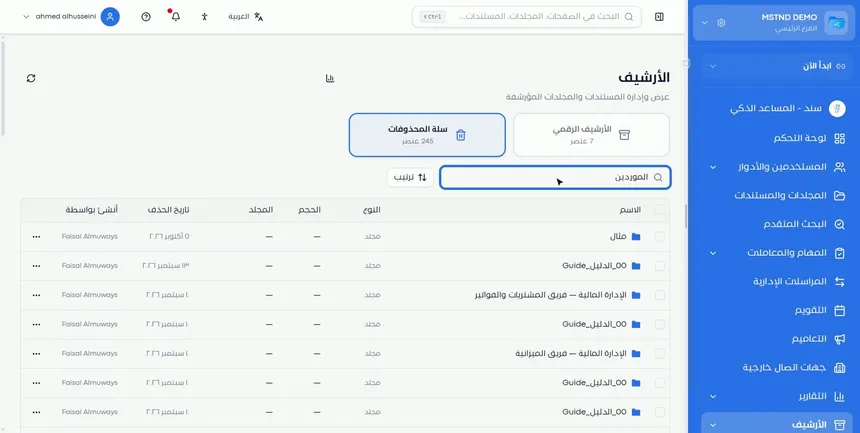
The trash may hold hundreds of items, especially in large organizations. Type part of the item's name in the search field to reach it directly. You can also use the «Sort» button to change the display order, such as starting with the most recently deleted when you are looking for a file you have just deleted.
Step 3: Restore the item or delete it permanently from «⋯»
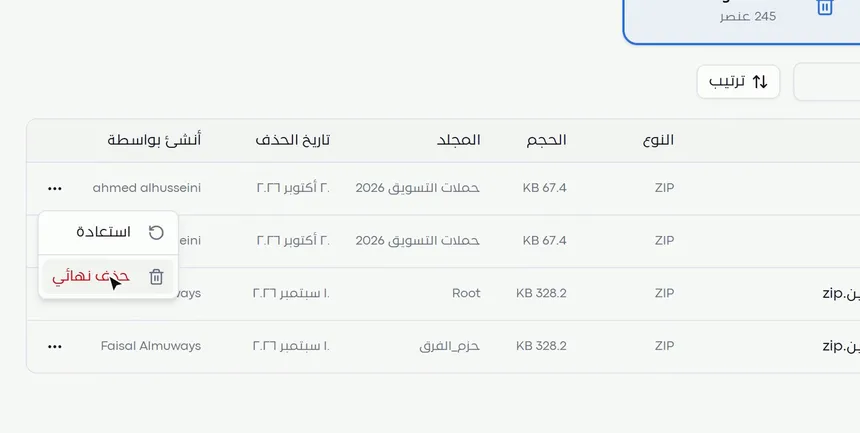
Next to each item is the three-dot menu «⋯», with two options:
- «Restore»: returns the item to its original place, as recorded in the «Folder» column, so it is available again as it was.
- «Delete permanently»: removes the item from the system for good.
Choose «Restore» whenever you are in doubt. Keep «Delete permanently» for items you are completely sure are no longer needed, such as duplicate copies or temporary compressed files after their content has been extracted.
Step 4: Select several items and apply the action at once
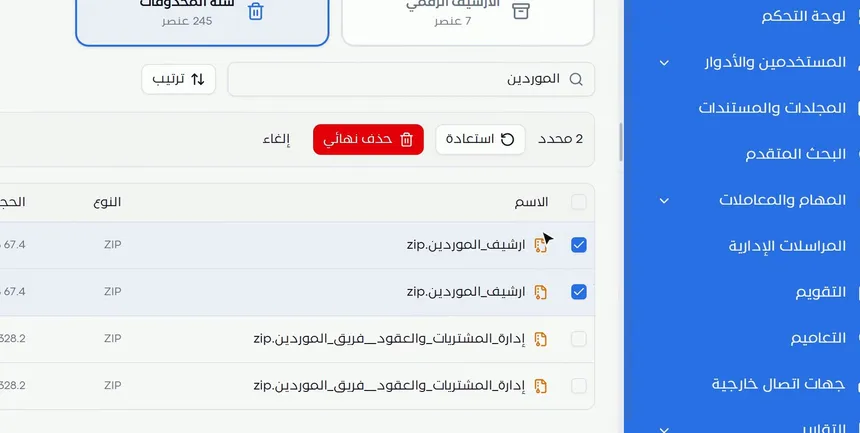
When you need to handle several items, there is no need to repeat the action on each one. Tick the checkbox next to each item, and an action bar appears above the table showing the number of selected items, such as «2 selected», along with:
- «Restore»: returns all the selected items to their original places.
- «Delete permanently»: permanently deletes all the selected items.
- «Cancel»: clears the selection without taking any action.
This is especially useful after a search. For example: search for a shared word, then select only the results you want, and apply the action to them together.
Options and their effect
| Option or setting | What it does | When to use it |
|---|---|---|
| Search field | Filters the deleted items by name | To reach a specific item quickly |
| «Sort» | Changes the display order | To show the most recent deletions first, or as you need |
| «⋯» → «Restore» | Returns the item to its original folder | After an accidental deletion, or when you need the item again |
| «⋯» → «Delete permanently» | Removes the item from the system for good | For items that are definitely no longer needed |
| Checkboxes | Select several items together | When handling a group of items |
| Action bar → «Restore» | Restores everything selected at once | To recover a group deleted by mistake |
| Action bar → «Delete permanently» | Permanently deletes everything selected | To clear duplicates and temporary files from the trash |
| Action bar → «Cancel» | Clears the selection | When you change your mind before applying the action |
Practical scenarios
Scenario: A law firm recovers a memorandum deleted by mistake
Situation: A trainee lawyer cleaned up a case folder and deleted a defense memorandum, thinking it was an old copy, and the hearing is in two days.
What you do in Mstnd:
- Open «Archive» → «Trash».
- Search by the memorandum's name or the case number.
- Use the «Folder» column to confirm that it comes from the right case folder.
- Choose «⋯» → «Restore».
Result: The memorandum is back in the case folder within a minute, with no need to rewrite it.
Scenario: A trading company clears out duplicate compressed files
Situation: The procurement team imported supplier ZIP files more than once, then deleted the compressed copies after extracting them, and the copies piled up in the trash.
What you do in Mstnd:
- Search the trash for the word «suppliers».
- Select the duplicate files with the checkboxes.
- Check the number in the action bar, then click «Delete permanently».
Result: A cleaner trash within seconds, without touching other items that may need to be restored.
Scenario: A school restores a whole folder for a school term
Situation: A school administrator deleted the results folder of a previous term, and then the education department asked for a copy of it.
What you do in Mstnd:
- Sort the trash to show the items by date deleted.
- Identify the item of the «Folder» type and its original folder.
- Choose «Restore».
Result: The folder returns to its original place, and what was requested is sent to the education department the same day.
Scenario: A department in a government entity reviews the trash before destruction
Situation: The records officer reviews the trash periodically before approving destruction, to make sure that no official document was deleted by mistake.
What you do in Mstnd:
- Review the «Folder» and «Created by» columns for each group of items.
- Select the official items that must not be deleted, and click «Restore».
- Inform their owners, then move what is needed to the digital archive instead of deleting it.
Result: No official document is destroyed without review, and the trash stays reserved for what can truly be disposed of.
How it relates to other features
- Digital archive: the neighboring card on the Archive page. The archive is for the items you keep, and the trash is for the items on their way to deletion; items can be moved from the archive to the trash.
- Move, archive and rename: before you delete a finished document, consider archiving it instead so that it remains a reference.
- Auto-archiving and retention: the retention policy can move items automatically to the trash and then to final destruction, with the option to require approval before deletion.
- Folders: the place an item returns to after a restore, and one of the places where items are deleted.
- Folder content: you delete files from inside the folder, and you restore them from the trash to the same folder.
- Activity: the log of users' actions, useful for finding out who deleted a particular item and when.
Tips and best practices
- Make «Restore» your default choice when in doubt, since permanent deletion cannot be reversed.
- Check the «Folder» column before any action, especially when item names are similar.
- Use search and then multiple selection to handle a consistent group of items accurately.
- Keep what you delete separate from what you archive: a document with reference value belongs in the archive, not in the trash.
- Set aside regular time to review the trash and clear out duplicates and temporary files.
- Decide who in your organization holds the permission to delete permanently, and keep it to a small group.
- Enable approval before deletion in auto-archiving if your organization follows an official destruction policy.
Warnings and common mistakes
FAQ
How do I restore a file I deleted in Mstnd?
Open «Archive» → «Trash», search for the file, then click «⋯» next to it and choose «Restore». The file returns to its original folder.
Is a file permanently deleted as soon as I delete it?
No. Any deleted item first moves to the trash, and it is removed from the system only by permanent deletion.
Where does a file go after it is restored from the trash?
It returns to its original place, which is the folder shown in the «Folder» column of the trash table.
Can I restore several files at once?
Yes. Select the items with the checkboxes, then click «Restore» in the action bar that appears above the table.
What is the difference between the trash and the digital archive?
The digital archive keeps the items you want to retain outside the workspace, while the trash holds deleted items on their way to permanent deletion.
Can permanent deletion be undone?
No. Permanent deletion removes the item from the system with no possibility of restoring it, so review the items carefully before you go ahead.
How do I know which folder a file was deleted from?
From the «Folder» column in the trash table; the deletion date and the item's creator appear next to it.
Summary
- Everything deleted in Mstnd passes through the trash before it is permanently deleted.
- The table keeps the deletion date, the original folder and who created the item.
- «Restore» returns the item to its original place, and «Delete permanently» removes it for good.
- Multiple selection lets you restore or delete a group of items at once.
- Use the digital archive for what you want to keep, and the trash for what can be disposed of.
Try it free: Create your organization's account in Mstnd
Was this article helpful?
Related articles
 0:35
The digital archive in Mstnd: keep finished work and restore it whenever you need it
Learn the digital archive in Mstnd: archived documents and folders, when and by whom they were archived, search, sort, restore with a reason or move to trash.
 0:42
Moving, archiving and renaming: organize your documents in seconds
Learn to rename a document in Mstnd, move it between folders and archive it without deleting it from the file's three-dot menu, and restore it from the Archive.
 1:28
Auto-archiving and retention: the document lifecycle in Mstnd
Set a retention policy in Mstnd: archive, then trash, then permanent destruction, with advance alerts, folder rules, legal holds and approval before deletion.
 1:26
Folders in Mstnd: organize your organization's documents from day one
Learn the Mstnd Folders page: Personal space, structure folders, Shared with me, new folders with a confidentiality level, color and icon, views and actions.
 1:05
Folder content in Mstnd: find your file and manage it in seconds
The Mstnd folder content screen explained: file cards and status changes, multi-select and bulk actions, the folder side panel, and AI chat about the files.
 0:23
The activity log in Mstnd: who did what, and when
The Mstnd activity log shows every operation in the system with who did it and when; search by keyword or user name and pick a date range to review events.