

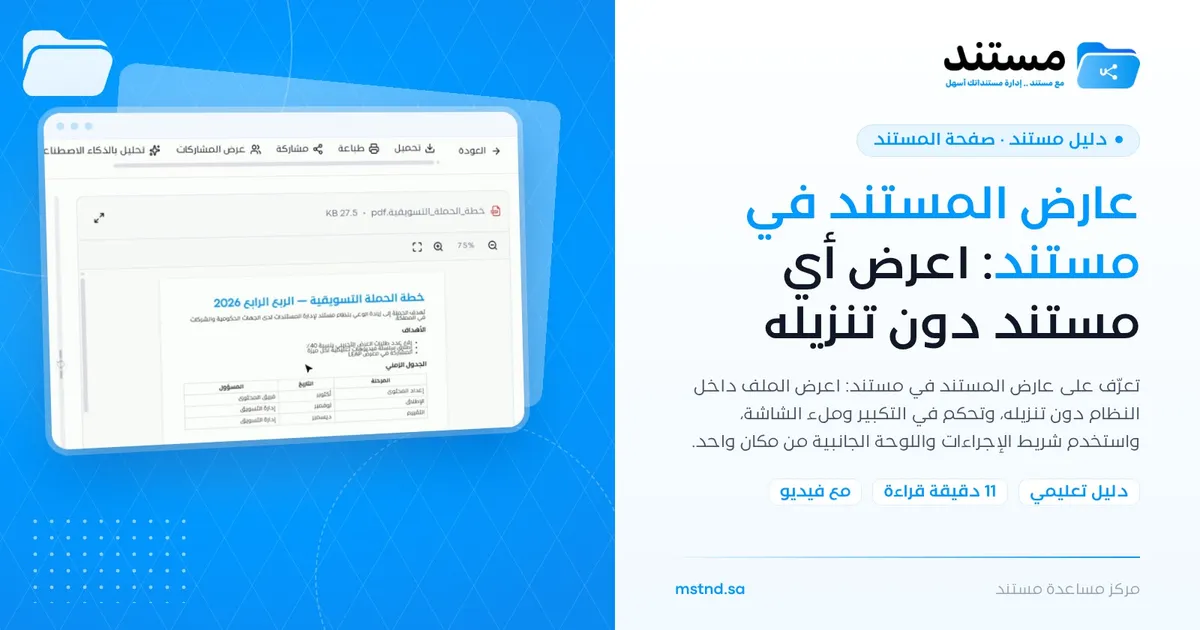
The document viewer in Mstnd: view any document without downloading it
In this article
The document viewer is the heart of the «Document page» in Mstnd: it shows the file in the middle of the screen without you having to download it, with a panel of the document's details beside it and a bar above it holding every action you can take on it. It serves every user who reads, reviews or works on documents, and it brings reading and control together in one place, so you do not move between screens to print, share, sign or start a workflow.
Quick overview
| Item | Details |
|---|---|
| Module | Document page |
| Where it is in the interface | Opens when you click any document inside the folders or in search results |
| Direct link | https://app.mstnd.sa/file/<document ID> (the link of the document you open) |
| Goal | View the document inside the system, and reach all of its actions and details from one page |
| Who it is for | Every user: the employee who reads, the reviewer who checks and the manager who approves and signs |
| Video length | About 51 seconds |
| What you will learn | Zooming and fitting to width, full screen, collapsing the side panel, what the actions bar contains and the side panel tabs |
Watch the video
In less than a minute, the video shows the layout of the document page and the display controls, then takes a tour of the actions bar and the side panel tabs.
Why this feature?
Traditionally, to read a document, you download it to your device and open it in another program. This repeats with every document, so copies pile up in the downloads folder, and the organization can no longer be sure how many copies are in circulation or which one is the latest. And if you want to sign or share, you go back to the system and look for the document again.
The document viewer solves both problems: you read the document directly inside the system, and everything you might do with it is right above it and beside it.
| Before the document viewer | With the document viewer in Mstnd |
|---|---|
| Downloading every file to read it | Viewing the document instantly inside the system |
| Multiple copies on employees' devices | Reading the copy stored in the system, without downloading |
| Moving between screens to print, share and sign | A single actions bar above the document |
| Looking for the document's data somewhere else | A side panel with the details, metadata and versions |
| Difficulty reading long documents or small print | Zoom, full screen and a collapsible panel for more space |
Value for the organization: fewer copies downloaded and circulating outside the system, and everyone working on a single copy. Value for the individual: comfortable reading, with every action one click away.
Where to find it
- From the side menu, choose «Folders and documents».
- Open the folder that contains the document.
- Click the document: the «Document page» opens with the viewer in its center.
Link: https://app.mstnd.sa/file/<document ID>; each document has its own ID.
You can also reach the document page from search results, and from the tasks and transactions linked to the document. To return to the folder, use the «Back» button or the breadcrumb path at the top of the page.
Concepts and terms
| Term | Meaning in Mstnd |
|---|---|
| Document page | The page that opens when you choose a document; it holds the viewer, the side panel and the actions bar |
| Viewer | The central area where the document's content is displayed |
| Actions bar | The top bar that gathers the operations you can perform on the document |
| Side panel | A panel beside the viewer with tabs for the details, metadata, versions and more |
| Fit to width | Sizing the page to the width of the viewer area |
| Full screen | Displaying the document across the whole screen for focused reading |
| Document path | The folder the document is in; it appears in the details and in the breadcrumb path |
Step by step
Step 1: Get to know the document page layout
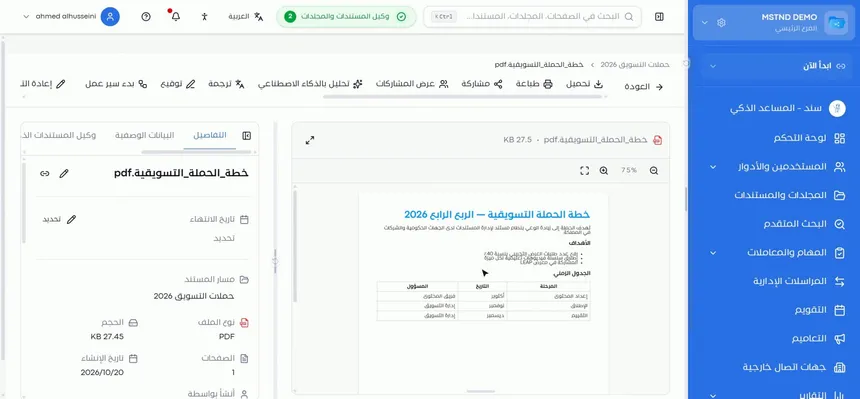
When you open any document, the page is divided into three areas:
- At the top: the breadcrumb path, such as «Marketing campaigns 2026 → Marketing_campaign_plan.pdf», the «Back» button, then the actions bar.
- In the middle: the viewer, which shows the file name and size in its header, followed by the document's content.
- On the side: the side panel, which opens on the «Details» tab.
In the «Details» tab, you find the document name with two buttons, edit and copy link, then «Expiry date» with «Set», «Document path», «File type», «Size», «Pages», «Created on» and «Created by».
Step 2: Zoom in and out, or fit to width
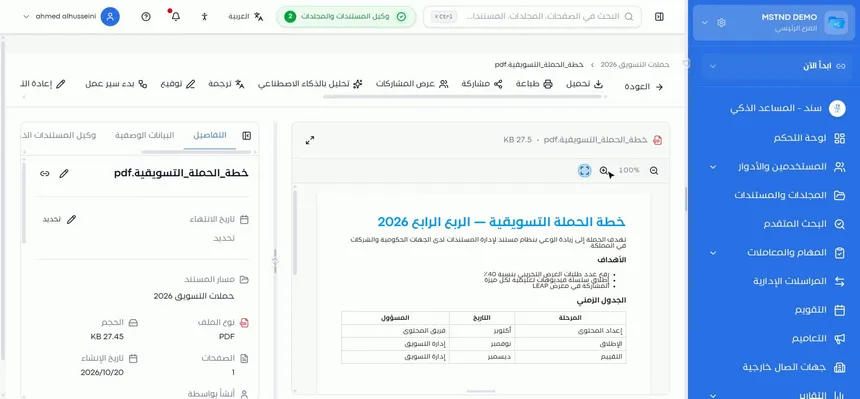
The viewer header holds the size controls:
- Zoom out (−) and Zoom in (+), with the current zoom level between them, such as «75%» or «100%».
- Fit to width: sizes the page to the width of the viewer area.
Use zoom in to read tables and small numbers, and zoom out to see the whole page and get a sense of its layout.
Step 3: View the document in full screen
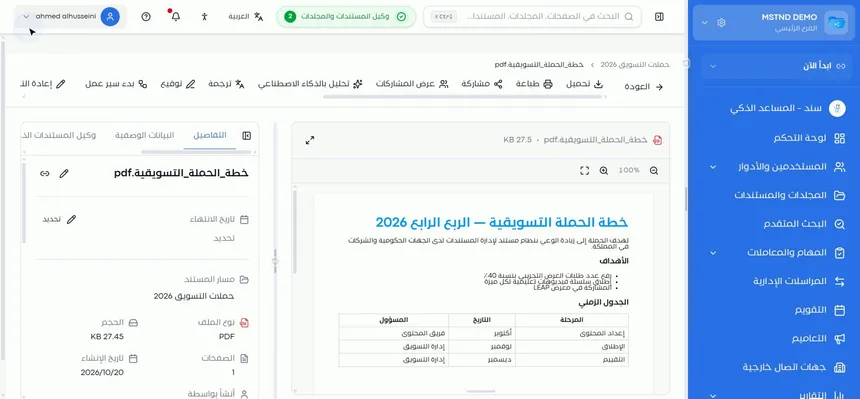
Click the full-screen button in the viewer header, and the document expands to fill the whole screen. This mode suits reading long documents or presenting a document on a screen in a meeting.
Step 4: Collapse the side panel for more space
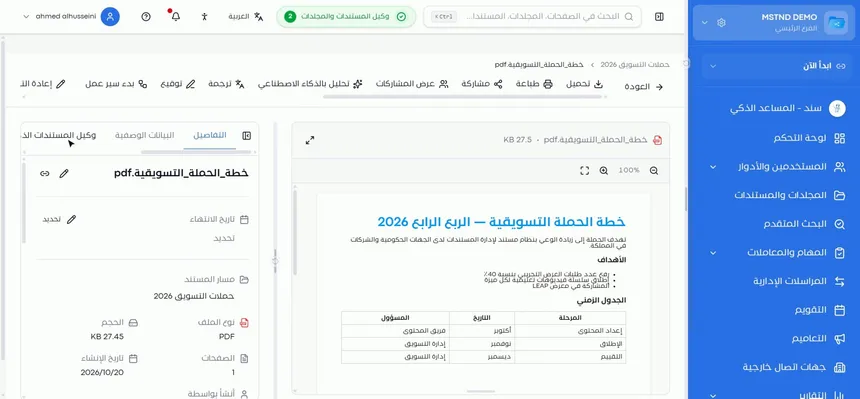
If you want more space for the viewer without going full screen, click the collapse button next to the side panel's tabs. The panel disappears and the viewer widens. When you need the details again, bring the panel back with the same button.
| Mode | When to choose it |
|---|---|
| Viewer with the side panel | When you need to see the details while reading |
| Collapsed panel | For comfortable reading while the actions bar stays visible |
| Full screen | For focused reading or presenting in a meeting |
Step 5: Get to know the actions bar
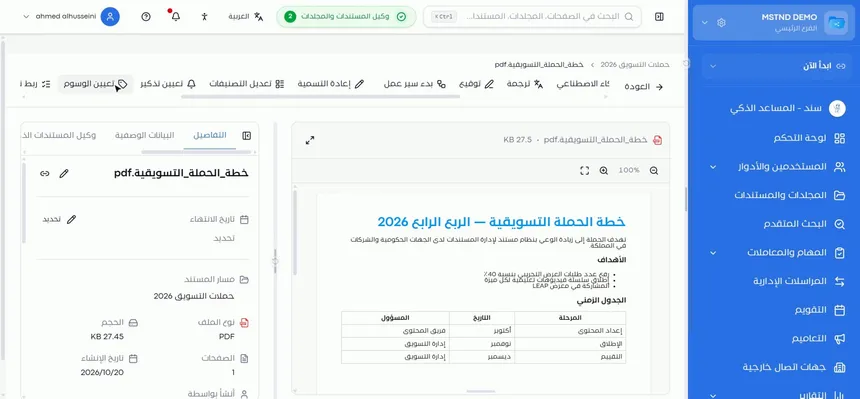
Above the document is the actions bar, which starts with the most frequently used operations:
| Action | What it does |
|---|---|
| «Download» | Downloads a copy of the document to your device |
| «Print» | Prints the document |
| «Share» | Shares the document with others |
| «View shares» | Shows who the document has been shared with |
| «Analyze with AI» | Analyzes the document with AI |
| «Translate» | Creates a translated copy of the document |
| «Sign» | Adds your electronic signature |
| «Start workflow» | Starts a transaction on the document from a workflow template |
Each of these actions has its own detailed guide, and you will find their links in the "How it relates to other features" section below.
Step 6: Browse the rest of the actions
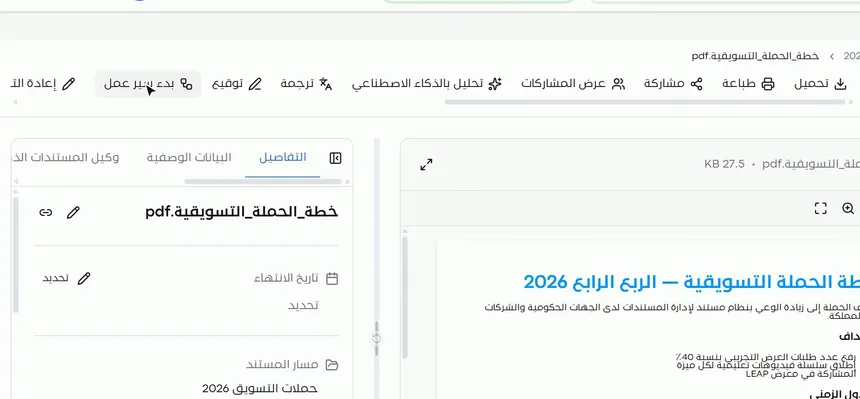
Scroll the bar to reach the rest of the actions:
- «Rename»: change the document's name.
- Categories: link the document to a category.
- Reminder: set a reminder linked to the document.
- Tags: add keywords that make searching easier.
- Move: move the document to another folder.
- Stamp: apply the organization's official stamp.
- Archiving: move the document to the archive.
- Delete: delete the document.
The bar puts the everyday actions first, and the organizing and final actions, such as archiving and deleting, at the end.
Step 7: Use the side panel tabs
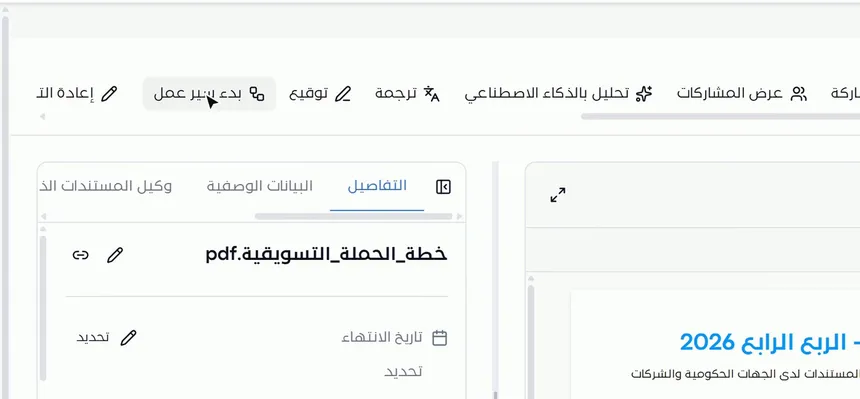
The side panel has six tabs:
- «Details»: the basic information, such as the path, type, size, pages, creation date, creator and expiry date.
- «Metadata»: the fields linked to the document's metadata template.
- Smart document agent: the results of reading and analyzing the document.
- Versions: the previous versions of the document.
- Comments: your colleagues' notes on the document.
- Chat: ask «Sanad» about the document itself.
This way, you read the document in the middle and review everything about it on the side, without leaving the page.
Options and their effect
| Option or setting | What it does | When to use it |
|---|---|---|
| Zoom in and out | Changes the page's display size | To read details or see the whole page |
| Fit to width | Sizes the page to the width of the viewer | For comfortable reading without horizontal scrolling |
| Full screen | Displays the document across the whole screen | For focused reading or presenting in a meeting |
| Collapsing the side panel | Widens the viewer by hiding the panel | When you do not need the details while reading |
| «Back» | Takes you back to the folder | When you have finished with the document |
| «Download» / «Print» | A local copy or a paper copy | When you genuinely need it outside the system |
| «Share» / «View shares» | Shares the document and reviews who can reach it | For collaboration or reviewing access |
| «Analyze with AI» / «Translate» | Analyzes the content or creates a translated copy | For a quick understanding or for an audience in another language |
| «Sign» / Stamp | Signs or stamps the document | For formal approval |
| «Start workflow» | Starts a transaction on the document | When the document needs a multi-step review or approval |
| Organizing actions | Rename, categories, reminder, tags and move | To organize the document and make it easier to reach |
| Archiving / Delete | Takes the document out of circulation | When it is no longer needed |
Practical scenarios
Scenario: An employee in a government entity reviews an incoming letter
Situation: An incoming letter has arrived; it must be read and referred for the manager's approval.
What you do in Mstnd:
- Open the document from the folder and read it in the viewer without downloading it.
- Zoom in on the attachments and tables to check the numbers.
- From the actions bar, choose «Start workflow» to refer it for approval.
Result: Review and referral from one page, with no downloaded copies on the device.
Scenario: An engineer in a contracting company reviews a detailed drawing
Situation: A drawing with small details needs careful reading.
What you do in Mstnd:
- Open the document and collapse the side panel.
- View it in full screen and zoom in on the parts you need.
- Bring the side panel back and add your note in the comments.
Result: Careful reading on screen, with notes documented right beside the document itself.
Scenario: A hospital manager approves an internal policy
Situation: A finished internal policy needs the manager's signature and the organization's stamp.
What you do in Mstnd:
- Open the document and review the «Details» tab to confirm the version and the path.
- Read the full text in the viewer.
- Choose «Sign», then the stamp, from the actions bar.
Result: A formal approval carried out on the document itself, inside the system.
Scenario: A relations officer in a trading company prepares a document for a foreign partner
Situation: A commercial offer in Arabic needs a copy in the partner's language, shared with them.
What you do in Mstnd:
- Open the document and review its content in the viewer.
- Choose «Translate» to create the translated copy.
- Use «Share» to send it, then «View shares» to check access.
Result: A document ready for the partner, without leaving the system or emailing files by hand.
How it relates to other features
- Document details: a detailed explanation of the «Details» tab in the side panel.
- Internal sharing and public link: what happens when you click «Share» in the actions bar.
- Smart document agent: the tab that shows the results of analyzing and reading the document.
- Signing: the steps for signing the document from the «Sign» button.
- Starting a workflow on the document: details of the «Start workflow» button.
- Reminder, tags and categories: the organizing actions in the second part of the bar.
- Versions and operations log: the Versions tab in the side panel.
- Sanad chat about the document: the Chat tab, for asking Sanad about the document.
Tips and best practices
- Read documents in the viewer instead of downloading them, and download only when you genuinely need a copy outside the system.
- Start with fit to width, then zoom in on the parts that need precision.
- Collapse the side panel for long reading sessions, and bring it back when you review.
- Review the «Details» tab before signing or stamping, to confirm the path and the creation date.
- Use copy link from the «Details» tab when you refer to the document in internal correspondence, instead of attaching a copy.
- Start the workflow from the document page itself, so the document is linked to the transaction automatically.
- Think before you use «Delete»: archiving may be the better choice for finished documents.
Warnings and common mistakes
FAQ
Can I read a document in Mstnd without downloading it?
Yes. When you open any document, it appears in the viewer in the middle of the document page, so you read it directly inside the system without downloading it.
How do I zoom in on a document in the viewer?
Use the zoom in and zoom out buttons in the viewer header; the current zoom level appears between them. You can also size the page to the viewer's width with the fit button.
How do I view a document in full screen?
Click the full-screen button in the viewer header, next to the file name and size, and the document expands to fill the whole screen.
How do I get more reading space without going full screen?
Collapse the side panel with the button next to its tabs, and the viewer widens. Bring it back with the same button when you need it.
What actions are available on a document from its page?
Among them: download, print, share, view shares, analyze with AI, translate, sign and start workflow, then rename, categories, reminder, tags, move, stamp, archiving and delete.
What tabs are in the side panel?
Details, Metadata, the smart document agent, Versions, Comments and Chat.
Why can't I see some actions that my colleague sees?
Because the available actions depend on the permissions your role grants you in the system.
Where do I find the document's path and creation date?
In the «Details» tab of the side panel, along with the file type, size, number of pages and who created it.
Summary
- The document viewer shows any document inside the system without downloading it.
- Zoom, fit to width, full screen and the collapsible panel make reading comfortable for every kind of document.
- The actions bar gathers every operation on the document, from downloading to archiving and deleting.
- The side panel, with its six tabs, puts everything about the document right beside it.
- The document page is the starting point for all work on a document in Mstnd.
Try it free: Create your organization's account in Mstnd
Was this article helpful?
Related articles
 0:44
Document details: everything about your document in one place
Learn the «Details» tab in Mstnd: expiry date, path, type, size, creator, confidentiality and status changes with a reason, reminder, tags and system number.
 0:57
Sharing a document internally and by public link in Mstnd
Learn document sharing in Mstnd: internally to people, units or positions with view, edit or delete permission, or by public link with password and expiry date.
 0:59
The Mstnd smart document agent: understand your document before you read it
Mstnd's smart document agent analyzes each file: text, summary and entities, plus suggested status, categories, tags, tasks and access with a confidence score.
 0:52
Electronic signature in Mstnd: sign your documents without printing
Learn electronic signature in Mstnd: draw, type or upload your signature, place it on the page, save it as a new version and verify your identity via Nafath.
 1:14
Starting a workflow on a document in Mstnd: launch the approval from the document
Learn to start a workflow from a Mstnd document: pick a template, set priority and due date, assign steps and launch the transaction with the document attached.
 0:47
Reminders, tags and categories: organize your document and never miss a date
Learn how to set a document reminder in Mstnd with a date, time and advance alert, and add tags and categories from the action bar to ease search and filtering.