

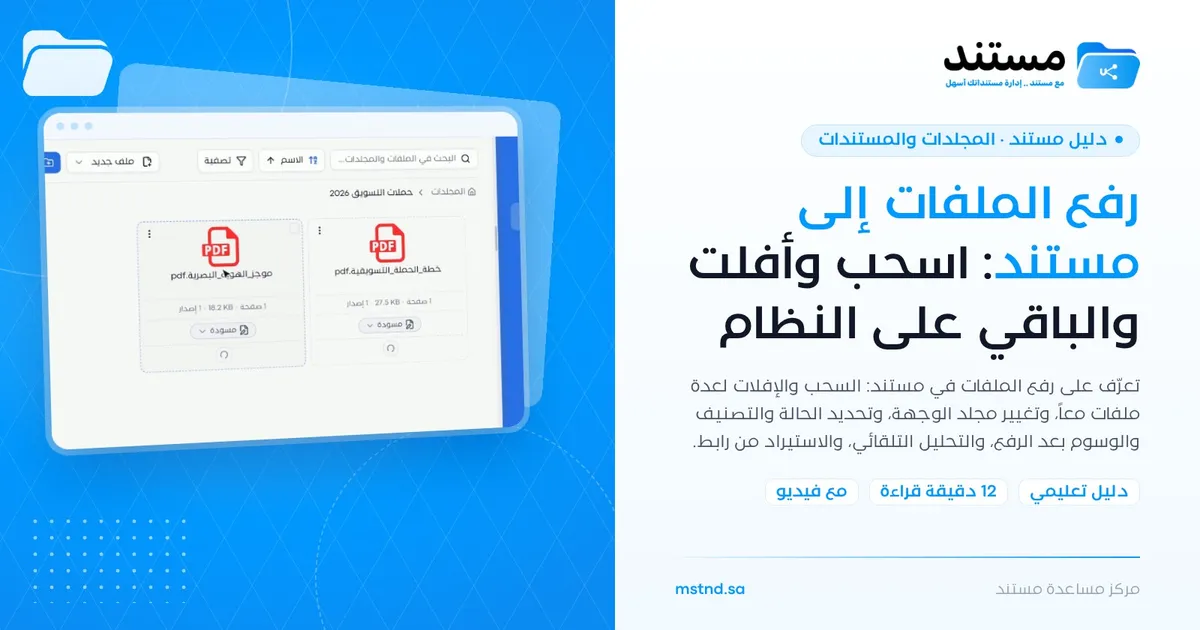
Uploading files to Mstnd: drag and drop, and the system does the rest
In this article
File upload in Mstnd is the main way to bring your digital documents into the system: you open the folder, choose «New file» and then «Upload file», and drag and drop one file or several. Right after the upload you set each file's status, expiry date, category and tags, and the system starts analyzing the files automatically. You can also import a file directly from a link on the internet without downloading it first.
Quick overview
| Item | Details |
|---|---|
| Module | Folders and documents |
| Where it is in the interface | Inside any folder → «New file» → «Upload file» or «Import from link» |
| Direct link | https://app.mstnd.sa/folders?folderId=<folder ID> |
| Goal | Bring files into the right folder quickly, with their basic data from the very first moment |
| Who it is for | Every user who adds documents, and especially department staff, records officers and digitization teams |
| Video length | About 49 seconds |
| What you will learn | Opening the upload window, uploading several files by drag and drop, changing the destination, following the progress, setting the status, expiry, category and tags, and importing from a link |
Watch the video
In under a minute, the video shows the full upload journey: from the «New file» menu until the files appear inside the folder and their analysis begins, followed by the option to import from a web link.
Why this feature?
Uploading is the first step in the life of any document in the system. If it is done haphazardly, problems start early: files in the wrong folder, with no category and no expiry date. Months later, finding them or knowing whether they are still valid becomes a difficult task.
File upload in Mstnd is designed to be fast and correct at the same time. It lets you upload several files in one batch, shows the destination clearly before the upload, asks for the basic data right after it, and then analyzes the files automatically so they are ready for search and use.
| Before | With file upload in Mstnd |
|---|---|
| You upload files one after another | You drag several files and drop them at once |
| You discover after the upload that you were in the wrong folder | You see «Uploading to» and change the destination before the upload |
| Data is added later, and often never added | You set the status, expiry, category and tags right after the upload |
| You download the file from a website, then upload it | You import it directly from its link |
| An uploaded file is just a file | The system analyzes it automatically so it becomes searchable and useful |
Where to find it
- From the side menu, choose «Folders and documents».
- Open the folder you want to upload to.
- Click «New file» in the toolbar.
- From the «Via» section, choose «Upload file» to upload from your device, or «Import from link» to import from a web link.
Direct link: https://app.mstnd.sa/folders?folderId=<folder ID>
Concepts and terms
| Term | Meaning in Mstnd |
|---|---|
| «New file» | A menu in the toolbar that gathers every way of adding a file to the folder |
| «Upload file» | Uploading files from your device to the current folder |
| Drag and drop | Dragging files from your device and dropping them in the upload area instead of browsing for them |
| Destination folder | The folder where the files will be saved; it appears in «Uploading to» |
| Document status | The document's stage in the work cycle; it is «Draft» for newly uploaded files |
| Expiry date | The date on which the document's validity ends, such as for a contract or a license |
| Automatic analysis | Processing that the system runs on a file after it is uploaded, to extract its content and understand it |
| «Import from link» | Fetching a file from a web link directly into the folder |
Step by step
Step 1: Open the folder, then «New file» → «Upload file»
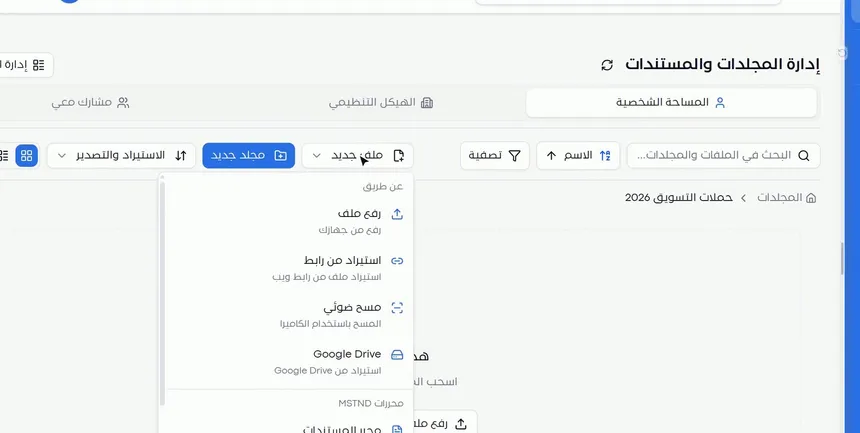
First, open the folder you want to upload to. Then click «New file», and a menu with two sections appears:
- «Via»: «Upload file» from your device, «Import from link», «Scan» with the camera, and «Google Drive».
- «MSTND editors»: for creating a new file inside the system.
Choose «Upload file». Opening the right folder first makes it the default destination, so you do not need to change it later.
Step 2: Drag and drop the files, or click to browse
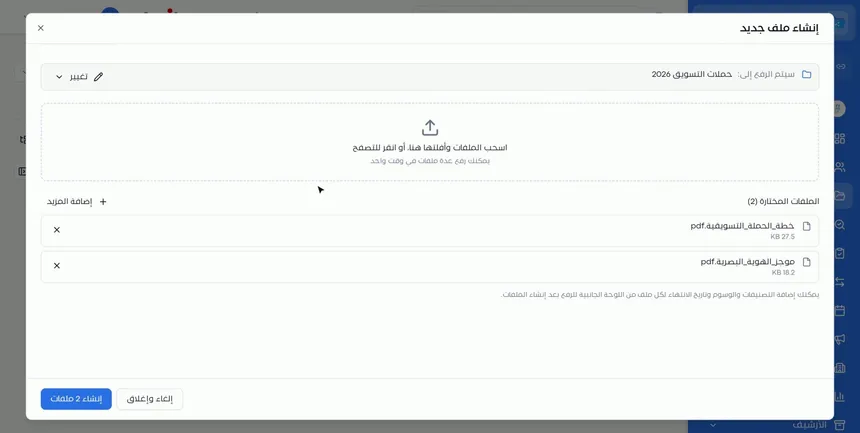
The «Create new file» window opens with an upload area in it. You have two ways:
- Drag and drop: drag the files from a folder on your device and drop them in the area.
- Browse: click the area to open a window for choosing files from your device.
As the window points out: «You can upload several files at once». So if you have ten documents for one project, select them all together instead of uploading them one by one.
Step 3: Review the selected files and change the destination if needed
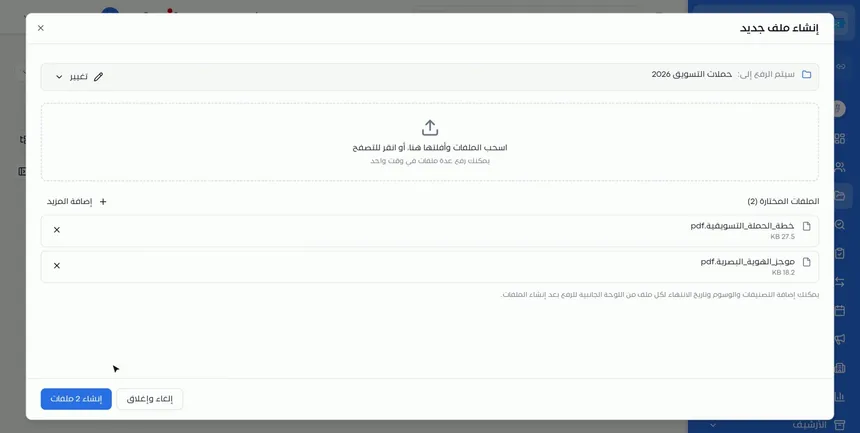
Before the upload, the window shows:
- «Uploading to»: the name of the destination folder, with a «Change» button for choosing another folder.
- «Selected files»: their number in parentheses, and each file's name and size.
- × next to each file: to remove it from the list before the upload.
- «Add more»: to add other files to the same batch.
This review prevents the two most common mistakes: uploading to the wrong folder, and uploading a file you did not mean to.
Step 4: Click «Create files» and follow the progress
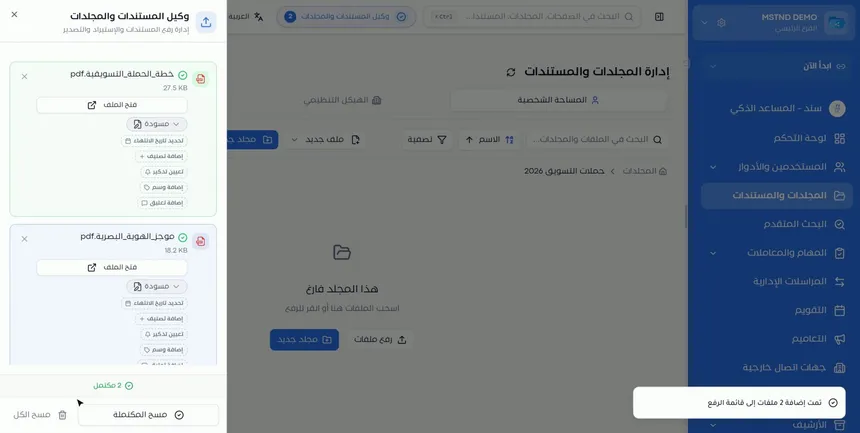
Click the create button, which shows the number of files, such as «Create 2 files». The upload starts and you see its progress. If you want to back out before the upload, click «Cancel and close».
How long the upload takes depends on the size of the files and the speed of your connection. Large files, such as a PDF of dozens of scanned pages, take longer.
Step 5: Set the status, expiry, category and tags right away
Right after the upload, you can set the following for each file:
| Field | Why it matters |
|---|---|
| Status | Shows the document's stage. New files start as «Draft» |
| Expiry date | Makes it possible to alert you and to follow up documents before their validity ends |
| Category | Links the file to its approved type in the organization, such as a contract or a certificate |
| Tags | Group the file with other files under one topic |
Adding this data now is much easier than coming back to it later. You know the file well at the moment you upload it; weeks later, you may need to open it just to remember its expiry date.
Step 6: The files are ready, and their content is analyzed automatically
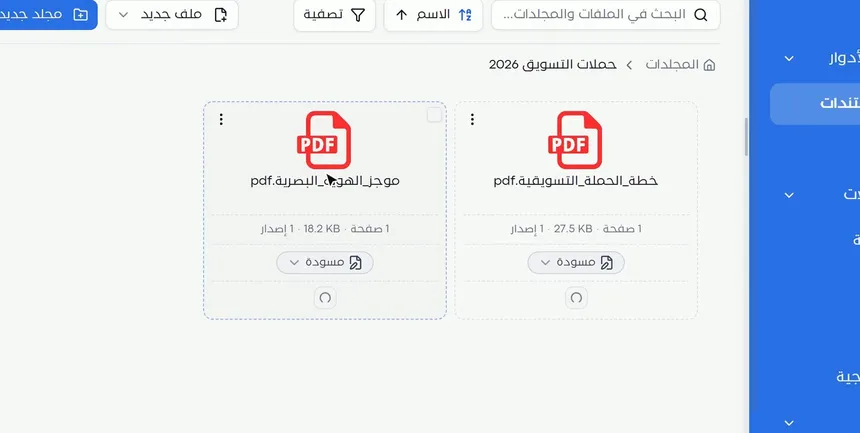
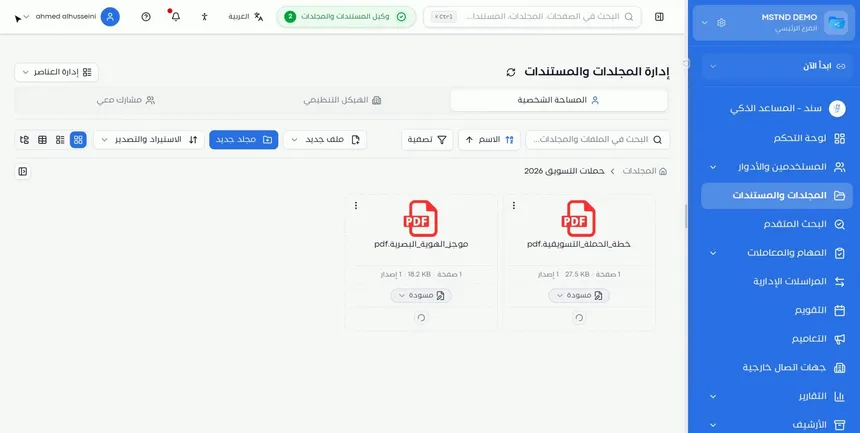
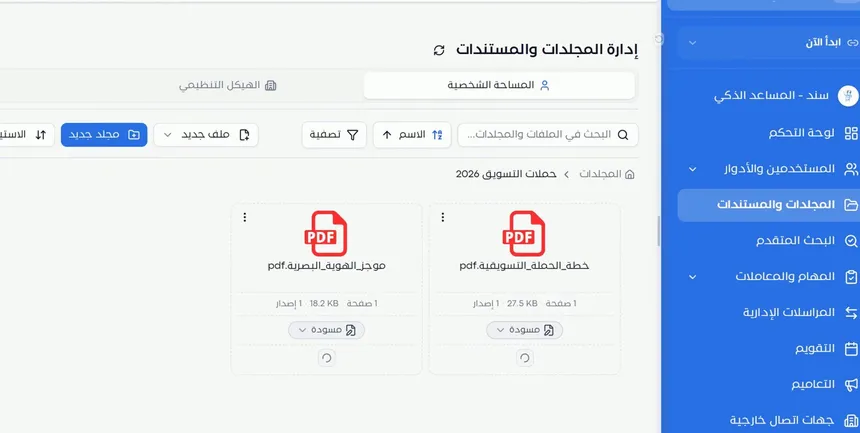
The files appear inside the folder as cards, each showing its number of pages, size, version number and status. At the same time, the system starts analyzing them automatically, and the «Documents and folders agent» indicator appears at the top of the screen with the number of operations in progress.
You do not need to wait for the analysis to start working on the file. But once it is complete, you can get more out of the file, such as searching its content and using the smart document agent.
Step 7: Import a file directly from a web link
If the file is published on the internet, such as a regulation on an official entity's website or a PDF sent as a link, choose «Import from link» from «New file». Paste the link, and the file is fetched straight into the folder.
This saves you two steps: downloading the file to your device, then uploading it. It also reduces the build-up of temporary files on your device.
Options and their effect
| Option or setting | What it does | When to use it |
|---|---|---|
| «Upload file» | Opens the window for uploading from your device | For files that are on your device |
| «Import from link» | Fetches a file from a web link | For files published on the internet |
| «Scan» | Turns paper into a PDF using the camera | For paper documents |
| «Google Drive» | Imports from Google Drive | For files saved there |
| Drag and drop | Adds files by dragging them into the window | For quickly uploading several files |
| Click to browse | Opens the file selection window | When dragging is not convenient |
| «Change» | Changes the destination folder | If you are not in the right folder |
| × next to the file | Removes the file from the batch | When you selected a file by mistake |
| «Add more» | Adds other files to the batch | When you forgot a file |
| «Create files» | Starts the upload | After reviewing the list and the destination |
| «Cancel and close» | Cancels the upload and closes the window | To back out before the upload |
| Status, expiry, category and tags | Add the file's data after the upload | Right after the upload, especially for contracts and licenses |
Practical scenarios
Scenario: A contracting company uploads tender documents
Situation: The procurement team received the documents of a tender: a terms and conditions booklet, drawings and bills of quantities, all of them PDF files on one employee's device.
What you do in Mstnd:
- Open the project folder → the tender's subfolder.
- «New file» → «Upload file».
- Drag all the files into the upload area in one batch.
- Check «Uploading to», then click «Create files».
- Add the tender's expiry date and a tag with its name.
Result: All the tender documents are in their folder, tagged, and their deadline is known.
Scenario: A government entity saves a published regulation
Situation: A new regulation was issued and published as a PDF file on an official entity's website, and the legal department wants to keep it as a reference.
What you do in Mstnd:
- Open the «Laws and regulations» folder.
- «New file» → «Import from link».
- Paste the regulation's link.
- Classify the file under the «Regulation» category and add a tag with the issuing entity.
Result: A saved copy of the regulation, whose text can be searched after the analysis.
Scenario: A trading company uploads its official documents
Situation: The administrative affairs department wants to upload the commercial registration, the zakat and social insurance certificates and the municipal license.
What you do in Mstnd:
- Open the «Official documents» folder.
- Upload all the documents in one batch.
- Set the expiry date of each document right after the upload.
- Classify each document by its type.
Result: Official documents ready for follow-up, with their expiry dates recorded from the start.
Scenario: A hospital uploads its monthly quality reports
Situation: The quality department receives monthly reports from the sections in different formats.
What you do in Mstnd:
- Open the quality reports folder for the current month.
- Upload the reports together, and use × to remove any file that arrived by mistake.
- Add the month's tag to all the reports.
- Leave the status as «Draft» until they are reviewed.
Result: The month's reports are gathered and tagged, and their status shows that they are waiting for review.
How it relates to other features
- Folders: create the folder structure first so you know where to upload each file.
- Folder content: uploaded files appear there as cards, and from there you carry out bulk actions.
- Scanning: the alternative to uploading when the document is on paper.
- Import and export: for uploading a whole folder as a ZIP file together with its subfolder structure.
- Reminders, tags and categories: for editing the category and tags or adding a reminder after the upload.
- Smart document agent: uses the file's automatic analysis to extract the summary, the amounts and the parties.
- Text search: after the analysis, the file's content becomes searchable.
- Document numbering: if numbering is set up for the folder, every uploaded file gets its number automatically.
Tips and best practices
- Open the right folder before uploading, so it becomes the default destination.
- Give the files clear names on your device before uploading them: the name appears on the card and is used in search.
- Upload the files related to one topic in one batch, then give them the same tag.
- Do not put off adding the expiry date for contracts, licenses and certificates.
- Use «Import from link» for published files instead of downloading and then uploading them.
- Leave new files as «Draft» until they are reviewed, and change their status when they are approved.
- If you have a large number of files in an existing folder structure, use Import and export instead of uploading them manually.
Warnings and common mistakes
FAQ
How do I upload a file to Mstnd?
Open the folder, click «New file» and then «Upload file», drag the file into the upload area or click to browse for it, then click «Create files».
Can I upload more than one file at a time?
Yes. The upload window lets you select several files or drag them together, and it lists them under «Selected files» before the upload.
How do I change the folder I am uploading to?
The upload window shows «Uploading to» with the folder's name, and next to it a «Change» button for choosing another folder before the upload.
When do I add the category, tags and expiry date?
Right after the upload, from the upload side panel. You can also edit them later from the document page.
What happens to a file after it is uploaded?
It appears inside the folder as a card with «Draft» status, and the system starts analyzing it automatically so that its content becomes searchable and useful.
Can I import a file from a link on the internet?
Yes. From «New file», choose «Import from link» and paste the file's link, and the file is fetched straight into the folder without being downloaded to your device.
What is the difference between uploading a file and importing a ZIP file?
Uploading adds individual files to the current folder, while importing a ZIP file from «Import and export» creates a whole folder with the same subfolder structure as the compressed file.
Can I remove a file I selected by mistake before the upload?
Yes. Click × next to the file in the «Selected files» list, and it is removed from the batch before the upload.
Summary
- Uploading starts from inside the folder: «New file» → «Upload file».
- You can drag and drop several files at once, and review the list and the destination before the upload.
- Add the status, expiry date, category and tags right after the upload to make follow-up and search easier later.
- The system analyzes uploaded files automatically, so they become searchable and ready for smart use.
- «Import from link» fetches a file from the internet directly, without downloading it to your device.
Try it free: Create your organization's account in Mstnd
Was this article helpful?
Related articles
 1:26
Folders in Mstnd: organize your organization's documents from day one
Learn the Mstnd Folders page: Personal space, structure folders, Shared with me, new folders with a confidentiality level, color and icon, views and actions.
 1:05
Folder content in Mstnd: find your file and manage it in seconds
The Mstnd folder content screen explained: file cards and status changes, multi-select and bulk actions, the folder side panel, and AI chat about the files.
 1:02
Scanning in Mstnd: turn paper into a digital PDF file
Scanning in Mstnd turns paper documents into a PDF with a phone or device camera: capture several pages, reorder them, retake what you need, save to the folder.
 0:58
Import and export in Mstnd: move entire folders in one compressed file
Learn import and export in Mstnd: import a whole ZIP file with its folder structure, or export a folder with versions, OCR text, tags, signatures and audit log.
 0:47
Reminders, tags and categories: organize your document and never miss a date
Learn how to set a document reminder in Mstnd with a date, time and advance alert, and add tags and categories from the action bar to ease search and filtering.
 0:59
The Mstnd smart document agent: understand your document before you read it
Mstnd's smart document agent analyzes each file: text, summary and entities, plus suggested status, categories, tags, tasks and access with a confidence score.